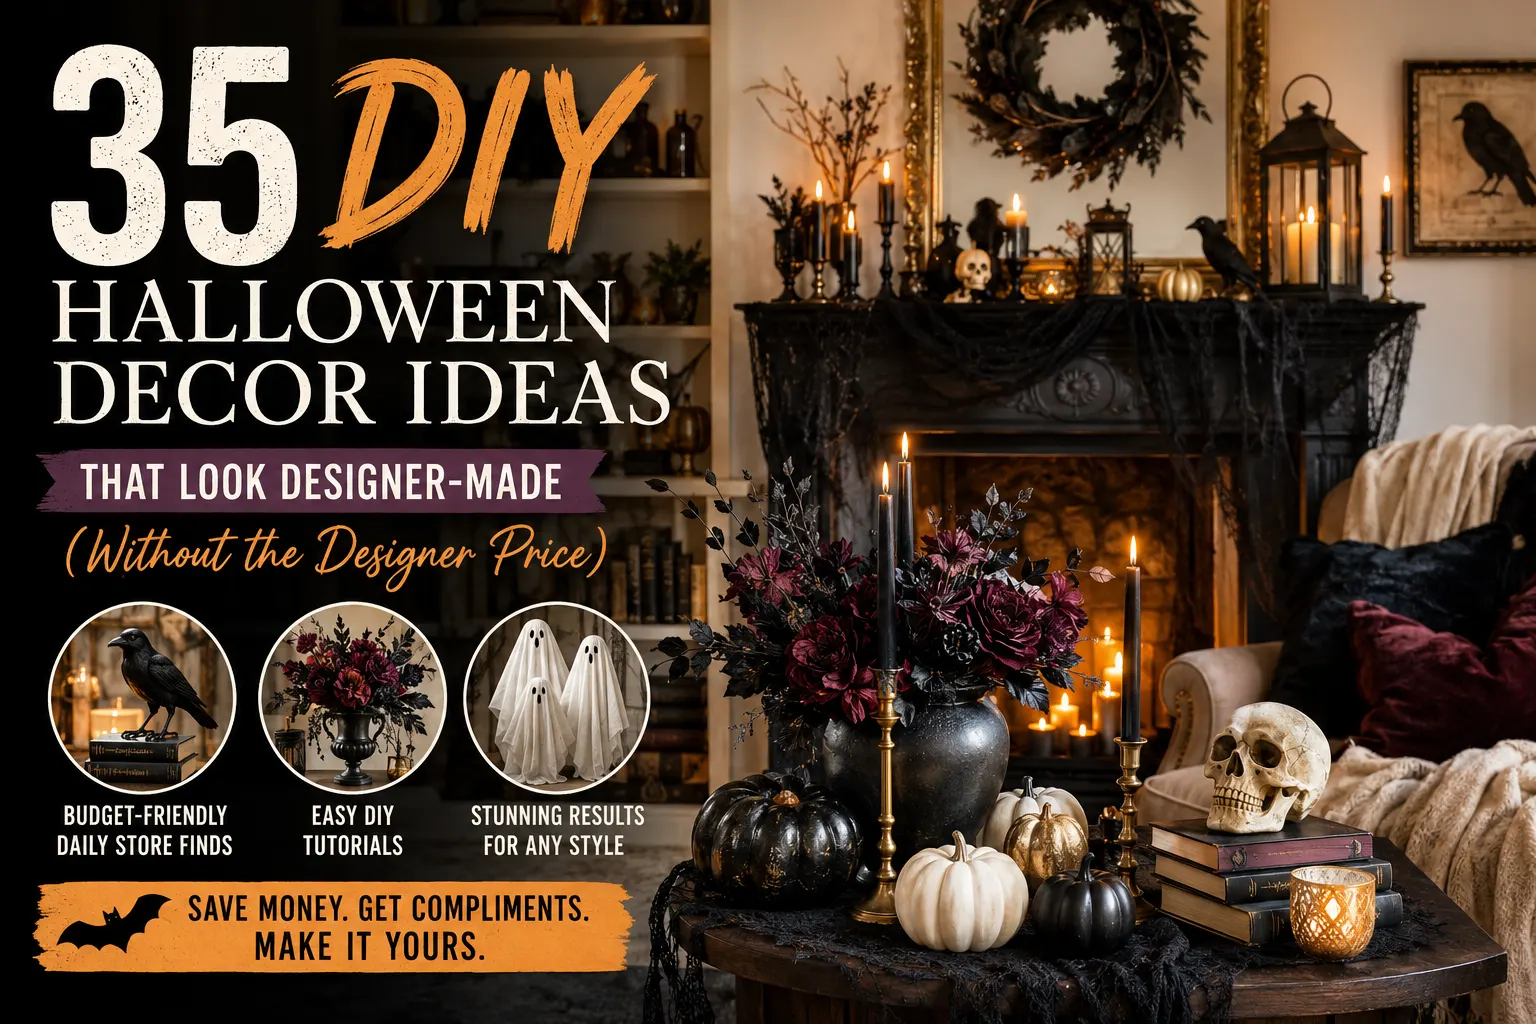
35 DIY Halloween Decor Ideas That Look Designer-Made (Without the Designer Price)
Store-bought Halloween decorations are easy to find, but they can also make very different homes look surprisingly similar. DIY gives you more control over the colors, scale, materials and amount of Halloween you actually want in the room—whether that Apartment Bedroom means repainting inexpensive pumpkins, building a moody mantel display or making one statement project for a small apartment.
Many DIY Halloween Decor Ideas tutorials end once the craft is finished. This guide showing you how color, scale, finish, lighting and placement affect the way the finished project works with the rest of the room.
This 35 projects below are organized by difficulty and time commitment, so you can start with simple projects or skip ahead to larger weekend builds without needing to make everything on the list and it also save a lot of time.
The fastest way to get a designer-looking Halloween home on a budget is to pick one style (not five), repaint Dollar Store finds in a consistent color palette, and group projects into full vignettes — a mantel, a console table, a porch setup — instead of scattering single crafts around the house.
Choose a DIY Halloween Style Before You Start
Before you buy a single black feather boa, it helps to pick a lane. Trying to do gothic and cute and neon in the same house is the fastest way to end up with a display that reads as clutter instead of decor.
Gothic Luxury leans into deep burgundy, black, and aged gold, with velvet, dripping candles, and ornate frames. It’s the most photogenic style on Pinterest right now because it photographs like a moody still life rather than a party store.
Dark Academia borrows from old libraries — leather-bound books, brass candlesticks, dried botanicals, and warm lamplight instead of overhead lighting. It works especially well if you already have a reading nook or built-in shelving.
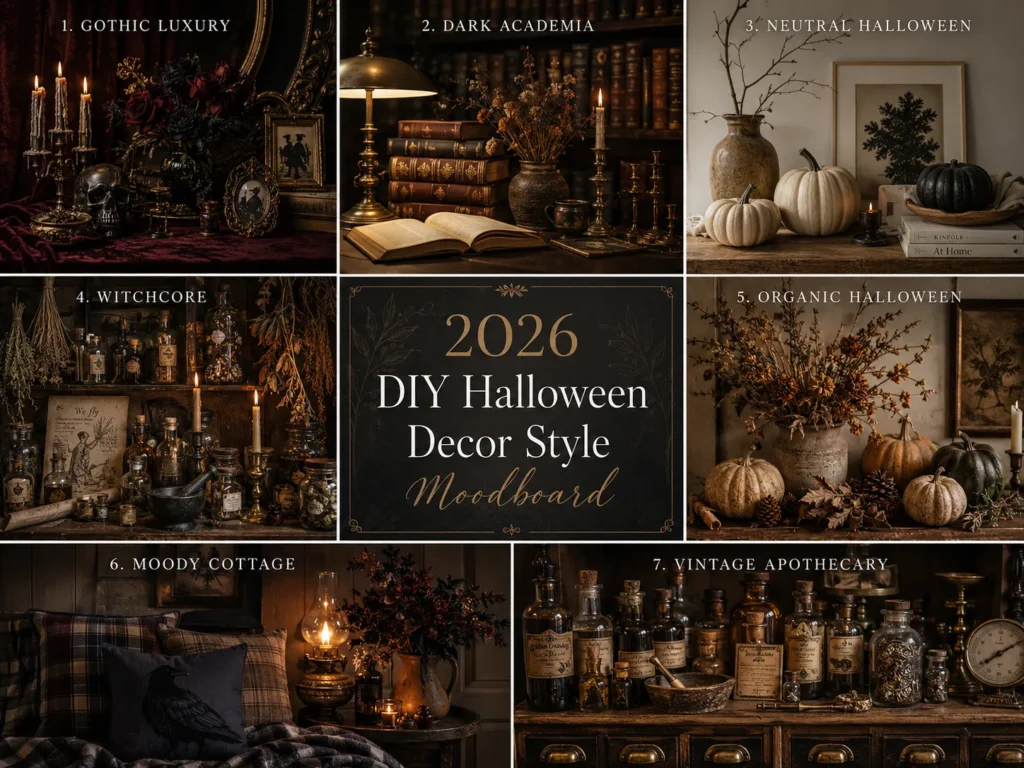
Neutral Halloween strips out orange and black entirely in favor of cream, bone, charcoal, and natural wood. It’s the easiest style to keep up year-round because most of the pieces double as fall decor through Thanksgiving.
Witchcore mixes dried herbs, apothecary bottles, and mismatched candlesticks for a lived-in, collected-over-time feel. It’s forgiving of imperfect DIY work, which makes it a smart pick for beginners.
Organic Halloween relies on real branches, dried florals, and natural pumpkins instead of plastic props, so it tends to look more expensive with less effort.
Moody Cottage keeps things warm and layered — think plaid, wood, and soft lighting with just a few dark accents, rather than a full transformation.
Vintage Apothecary uses old bottles, hand-lettered labels, and warm brass for a display that looks pulled from a 1920s pharmacy shelf.
You don’t need to commit to one forever. Pick the style that matches furniture and colors you already own, since that’s what will make your DIY pieces look intentional instead of layered on top of a mismatched room.
Plan Before You Craft
Choose one decorating style. This is the single biggest factor in whether your finished display looks pulled-together or scattered. Pick from the list above and filter every project idea through it before you buy supplies.
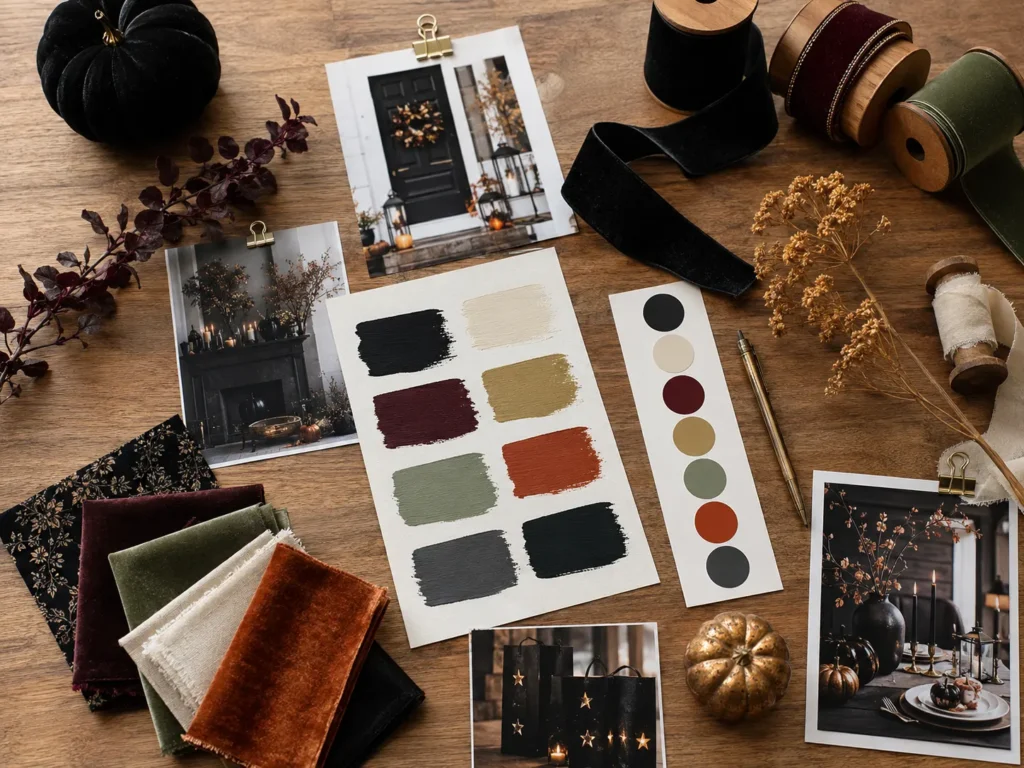
Pick a color palette. Three colors is the sweet spot — a base (black or cream), an accent (burgundy, sage, or rust), and a metallic (gold, brass, or pewter). Every project in this guide can be adjusted to fit almost any three-color combination just by changing your paint and ribbon choices.
Decide where each project will go before you build it. A wreath sized for a narrow apartment door will look lost on a wide farmhouse entry, and a tablescape planned for a six-seat dining table won’t work on a studio kitchen counter. Measure the space first.
Set your DIY budget. Decide upfront how much you’re comfortable spending across the whole project list, then work backward. This keeps you from buying a $40 fog machine on impulse and running out of budget for the mantel display you actually wanted.
Create a weekend DIY plan. Trying to build all 35 projects in one sitting is how good ideas turn into unfinished piles on the kitchen table. The weekend decorating plan later in this guide gives you a realistic two-day breakdown.
Five coordinated DIY projects create a more luxurious home than thirty random crafts. A curated mantel, one styled console table, a wreath, a few lanterns, and a tablescape will read as “designer” far faster than filling every surface with a different Halloween craft.
If your space is on the smaller side, it’s worth pairing this plan with our apartment decorating ideas — a lot of the scaling-down principles for bedrooms apply directly to keeping a Halloween display from overwhelming a small living room or entry.
Essential DIY Halloween Supplies
Basic tools: A useful craft kit may include scissors, brushes, a craft knife, floral wire and an adhesive applicator, but use only tools appropriate to the specific project and follow the manufacturer’s instructions.
Paints and finishes: Match the paint to the material instead of assuming one coating works everywhere. Foam, plastic, wood, glass and metal can require different preparation and finishes. Check the product label for material compatibility, ventilation requirements, drying or curing time and whether the finished coating is intended for indoor or outdoor use.
Adhesives: Choose adhesive based on both materials being joined and where the finished decoration will be used. An adhesive suitable for lightweight indoor fabric may not be suitable for outdoor wood, foam or plastic. Follow the adhesive manufacturer’s compatibility and use instructions instead of treating hot glue or one construction adhesive as a universal solution.
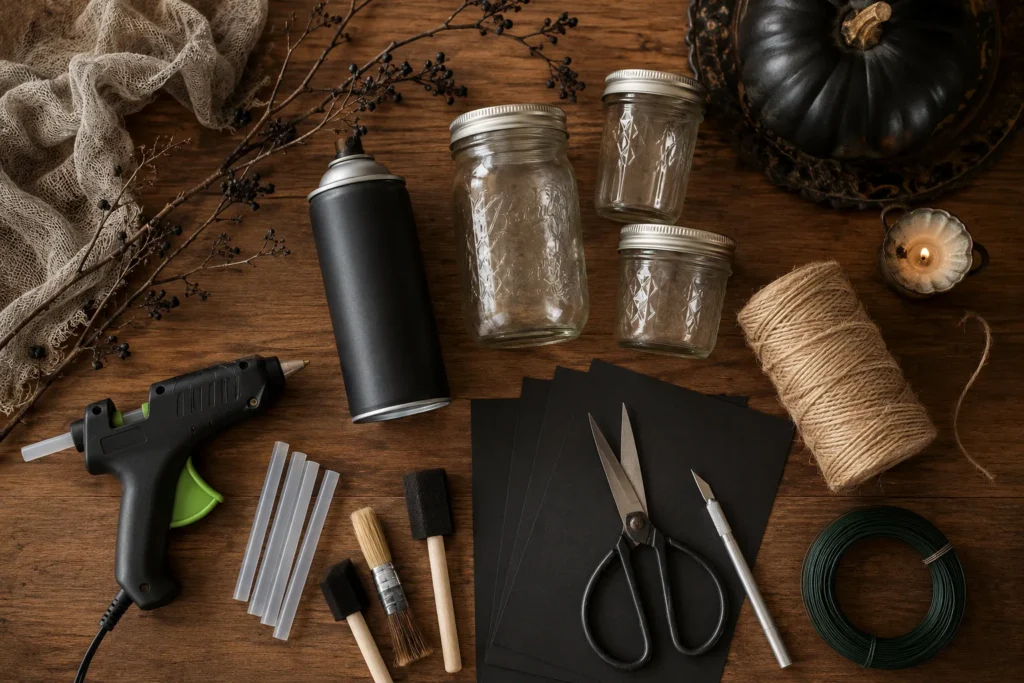
Budget-friendly materials to stock up on: black cardstock, mason jars, twine, dried branches (free if you have a yard), and cheesecloth or gauze fabric, since all of these show up across more than half the projects in this guide.
Where to buy affordable DIY supplies: Dollar Tree and Dollar General for base materials, Michaels or Hobby Lobby during their 40–50% off Halloween coupon weeks, and your own recycling bin for jars, cans, and cardboard before you buy anything new.
DIY Halloween Decor Safety Tips (Read Before You Craft)
This is the section most Halloween decor guides skip, and it’s the one that actually protects your home. A few minutes of planning here prevents the two most common Halloween decorating accidents: fires and falls.
Use flameless lighting wherever possible. Battery-operated tea lights and flameless candles are especially useful inside pumpkins, jars, lanterns and DIY vignettes containing paper, fabric or dried botanicals. CPSC recommends keeping burning candles away from combustible decorations and places where they can be knocked over or brushed against.
Follow product-specific guidance for outdoor electrical decorations. Use lights and extension cords rated for their intended use, inspect them for cracked sockets, frayed wires or loose connections, and use GFCI protection for outdoor lighting as recommended by CPSC.
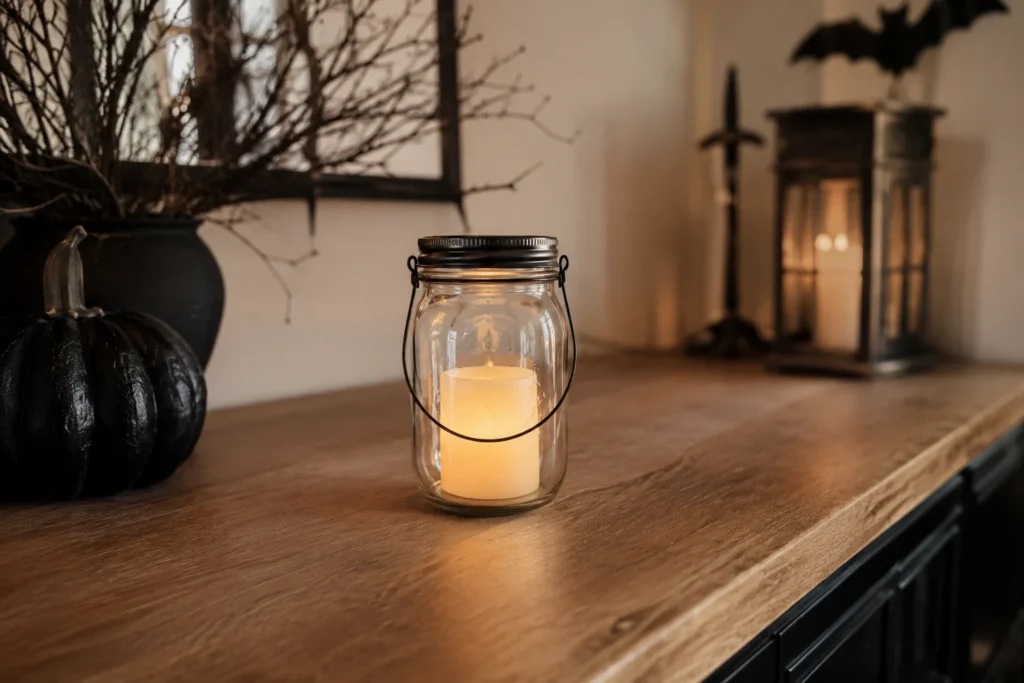
Keep cords out of walking routes whenever possible. Where cord protection or securing is necessary, use a product designed for that location and follow its instructions rather than improvising with ordinary household tape.
Secure outdoor props according to the decoration and surface. Follow the manufacturer’s anchoring instructions where available, and bring lightweight or vulnerable pieces indoors before severe wind rather than relying on increasingly heavy improvised anchoring.
Keep small parts and breakables away from kids and pets. Tiny bottle stoppers, dried florals, and glued-on embellishments are easy for curious hands or paws to pull loose. If your household includes young kids or pets, favor the larger-format projects and keep smaller vignettes like the potion bottle display on higher shelves.
35 DIY Halloween Decor Ideas by Skill Level
Beginner DIY Projects (Under 30 Minutes)
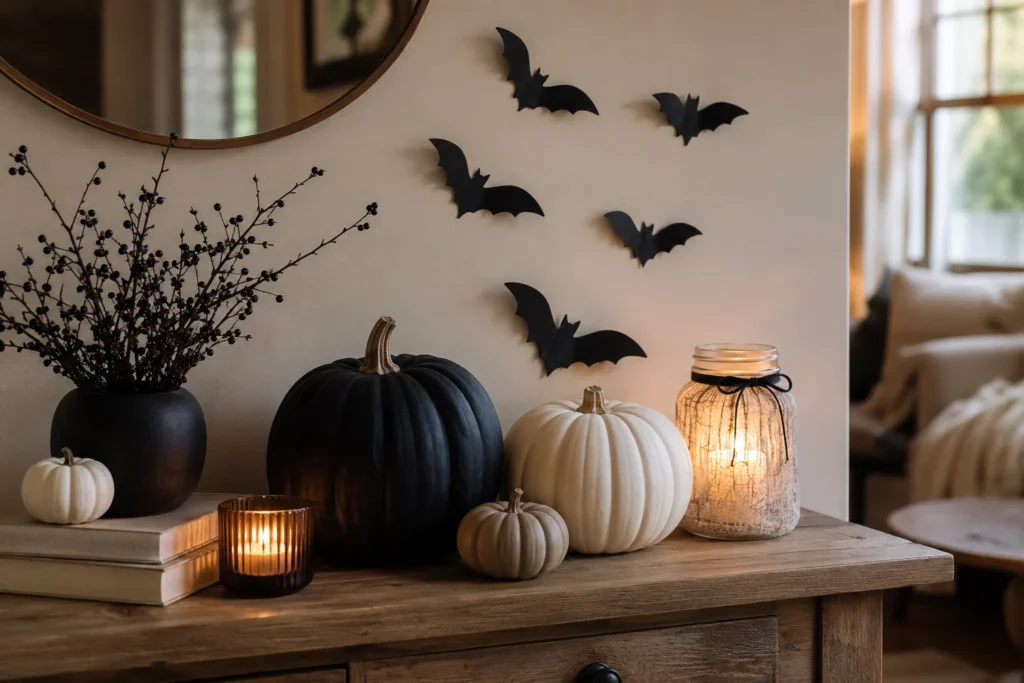
These eight are the easy Halloween crafts to start with if you’ve never picked up a glue gun for a seasonal project before — no special skills required, and every one of them is forgiving of a slightly imperfect first attempt.
1. Painted Faux Pumpkins. Buy plain foam or plastic pumpkins and repaint them in your chosen palette — charcoal, cream, or deep sage instead of the usual orange. This single swap is what makes Dollar Store pumpkins look like a $30 boutique version, because the color, not the shape, is what reads as “cheap” to the eye.
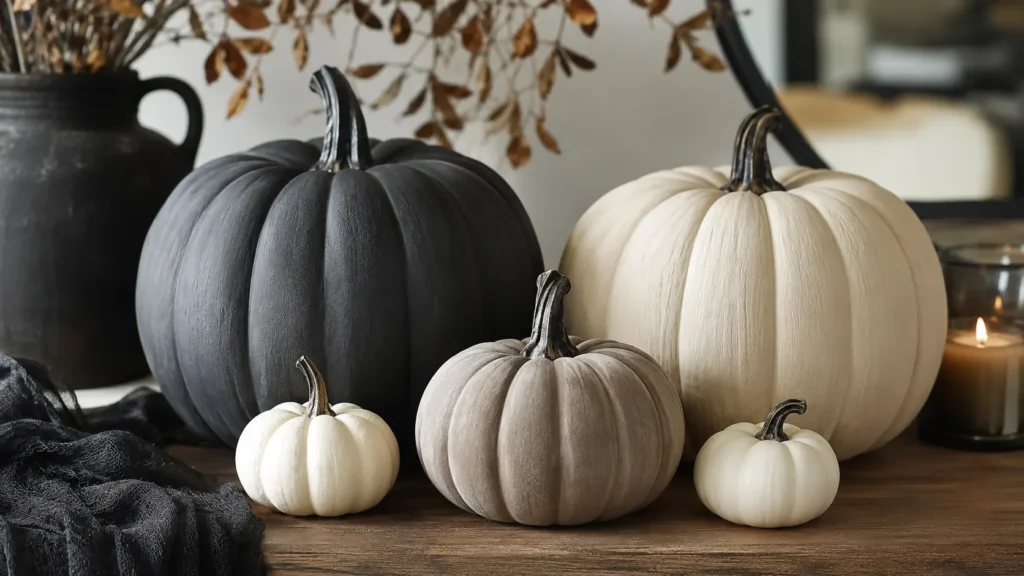
2. Floating Paper Bats. Cut bat silhouettes from black cardstock and hang them at varying heights with fishing line. Vary the sizes and angles slightly — a uniform grid of identical bats reads as a template, while irregular spacing looks like they’re mid-flight.
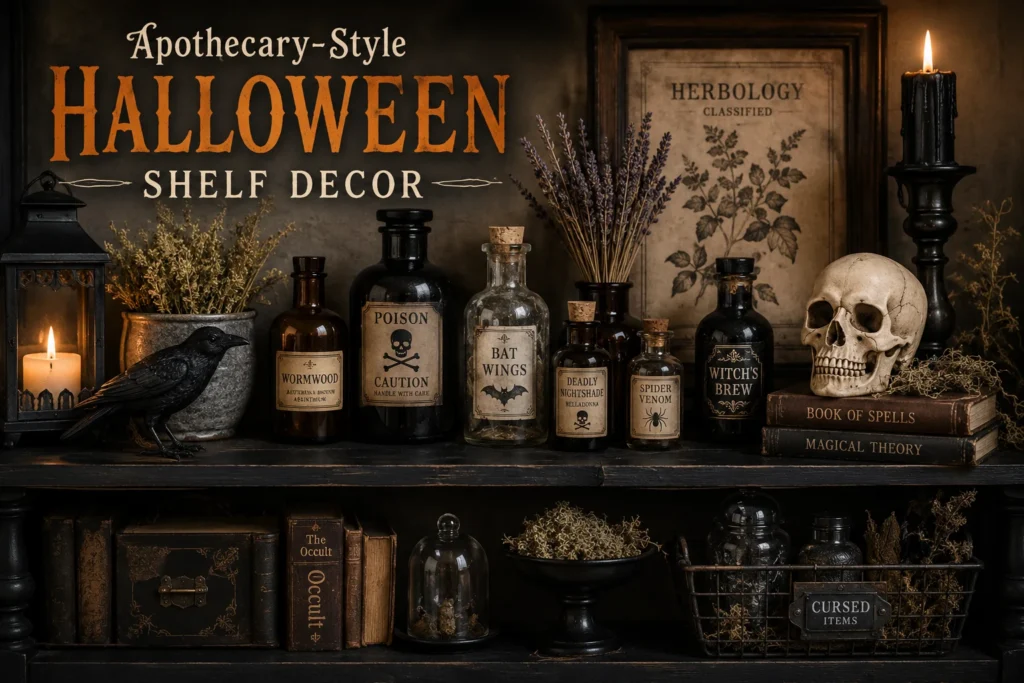
3. Apothecary Bottle Labels. Print or hand-letter vintage-style labels and wrap them around plain glass bottles. Aged paper (tea-stained printer paper works) sells the illusion far better than crisp white labels, since it mimics real wear.
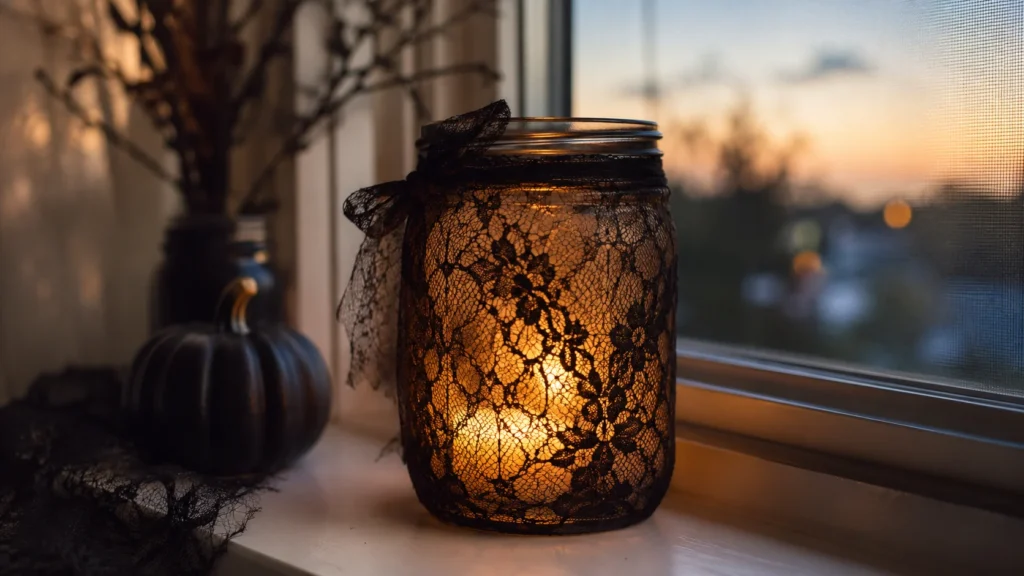
4. Halloween Mason Jar Lanterns. Wrap black lace or tulle around a mason jar, drop in a battery tea light, and tie raffia at the neck. Battery lights matter here — an open flame in a jar with fabric wrapped around it is a fire risk you don’t need to take.
5. Ghost Candle Holders. Drape a small piece of thin white fabric over a votive holder and cut simple eye holes. The fabric should hang loosely rather than being glued flat, since movement in the folds is what gives it a ghostly silhouette instead of looking like a paper cutout.
6. No-Sew Halloween Pillow Covers. Use fabric glue or a no-sew hemming tape to wrap seasonal fabric around your existing pillow inserts. This is the fastest way to shift a whole room’s mood without buying new pillows outright.
7. Mini Potion Bottle Display. Group five or six small bottles filled with colored water or dried herbs on a wood tray. Odd numbers and varied bottle heights are what make a grouped display look styled instead of just lined up.
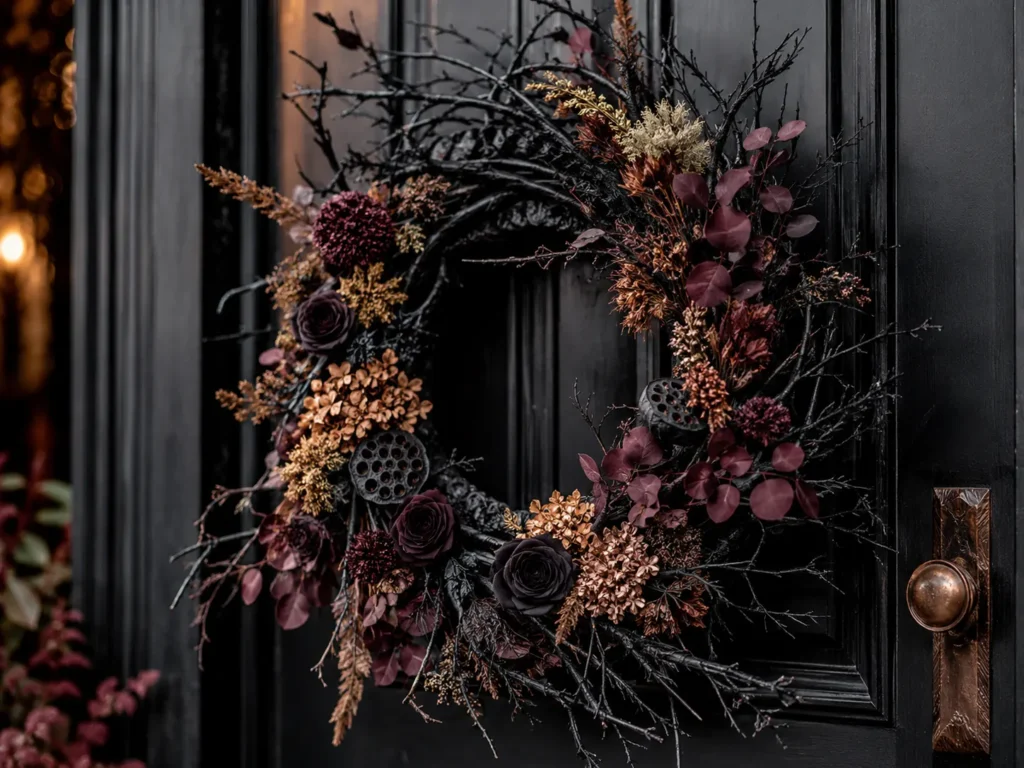
8. Black Branch Centerpiece. Spray-paint bare branches matte black and arrange them in a tall vase. This is one of the lowest-effort, highest-impact projects on this list — it takes ten minutes and instantly reads as “gothic luxury” on a console table or mantel.
Intermediate DIY Projects (30–90 Minutes)
9. Floating Witch Hat Chandelier. Suspend a small witch hat upside down from the ceiling with fishing line, ring it with faux candles or string lights, and let fabric drape from the brim. Hang it slightly off-center rather than dead-center over a table, which reads as more intentional and less like a party store prop.
10. Haunted Mirror. Use dry-erase marker or removable window paint to add a foggy handprint or faint lettering to an existing mirror. Because it’s removable, this works even in a rental — wipe it clean with glass cleaner come November.
11. Spell Book Stack. Cover old hardcover books in kraft paper or black cardstock, then add hand-lettered titles and a leather cord tie. Stack them at slightly uneven angles with a candle or dried floral on top for an instant apothecary vignette.
12. Raven Branch Arrangement. Attach a few faux ravens to a black branch arrangement using thin wire so they look perched rather than glued flat. Positioning one bird slightly higher than the others breaks the symmetry and makes the whole piece look more natural.
13. Floating Ghost Window Display. Cut simple ghost shapes from cheesecloth stiffened with fabric stiffener or diluted glue, then hang them in a window at different lengths of fishing line. Stiffened cheesecloth holds a slight billow shape even indoors, which looks far more expensive than flat white fabric.
14. DIY Halloween Wreath. Build a base from a grapevine or foam wreath form, then layer dried florals, small branches, and a few faux crows or moths. Anchor everything with hot glue on the back side of the wreath so the front stays clean and dimensional rather than flat.
15. Potion Shelf Display. Style a floating shelf with labeled bottles, dried herbs bundled with twine, and a small brass candlestick. Group items in threes across the shelf rather than spacing them evenly — visual triangles read as curated, even spacing reads as a store display.
16. Halloween Coffee Bar Styling. Swap your everyday mugs for black or amber glassware, add a small chalkboard sign, and tuck in a bundle of dried orange slices or cinnamon sticks.
17. Apothecary Cabinet Display. If you have open shelving or a glass-front cabinet, fill it with labeled jars, dried botanicals, and a few candlesticks instead of dishware for the season. Leave some negative space between groupings — a fully packed cabinet reads as cluttered rather than curated.
18. Gothic Picture Frames. Spray-paint thrifted frames black or aged gold, then insert vintage-style portraits (printable online) or leave them empty and lean them against a wall in a cascading stack. Empty frames leaned at an angle photograph surprisingly well and require zero printing.
Advanced DIY Halloween Weekend Projects
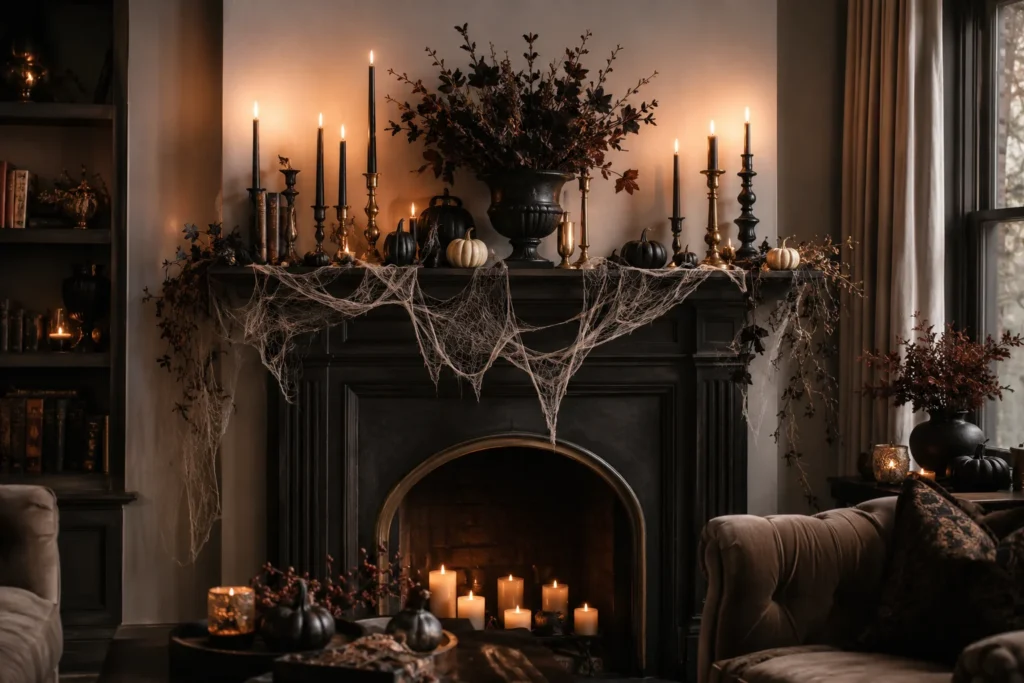
19. Designer Halloween Fireplace Mantel. Layer height by grouping candlesticks of different sizes, drape thin cheesecloth “cobwebs” sparingly (a little goes further than a lot), and anchor the display with one larger statement piece like a black urn or oversized pumpkin. Odd-numbered groupings of three or five keep it from feeling stiff.
20. Luxury Halloween Tablescape. Use a dark tablecloth or bare wood table, black taper candles in varying heights, and a low, elongated centerpiece of dried florals or mini pumpkins so guests can still see across the table. Skip tall centerpieces at a dinner table — they block conversation and look accidental rather than styled.
21. Stacked Pumpkin Topiary. Stack three foam pumpkins of decreasing size with a dowel through the center, paint the whole stack a single matte color, and top it with a small floral pick or bow. Monochrome painting is what turns this from a craft project into something that looks like a florist made it.
22. Haunted Entryway Console. Style your entry table with a lantern, a stack of “spell books,” and a small branch arrangement, keeping the back wall simple so the styled objects have visual breathing room. If your entry doubles as a small living space, our cozy living room ideas post covers the same negative-space principle for keeping a compact area feeling warm instead of crowded.
23. Floating Candle Ceiling Installation. Suspend battery-operated pillar candles at varying heights over a dining or entry table using fishing line and small ceiling hooks. Stagger the heights by at least four inches between candles so the installation reads as intentional rather than accidental clutter overhead.
24. Witch’s Herb Drying Rack. Hang a wooden dowel or branch horizontally and tie small bundles of dried herbs or florals along it with twine. This project doubles as functional kitchen decor if you actually dry herbs, which makes it one of the few pieces worth keeping up well past October.
25. Black Floral Arrangement. Spray-paint dried or faux florals matte black and arrange them in a simple ceramic or black vase. Keep the arrangement asymmetrical, with a few stems noticeably taller than the rest, since a symmetrical dome shape reads more like a funeral arrangement than a styled centerpiece.
Outdoor DIY Projects
This next set covers DIY Halloween porch decor specifically — the projects that need to hold up to wind, rain, and cooler nights, not just look good under indoor lighting.
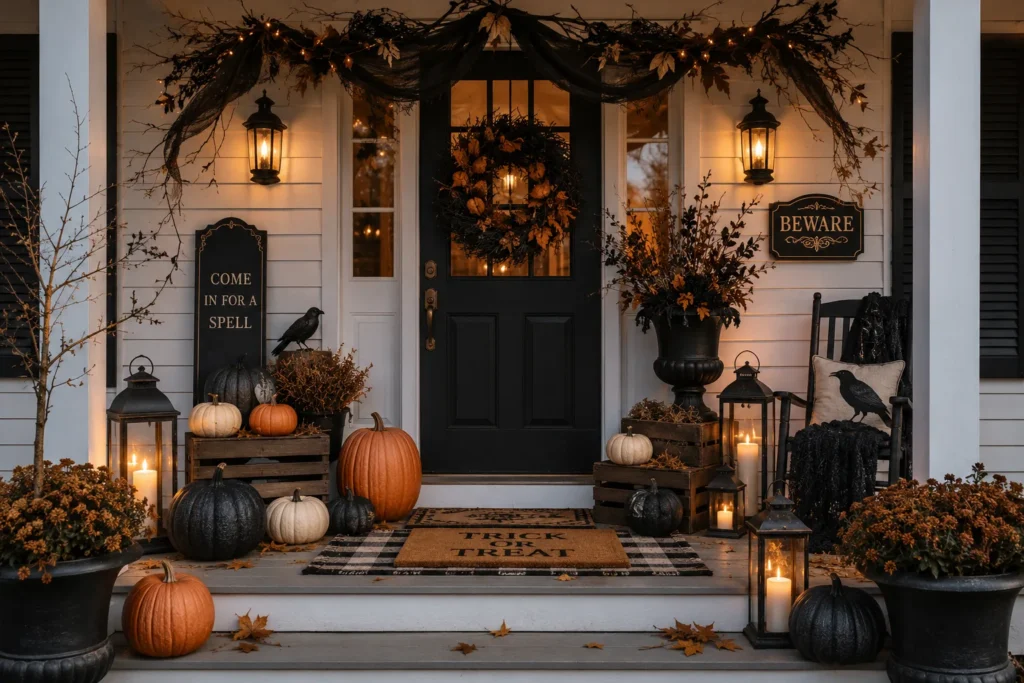
26. Halloween Front Door Swag. Build an asymmetrical swag from dried branches, faux florals, and a wide ribbon bow, hung to one side of the door rather than dead center. Off-center placement is a simple trick that makes handmade swags look like they came from a florist.
27. Floating Porch Ghosts. Same technique as the indoor ghost windows, scaled up with larger stiffened fabric and hung from a porch overhang. Use a slightly weighted hem (a small washer sewn into the bottom corner) to keep them from tangling in wind.
28. Wooden Porch Sign. Paint or stencil a simple phrase onto a piece of scrap wood or an inexpensive pine board and lean it against your door or porch railing. Keep the wording short — one phrase in large letters reads better from the street than a paragraph in small text.
29. Haunted Walkway Lanterns. Line your front walkway with mason jar lanterns (see #4, upgraded with outdoor-rated battery candles) spaced evenly on either side. Consistent spacing matters more outdoors than indoors, since walkway lighting is read as a full sequence rather than individual pieces.
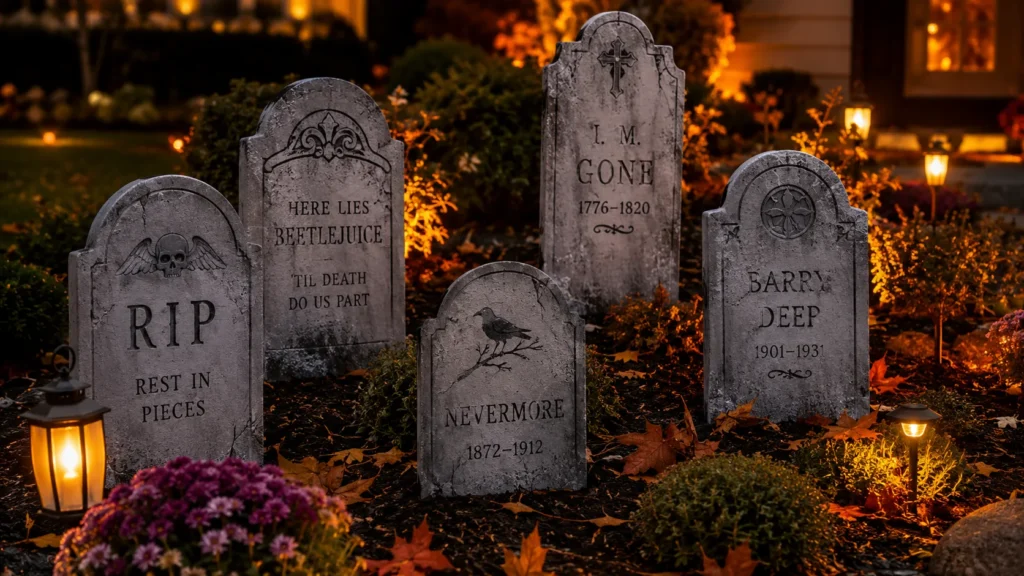
30. DIY Tombstone Garden. Cut tombstone shapes from foam board, seal with exterior paint, and stencil on epitaphs before staggering them at slightly different heights and angles in a garden bed or yard patch. Uneven placement, not a straight row, is what sells the “aged cemetery” look.
31. Witch Broom Parking Station. Bundle a few brooms (real or craft) upright in a large planter or urn by the front door, as if a coven just landed. It’s a low-effort, high-charm project that takes minutes and photographs extremely well on a porch.
32. Skeleton Welcome Display. Pose a full-size skeleton prop in a seasonal “activity” — reading a newspaper on a porch chair, holding a welcome sign, or seated at a small table — rather than standing it stiffly upright. The pose is what turns a $25 prop into a talked-about display.
33. Haunted Mailbox. Wrap your mailbox post in black fabric or spider webbing and tuck in a few faux crows or spiders. It’s a small, five-minute detail, but it extends your styled look past the porch and to the curb, which matters if street appeal is part of your goal.
34. Outdoor Pumpkin Crate Display. Stack wooden crates of varying sizes on your porch steps and fill them with a mix of real and faux pumpkins in your palette. The crates add height variation that flat porch steps usually lack, which makes the whole display feel more three-dimensional.
35. Layered Halloween Porch Setup. This is the project that pulls every piece of DIY Halloween porch decor into one cohesive scene. Combine three or four of the projects above — a swag, walkway lanterns, a pumpkin crate display, and a wooden sign — using the same color palette throughout. This is the project that ties the whole outdoor space together, and it’s the reason planning your palette earlier in this guide matters so much.
These projects focus on making the decorations themselves. If you want help deciding how the finished pieces should work together throughout the house, continue with our Halloween Home Decor Ideas guide. For porch zones, outdoor lighting, weather exposure and yard placement, use the Halloween Outdoor Decorations guide instead.
Dollar Store Halloween DIY Finds
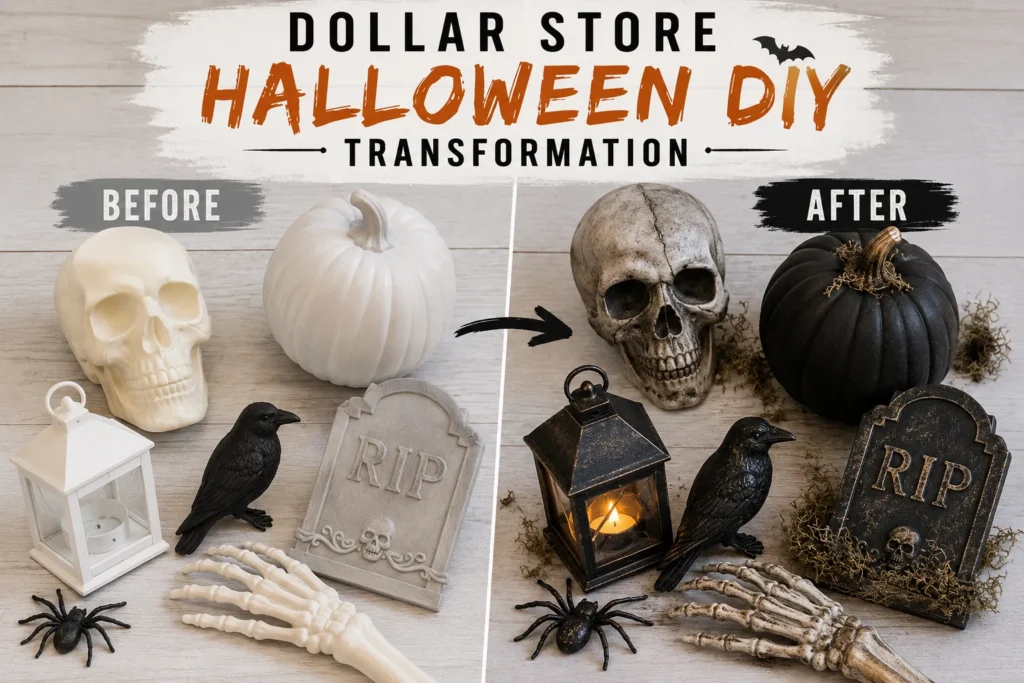
The 20 best Dollar Store items to buy include plain foam pumpkins, mason jars, black cardstock, cheesecloth or gauze, faux florals, wooden picture frames, small glass bottles, twine, black ribbon, plastic spiders and crows, battery tea lights, wooden dowels, craft branches, plain candlesticks, burlap ribbon, small baskets, chalkboard signs, floral wire, spray paint, and plain white sheets.
Dollar Store DIY projects under $20 include the painted pumpkin set, the mason jar lanterns, the potion bottle display, and the floating paper bats — all buildable for well under $20 total, even before accounting for supplies you likely already have on hand like scissors and glue.
How to make Dollar Store decor look high-end comes down to three moves: repaint everything in your chosen palette instead of using the original colors, swap plastic ribbon for fabric or raffia, and never display Dollar Store pieces at their original scale alone — grouping three small items together always reads better than one small item on its own.
Dollar Store mistakes to avoid are mixing too many original packaging colors (the orange-purple-green combo most items ship in), skipping a matte spray paint pass on shiny plastic, and buying more props than you have a styled place to put — a pile of unstyled Dollar Store finds looks cheap regardless of what they cost.
Homemade Halloween Decor Using Recycled Materials
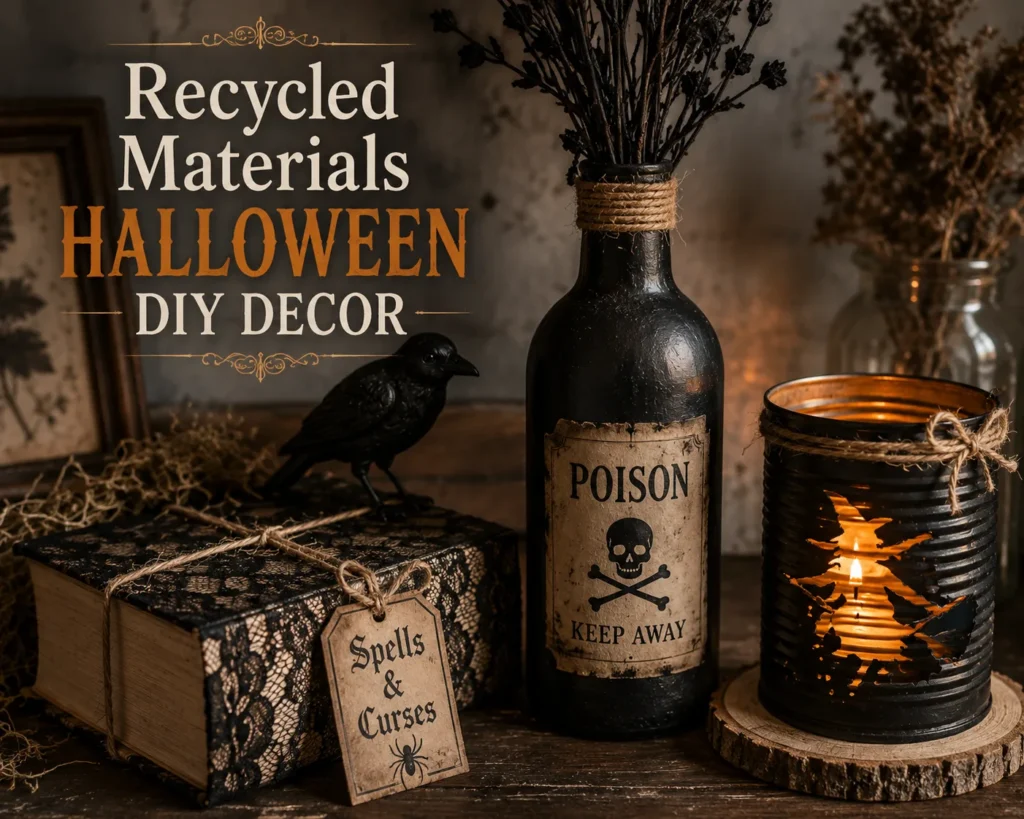
Glass jars become lanterns, potion bottles, or a herb-drying display base with almost no cost beyond what you already have in the recycling bin.
Cardboard boxes flatten into tombstone shapes or get cut into bat and pumpkin silhouettes for window displays.
Scrap wood works for the porch sign and as a base for the pumpkin topiary dowel.
Tin cans clean up into candle holders — punch a simple pattern into the side with a hammer and nail before adding a tea light for projected light patterns.
Wine bottles make taller apothecary bottles once labels are soaked off, and their curved shape adds height variation a mason jar can’t.
Fabric scraps cover pillow inserts or stiffen into ghost shapes.
Old books get the spell book treatment instead of heading to a donation pile.
If recycled and upcycled materials are your thing beyond Halloween, our broader recycled home decor projects guide has fifteen more ideas that work year-round, not just for October.
DIY Halloween Decor Ideas by Budget
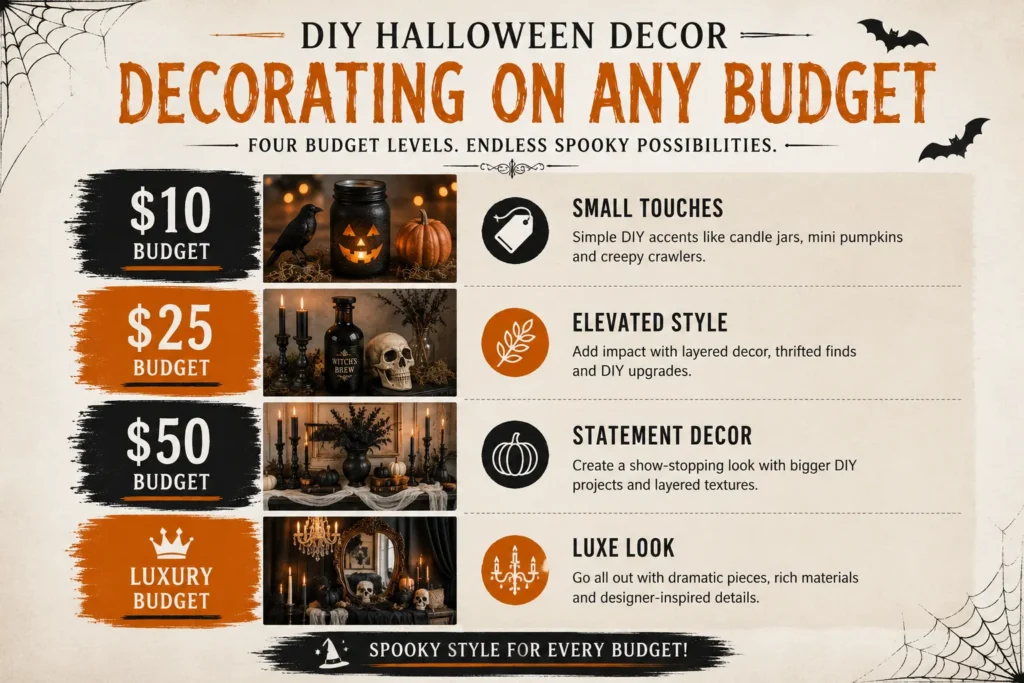
Projects under $10: painted pumpkins, paper bats, mini potion bottles, and ghost candle holders — all buildable from a single Dollar Store trip.
Projects under $25: the DIY wreath, witch hat chandelier, and mason jar walkway lanterns if you’re making three or more.
Projects under $50: the designer fireplace mantel and the layered porch setup, since both combine several smaller projects into one cohesive display.
Luxury DIY statement pieces: the floating candle ceiling installation and a full luxury tablescape cost more mainly in candles and florals, but both create the kind of visual impact that would run $150+ if bought pre-made from a home decor retailer.
Style Your DIY Decorations Like an Interior Designer
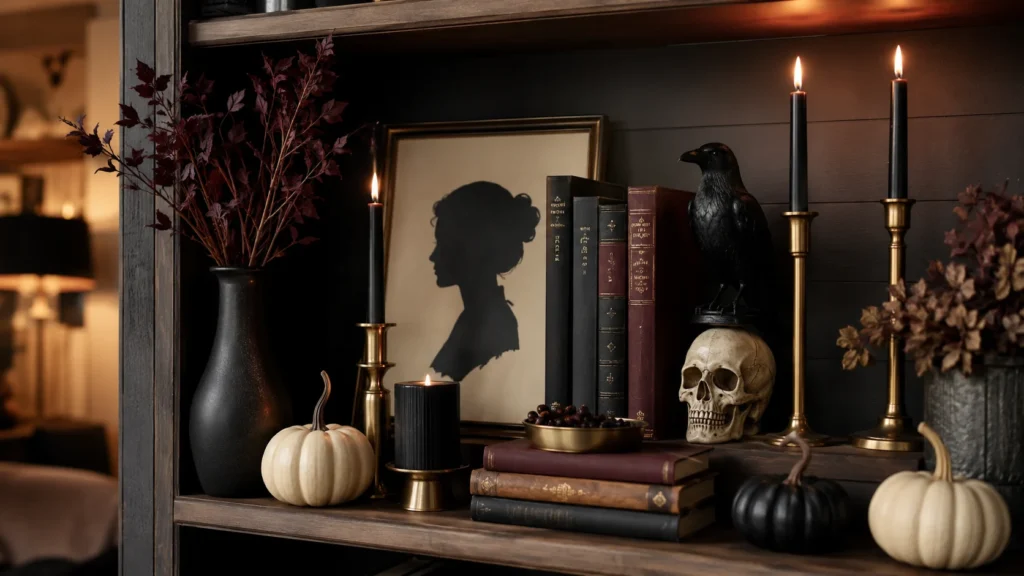
Coffee table styling formula: one low, wide element (a tray or shallow bowl), one taller element (a candle or small vase), and one textural element (dried branches or a stack of books), grouped together rather than spread across the whole surface.
Fireplace mantel styling formula: anchor the center with your largest piece, flank it with matched candlesticks, and let one draping element (cheesecloth or garland) connect the pieces visually instead of leaving hard gaps.
Bookshelf styling formula: alternate vertical (books, frames) and horizontal (stacked books, small boxes) elements, and never fill every shelf at the same density — empty space on at least one shelf keeps the whole unit from feeling busy.
Dining table styling formula: keep the centerpiece under 12 inches tall so sightlines stay clear, and repeat your accent color in at least two places (candles and a runner, for example) so the table reads as coordinated.
Entryway styling formula: one functional piece (a tray for keys), one styled vignette (books or bottles), and one seasonal accent (a small pumpkin or branch arrangement) is enough — entryways get cluttered fast because they’re also functional space.
Front porch layering formula: vary height (tall swag, mid-height crates, low pumpkins), vary texture (wood, fabric, natural greenery), and repeat your color palette at least three times across the porch so it reads as one display instead of separate purchases.
How to Make Homemade Halloween Decor Look Expensive
Choose a consistent color palette and apply it across every single project — this one habit does more to elevate a Halloween display than any individual craft technique.
Layer different textures. Smooth ceramic, rough dried branches, soft fabric, and matte painted surfaces sitting near each other is what separates a styled vignette from a flat collection of same-textured plastic props.
Use matte and satin finishes instead of glossy plastic. Glossy surfaces read as cheap under most indoor lighting; matte spray paint is one of the cheapest fixes available for this exact problem.
Add warm ambient lighting. Swap harsh overhead light for candles, string lights, or warm-toned battery lanterns. Warm light alone can make a $15 Dollar Store setup photograph like a much pricier one.
Mix DIY pieces with store-bought decor. A few quality anchor pieces — real dried florals, a nice candlestick, a genuine wood tray — give your handmade projects something polished to sit alongside, which raises the perceived quality of everything around them.
Store and Reuse Your DIY Halloween Decorations
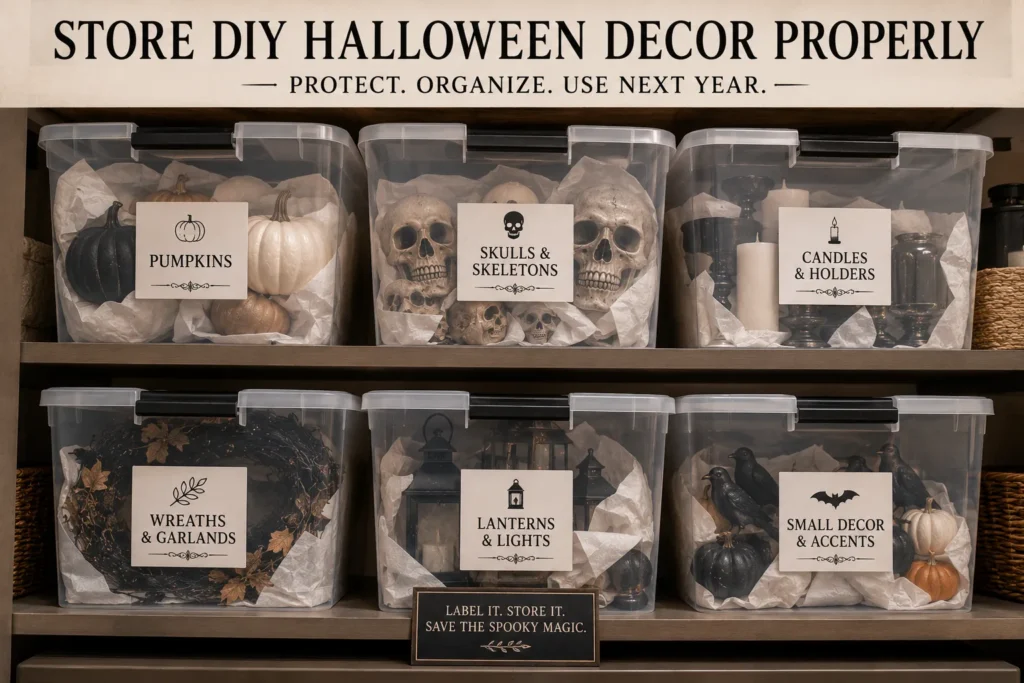
Best storage containers are clear plastic bins labeled by project type (lighting, fabric pieces, painted pumpkins) rather than one giant mixed box, since digging through a jumbled bin next year is what leads to re-buying things you already own.
Prevent paint and glue damage by wrapping painted pieces in tissue paper before stacking, and storing anything with hot glue joints flat rather than upside down, since glue can soften and shift in a hot attic or garage.
Reuse DIY projects for fall and Thanksgiving by swapping black ribbon for burlap, and pulling ghosts and bats out of the mix while keeping branches, dried florals, pumpkins, and candlesticks in place — most of the neutral and organic-style projects in this guide transition straight into Thanksgiving décor with a five-minute refresh.
Common DIY Halloween Decorating Mistakes
Mixing too many decorating styles in one space is the single most common issue — gothic candlesticks next to neon skulls reads as indecisive rather than eclectic.
Using low-quality paint finishes, especially glossy craft paint on plastic, undercuts even a well-designed project.
Ignoring scale and proportion, like a tiny wreath on an oversized door, makes handmade pieces look like an afterthought.
Overcrowding every surface leaves no visual rest for the eye and makes a home feel cluttered instead of festive.
Forgetting outdoor durability means a beautiful indoor-glue project falls apart in the first rain.
Skipping protective sealers on outdoor wood or foam pieces shortens their lifespan to a single season.
Using too many bright, saturated colors at once competes with the moodier palettes that read as higher-end.
Not planning the overall room design before crafting individual pieces is how a full weekend of work ends up looking disjointed instead of cohesive.
DIY Halloween Weekend Decorating Plan
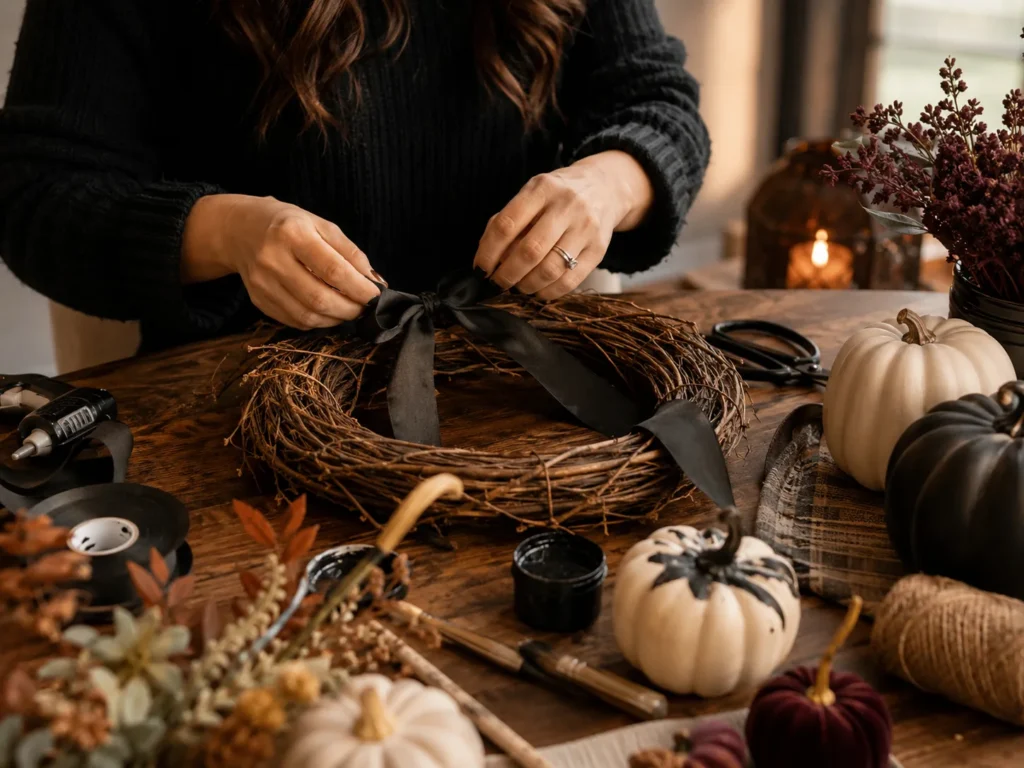
Friday: Shop and gather supplies. Do one Dollar Store run and one Michaels or Hobby Lobby run (ideally during a coupon week), plus a walk through your own recycling bin and yard for branches, jars, and cardboard.
Saturday morning: Build the main projects. Tackle anything requiring drying time first — spray-painted pumpkins, branches, and frames — so they’re ready to style by afternoon.
Saturday evening: Paint and finish. Add second coats, seal outdoor pieces, and finish detail work like labels and hand-lettering while the morning’s base coats cure.
Sunday morning: Style every room. Work room by room using the styling formulas above, starting with your most visible space (usually the entry or living room) and working outward.
Sunday evening: Add lighting and final details. Lighting is always the last step — it’s what turns a finished display into an atmospheric one, and it’s easiest to judge once everything else is already in place.
Conclusion
Focus on creating a cohesive decorating style instead of making as many crafts as possible — five well-styled projects will always outperform thirty scattered ones. Invest in a few reusable, high-quality DIY pieces that can become part of your seasonal decorating collection year after year, rather than treating every project as disposable. Combine thoughtful styling, layered textures, and quality finishes, and you’ll get a designer-inspired Halloween home without the designer price tag.
Frequently Asked Questions (FAQ)
Painted faux pumpkins and floating paper bats are the two easiest projects here — both take under 15 minutes, need no special tools, and are hard to get wrong even on a first attempt.
Stick to one consistent color palette across every piece, use matte finishes instead of glossy plastic, and add warm ambient lighting — these three changes matter more than any individual craft technique.
Painted pumpkins, mason jar lanterns, and mini potion bottle displays are the strongest Dollar Store projects because the base materials are already close to what you need, with minimal alteration required.
Painted branches, apothecary bottles, spell books, candlesticks, and neutral-toned pumpkins all store well and reuse cleanly, since they’re not tied to a specific paint trend or fabric that fades.
Exterior-rated spray paint with a built-in sealer, or a separate clear matte outdoor sealer applied over craft paint, holds up best against rain and temperature swings.
Use exterior adhesive instead of hot glue for anything outdoors, seal painted wood and foam pieces, and choose battery-powered lighting over anything with an open flame or exposed cord.
Yes — swap black ribbon for burlap or rust tones, remove ghosts and bats, and keep branches, dried florals, candlesticks, and neutral pumpkins in place for an easy transition.
It’s safer to use battery-operated candles in most of these projects, especially anything involving fabric, cheesecloth, or dried florals, since those materials ignite easily. Save real flame for pieces on stone or metal surfaces, away from anything draped or hanging.