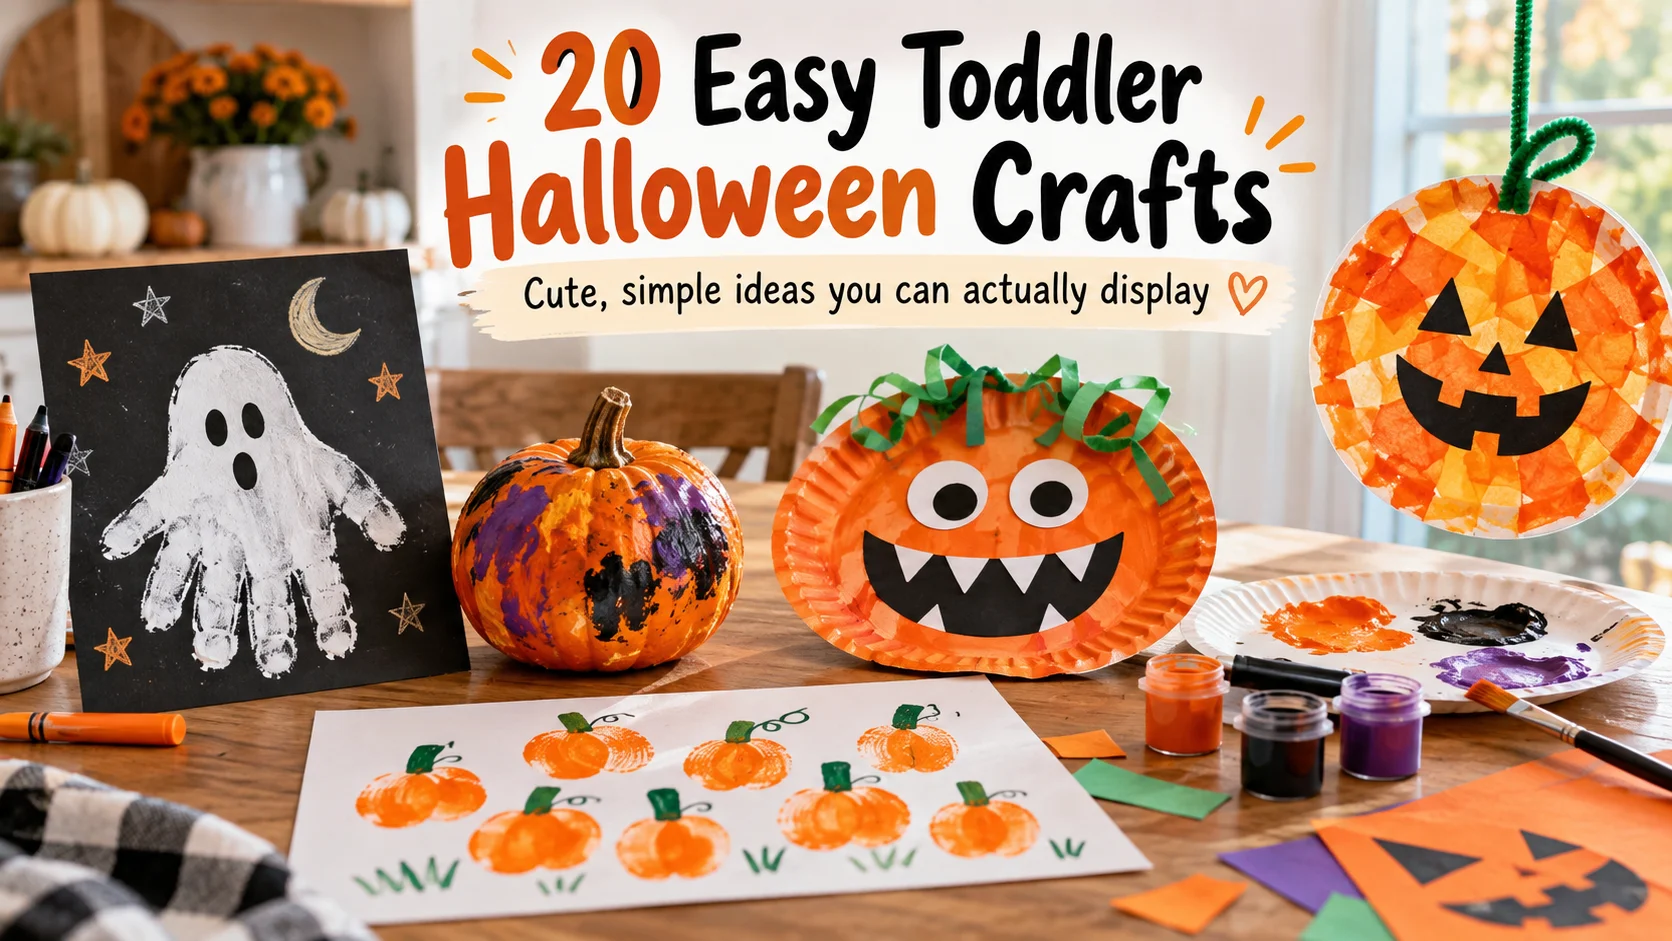
20 Easy Toddler Halloween Crafts (That Look Good Enough to Display)
Most toddler Halloween craft lists have the same problem. The crafts look great in the photo. Then you try one with a two-year-old and end up with glue on the dog and a meltdown by minute six.
This list is built differently. Every craft below is chosen because a toddler can actually do the messy, fun part, while an adult handles the fiddly part. And because this is a home décor blog, each one also earns a spot on your mantel, window, or front door once it dries.
You’ll find easy toddler Halloween crafts with hand prints, pumpkins, paper plates, and sensory materials. Every craft has a “why it works” note, and each one has a finished-result photo so you know what “good enough” looks like.
The best toddler Halloween crafts use one big action, like stamping, sticking, or painting, with large non-toxic supplies and about 10 to 15 minutes of effort. Start with hand print ghosts, painted mini pumpkins, and paper plate monsters. All three need little prep, use supplies you likely own, and look great taped to a window or hung on twine.
Before You Start: Set Up for a Toddler, Not a Pinterest Board
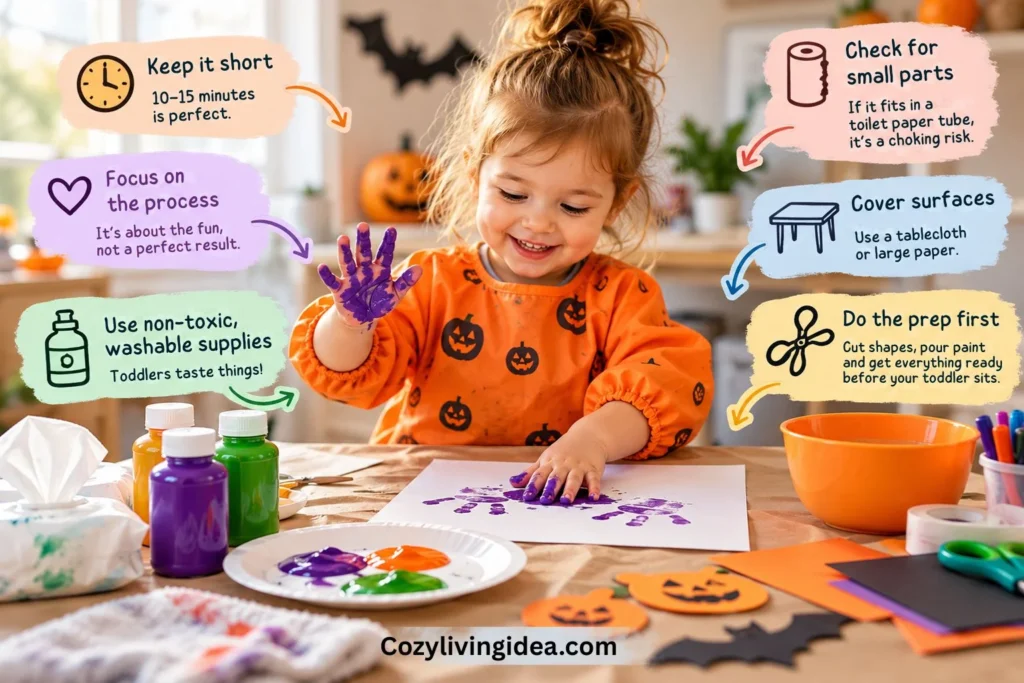
A little setup decides whether the craft works. Spend 5 minutes on this and every idea below gets easier.
Keep the activity short. Plan for a short activity and follow your child’s interest. Some toddlers may stay engaged for several minutes; others will want to stop almost immediately. Ending while they’re still having fun is better than pushing for a finished product.
Pick the process over the product. Your toddler cares about squishing paint, not about a ghost with even edges. If they paint the pumpkin blue, that’s a blue pumpkin. It still looks fine on a shelf, and your toddler stays interested in crafting.
Use the toilet paper tube test for small parts. Any object that fits inside an empty toilet paper tube is a choking risk for kids three and under. Seattle Children’s toy safety guidance recommends this exact check, and it takes two seconds. Googly eyes, sequins, beads, and small pom-poms all fail it. Draw eyes with a marker, or cut them from paper, whenever your child still mouths objects.
Choose art materials made for young children. Follow the age guidance on the package and look for products carrying the ACMI AP (Approved Product) Seal where available. “Washable” is useful for cleanup, but it does not by itself mean a product is appropriate for every use. For handprint and footprint crafts, use paint whose label permits the intended skin contact rather than assuming any craft paint is suitable.
Cover the surfaces. Tape a big sheet of paper or an old tablecloth to the floor or table. Put your toddler in a T-shirt you don’t mind losing. Keep a damp cloth and a bowl of soapy water within reach before you open any paint.
Do the fiddly prep first. Cut shapes, pour paint onto plates, and tear tape into strips before your toddler sits down. Once they’re in their seat, you have very little time to spare.
Set out only the supplies for one craft. A toddler faced with ten colors of paint and a pile of stickers will use all of them at once, usually on one square inch of paper.
Toddler Halloween Crafts With Hand Prints (5 Ideas)
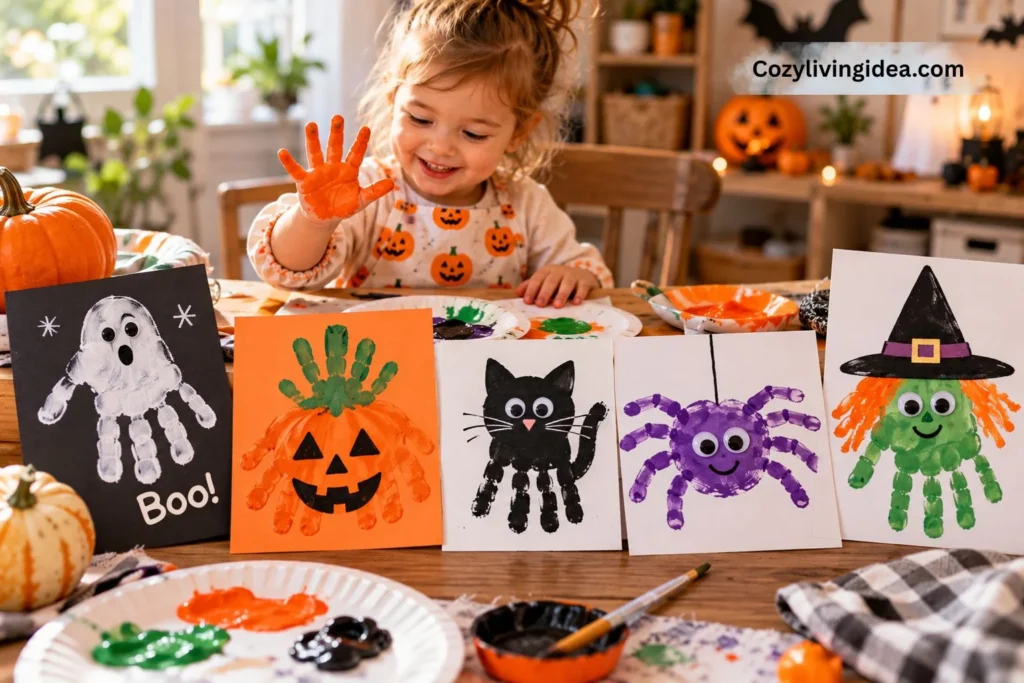
Hand prints are the easiest craft category for toddlers. The action is simple, the result is easy to recognize, and the print doubles as a keepsake. Check each year’s prints against the last and you’ll see how quickly small hands change.
Supplies for all hand print crafts: washable non-toxic paint, paper plates for paint (a thin layer works best), heavy paper or cardstock, baby wipes, and a black marker.
1. Handprint Ghost
- ✓
Age fit: 18 months and up
- ✓
What you need: white washable paint, black or navy construction paper, black marker
- ✓
Steps: 1. Paint your toddler’s palm and fingers white, thumb included. 2. Press the hand down on dark paper with the fingers pointing down. The fingers become the wavy ghost bottom. 3. Let it dry, then add two eyes and a mouth with the marker.
- ✓
Why it works: The dark background makes white paint pop, and pressing a hand is a one-step action. The high contrast also means the ghost reads clearly from across the room.
2. Footprint Bat
- ✓
Best for: toddlers who can participate while seated securely, with direct adult help
- ✓
What you need: black washable paint, white or orange paper, marker or white crayon
- ✓
Steps: 1. Paint the bottom of one foot black and press it sideways on the paper. 2. Repeat with the other foot so the heels touch in the middle. Those are the bat’s wings. 3. Add two small ears above the heels and two eyes with the marker.
- ✓
Why it works: The adult handles most of the setup while the child contributes the footprint. Seat the child securely, apply an age-appropriate washable paint to the foot, press the paper to the foot or guide the foot onto paper, and clean it immediately afterward.
3. Handprint Spider
- ✓
Age fit: 18 months and up
- ✓
What you need: black paint, light-colored paper, marker
- ✓
Steps: 1. Press a painted hand down with the fingers spread wide. 2. Draw a round body on the palm section with the marker. 3. Add extra legs to the sides if you like. Your toddler won’t count.
- ✓
Why it works: Fingers look like legs without any extra work. A hand stamp becomes a friendly, slightly silly spider that doesn’t scare small kids.
4. Fingerprint Pumpkin Patch
- ✓
Age fit: 2 years and up
- ✓
What you need: orange washable paint, green marker, white paper
- ✓
Steps: 1. Draw a long wavy vine across the paper with the green marker. 2. Press one painted fingertip along the vine again and again, once per pumpkin. 3. Add tiny green stems once the paint dries.
- ✓
Why it works: Repetition is a toddler’s favorite skill. Pressing the same finger down twenty times is exactly the kind of task they enjoy, and it builds finger control.
5. Handprint Monster Wreath
- ✓
Age fit: 2 years and up
- ✓
What you need: paint in green, purple, and orange, a paper plate with the center cut out, a marker
- ✓
Steps: 1. Cut the center out of a paper plate to make a ring. An adult does this part. 2. Press hand prints around the ring in different colors. 3. Add a big eye to the center of each print with the marker. Every hand becomes a monster. 4. Tape a loop of ribbon to the back for hanging.
- ✓
Why it works: This is the one that looks the most like real décor. It hangs on a door or wall like a store-bought wreath, and it takes about the same effort as one hand print.
Set up hand print crafts with a “paint plate” and a “wipe station.” Press the hand into the paint, print, then go straight to the wipes and soapy bowl. Never carry a painted hand across the room.
Toddler Halloween Crafts With Pumpkins (5 Ideas)
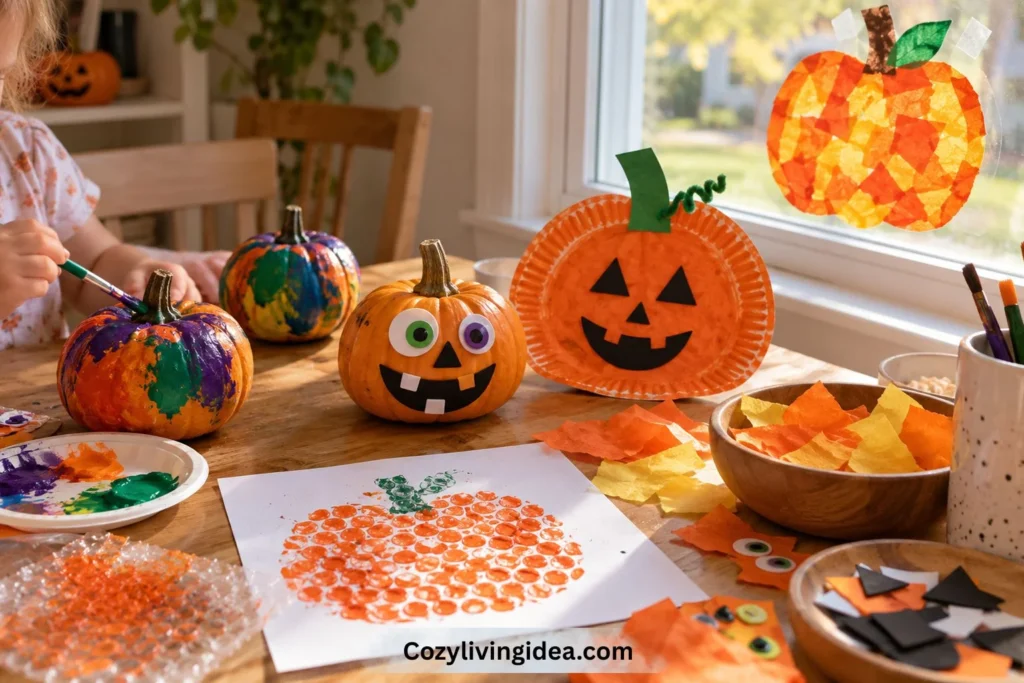
Pumpkin crafts are the classic toddler Halloween craft because pumpkins are friendly, round, and orange. They also work all season, well past October 31st. If your décor leans more autumn than spooky, these are the ones to lean on.
6. Painted Mini Pumpkins
- ✓
Age fit: 18 months and up
- ✓
What you need: mini pumpkins, washable paint, thick brushes or foam brushes, a paper plate for paint
- ✓
Steps: 1. Set the pumpkins on a tray or a piece of cardboard. 2. Hand over the brush and paint in any color and pattern they like. 3. Dry overnight before moving them to a shelf.
- ✓
Why toddlers like it: A real pumpkin has a texture that paper never can, and toddlers love the way paint drags across the bumps. There’s no wrong way to do it, so nobody feels pressure.
7. Sticker-Face Pumpkins
- ✓
Best for: older toddlers who no longer routinely mouth craft materials, with direct supervision
- ✓
What you need: pumpkin plus oversized face shapes specifically intended for the child’s age, or large paper face pieces prepared by an adult
- ✓
Steps: 1. Lay out a small pile of stickers on a plate. 2. Stickers go wherever they decide. 3. Take a photo, since no two faces will match.
- ✓
Why toddlers like it: This is the lowest-mess craft on the list. It’s ideal for a toddler who hates having paint on their hands and for anyone who wants a craft with zero cleanup.
8. Paper Plate Pumpkin
- ✓
Age fit: 2 years and up
- ✓
What you need: paper plate, orange paint, green construction paper, glue stick, black paper shapes for a face
- ✓
Steps: 1. Paint the plate orange and let it dry. 2. Glue on a green paper stem and pre-cut black triangles for eyes and a big smile. 3. Add a short loop of string on the back for hanging.
- ✓
Why toddlers like it: Painting a plate is easy, and gluing a few large shapes teaches early hand-eye coordination. Pre-cutting the shapes yourself keeps things moving.
9. Tissue Paper Pumpkin Suncatcher
- ✓
Age fit: 2 years and up
- ✓
What you need: clear contact paper, orange and yellow tissue paper torn into small pieces, black paper for the outline, tape
- ✓
Steps: 1. Tape a sheet of contact paper to a table with the sticky side up. 2. Press torn tissue pieces onto the sticky surface. 3. Cover with a second sheet of contact paper, then trim into a pumpkin shape. 4. Tape it to a sunny window.
- ✓
Why toddlers like it: Tearing paper and sticking it down are two things toddlers love, and the sticky surface means no glue. When sunlight hits the tissue, it glows like stained glass.
10. Bubble Wrap Stamped Pumpkin
- ✓
Age fit: 2 years and up
- ✓
What you need: a small piece of bubble wrap wrapped around a cardboard tube, orange paint, white paper
- ✓
Steps: 1. Cut a pumpkin shape from white paper and set it on the table. 2. Roll the bubble-wrapped tube through paint, then over the paper. 3. Add a green stem once it’s dry.
- ✓
Why toddlers like it: The bumpy pattern looks like the ribs on a real pumpkin, and rolling is a satisfying big-arm motion.
Skip carving with toddlers entirely. Let them decorate a pumpkin with paint or stickers while you carve a second one in another room. It keeps small hands safe and still gives them a starring role.
Looking for ways to go beyond toddler crafts? Our DIY Halloween decor ideas cover projects the whole family can tackle together.
Simple Paper and Paper Plate Halloween Crafts (5 Ideas)
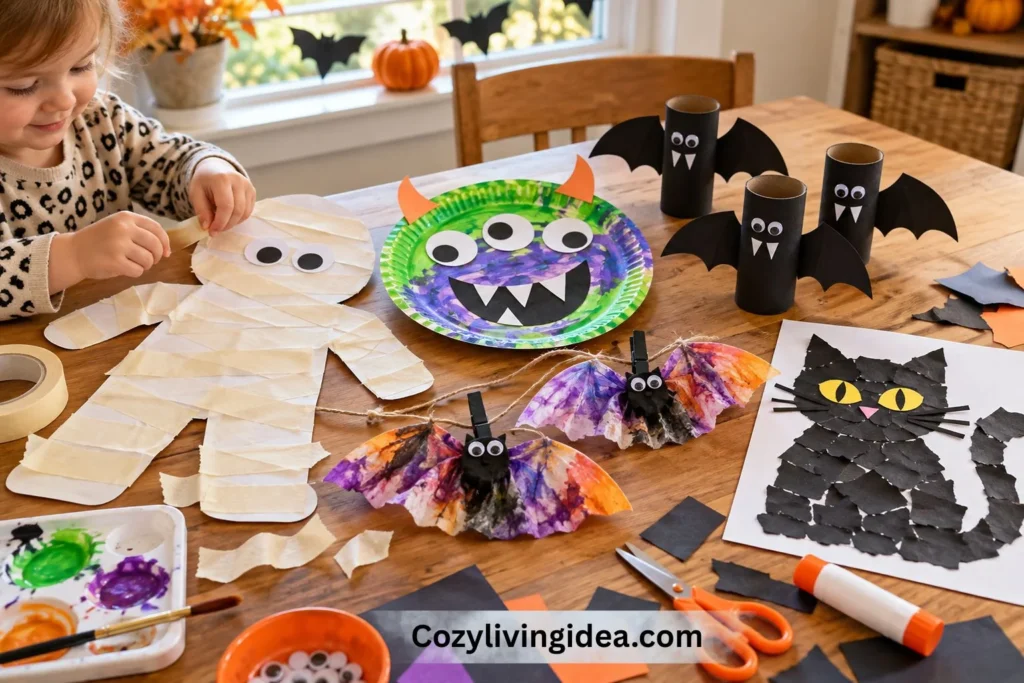
Paper is cheap, forgiving, and already in your house. These simple toddler Halloween crafts need almost nothing beyond paper, tape, and a few markers.
11. Masking Tape Mummy
- ✓
Age fit: 2 years and up
- ✓
What you need: a large paper cutout of a mummy shape (an adult can draw and cut this), masking tape, paper eyes
- ✓
Steps: 1. Tear masking tape into strips and stick a few to the edge of the table. 2. Strips go across the mummy at any angle. 3. Add two paper eyes peeking out from the middle.
- ✓
Good to know: Tape is fun to pull and stick, and it gives instant results. The overlapping strips look wrapped on purpose, so nothing needs to be neat.
12. Paper Plate Monster Face
- ✓
Age fit: 2 years and up
- ✓
What you need: paper plate, washable paint or crayons, large paper eyes, glue stick, paper scraps for teeth and hair
- ✓
Steps: 1. Paint or color the plate in a monster color like green or purple. 2. Glue on big paper eyes and a jagged mouth. 3. Add strips of scrap paper around the edge for hair.
- ✓
Good to know: A monster has no wrong face. It rewards silliness, and an off-center eye only makes it better.
13. Cardboard Tube Bats
- ✓
Age fit: 3 years and up
- ✓
What you need: toilet paper tubes, black paint, black paper wings (pre-cut), paper eyes, glue
- ✓
Steps: 1. Paint the tube black and let it dry. 2. Glue on paper wings, ears, and eyes. An adult can fold the top of the tube to form the ears. 3. Hang a group of bats from a string.
- ✓
Good to know: A tube is a sturdy, ready-made body. This one suits older toddlers because it involves a few more steps.
14. Coffee Filter Bat
- ✓
Age fit: 2 years and up
- ✓
What you need: round coffee filters, washable markers, a spray bottle or dropper with water, a clothespin
- ✓
Steps: 1. Scribble all over a flat coffee filter with markers. 2. Dab it with water and watch the colors bleed together. 3. Once dry, pinch the middle with a clothespin. The filter fans out into wings.
- ✓
Good to know: The colors spread on their own once they get wet, so your toddler sees cause and effect within seconds. Clip a few onto a string and you have a garland.
15. Torn-Paper Black Cat
- ✓
Age fit: 2 years and up
- ✓
What you need: black paper, orange or yellow paper, glue stick, marker
- ✓
Steps: 1. Tear black paper into ragged pieces. 2. Glue the pieces onto a white sheet in a rough cat shape that you sketch first. 3. Add yellow eyes and whiskers with a marker.
- ✓
Good to know: Tearing is a real workout for small fingers. Ragged edges read as fur, so nothing needs to be cut neatly.
Keep a glue stick, not liquid glue, in your toddler’s hands. Sticks are harder to over-squeeze and dry fast, so crafts stay flat.
Sensory and No-Glue Halloween Crafts (5 Ideas)
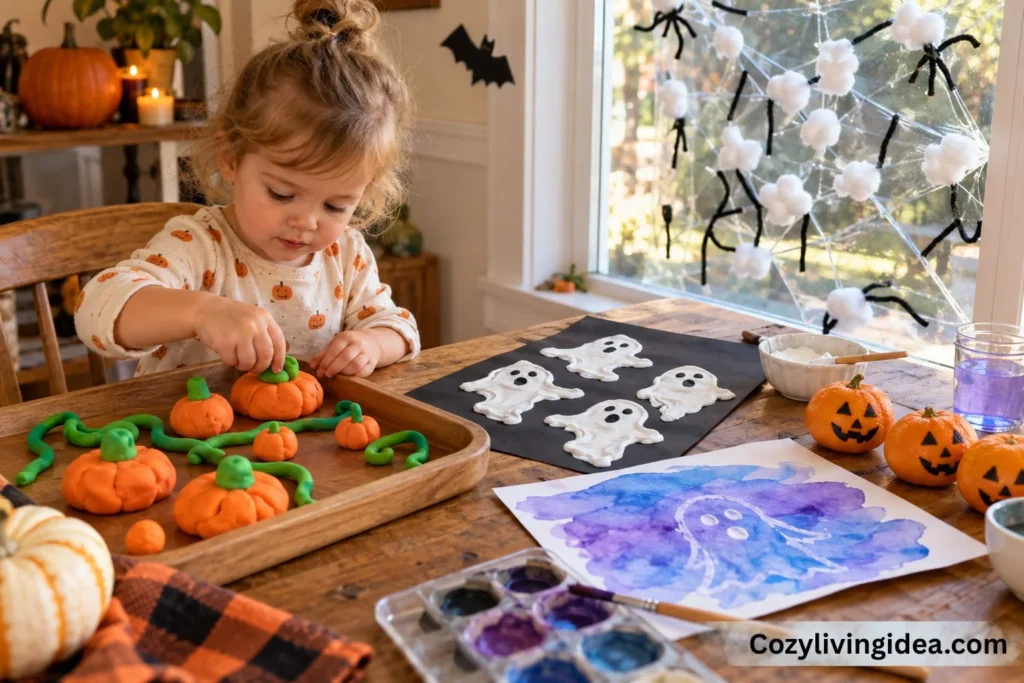
These crafts are for the toddler who would rather squish, poke, and explore than make a “thing.” They’re some of the most engaging DIY toddler Halloween crafts, and most leave nothing to glue or cut.
16. Sticky Spiderweb Wall
- ✓
Best for: toddlers with direct adult supervision
- ✓
What you need: clear contact paper, large strips or shapes of black paper/felt, and oversized lightweight paper web pieces
- ✓
Steps: 1. Tape a large sheet of contact paper to a wall or window with the sticky side facing out. 2. Press the large paper or felt shapes onto the sticky surface and rearrange them as often as your toddler likes.
- ✓
The payoff: It’s a craft with no drying time and no cleanup beyond peeling off the tape. The fluffy cotton looks just like webs.
17. Puffy Paint Ghosts
- ✓
Age fit: 2 years and up
- ✓
What you need: washable dimensional or puffy children’s paint labeled for your child’s age, black cardstock
- ✓
Steps: Let the child make large white blobs or ghost shapes on dark paper. Once fully dry, an adult can add the eyes.
- ✓
The payoff: The puffy texture dries raised and cloud-like, so the ghosts have real dimension. Keep it out of little mouths.
18. Ghost Resist Art
- ✓
Age fit: 2 years and up
- ✓
What you need: white crayon, white paper, watery blue or purple watercolor, a big brush
- ✓
Steps: 1. Draw a ghost outline on white paper with the crayon. An adult can do this, or a toddler can scribble. 2. Paint over the whole page with watercolor.3. Watch the ghost appear where the wax repelled the paint.
- ✓
The payoff: The reveal is a small surprise. Toddlers love a craft that “does something.”
19. Playdough Pumpkin Patch
- ✓
Age fit: 18 months and up
- ✓
What you need: orange and green playdough, a rolling pin, pumpkin-shaped cutters or bottle caps
- ✓
Steps: 1. Roll out orange dough and let your toddler press shapes into it. 2. Roll green dough into thin snakes for vines and stems.3. Arrange everything on a tray.
- ✓
The payoff: Playdough is a sensory workout for small hands. You also get the entire craft back afterward, since it can be squished into a ball again.
20. Clementine Jack-o’-Lanterns
- ✓
Age fit: 2 years and up
- ✓
What you need: clementines or satsumas and a marker specifically labeled for food decoration/edible use
- ✓
Steps: 1. Give your toddler an easy-to-peel citrus fruit. 2. Let them draw a face on the peel with the marker.3. Peel and eat once the art show is over.
- ✓
The payoff: It’s a quick seasonal activity that can double as a snack when you use a food-decoration product specifically labeled for that purpose. Follow the marker manufacturer’s directions and supervise the activity closely.
Preschool and Toddler Halloween Crafts: How to Adjust by Age
A craft for a 3.5-year-old will overwhelm a one-year-old, and the reverse is just as true. Adjust the same idea instead of buying new supplies.
- ✓
12 to 18 months: Stick with stamping, sticking, and scribbling. Hand prints, footprints, and sticker faces work best. The adult does all the setup and the finishing.
- ✓
18 months to 2 years: Add painting with a chunky brush and tearing paper. Let them choose between two colors so they feel in control.
- ✓
2 to 3 years: Introduce glue sticks, large pre-cut shapes, and simple multi-step crafts like the paper plate pumpkin.
- ✓
3 to 4 years (preschool): Add safety scissors with adult help, simple face-building, and crafts like cardboard tube bats. Many of the ideas above can become “make your own face” projects at this age.
When siblings of different ages share the table, give everyone the same craft. Just adjust the job: the baby stamps, the toddler glues, and the preschooler draws the details.
How to Display Toddler Crafts as Real Halloween Decor
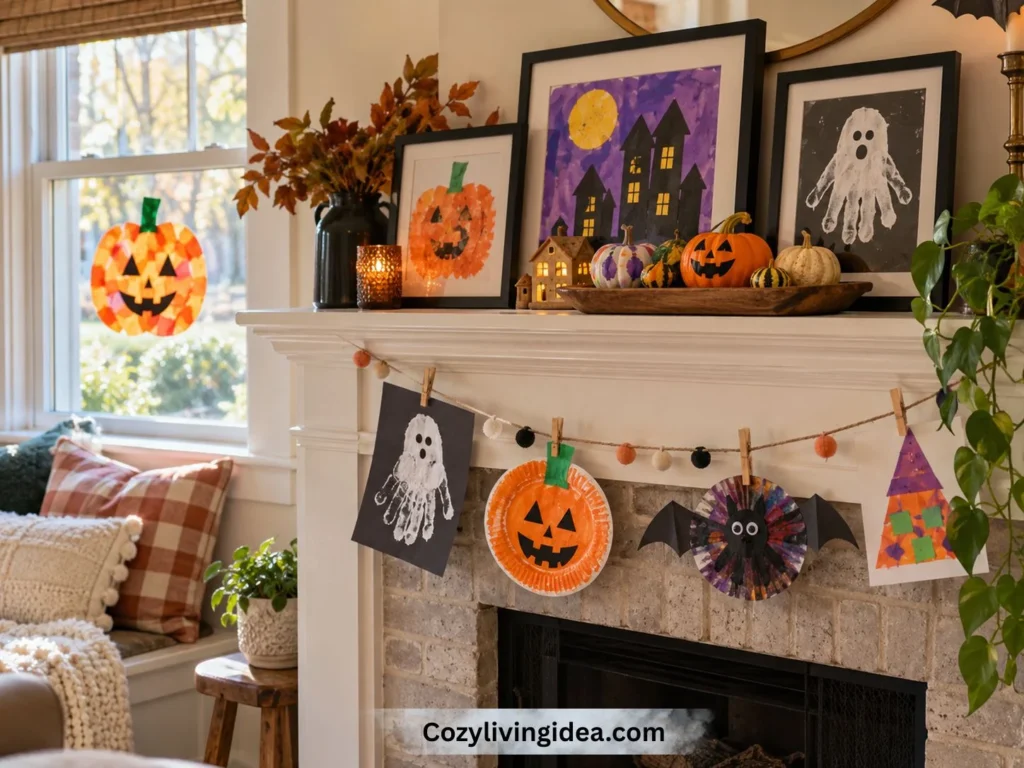
Most craft lists stop once the craft is made. A pile of paper on the fridge is sweet, but a styled display looks intentional. Toddlers notice the difference between “my art is on the fridge” and “my art is part of the decorations.”
- ✓
High garland display: Clip finished paper crafts to twine across a mantel, shelf or upper wall area where the cord and clothespins remain completely out of the toddler’s reach.
- ✓
Low flat-art display: Flat paper artwork or securely attached suncatchers can be displayed closer to the child’s eye level so they can see their work, provided there are no loose cords, detachable small parts or accessible window-covering cords nearby.
- ✓
Front door wreath: Hang the handprint monster wreath outside or on an inside door.
- ✓
Pumpkin tray: Group painted mini pumpkins on a wooden tray with a few real gourds. Mixing toddler pumpkins with store-bought ones makes the whole arrangement feel curated.
- ✓
Frame the best ones: Pick two or three favorites, mat them in simple black frames, and lean them on a shelf. A black frame turns a footprint bat into something that looks chosen.
- ✓
Keep a memory box: Date each print on the back so you can sort them by year later.
If you’re pulling together a bigger seasonal look, our Halloween home decor ideas show how to mix kid crafts with store-bought and thrifted pieces.
Common Toddler Craft Mistakes
Choosing crafts that need a final product. If the goal is a perfect ghost, your toddler will feel like they failed. Aim for participation, and any result becomes a win.
Adding small parts. Googly eyes are the most common offender. They look cute, but they fail the toilet paper tube test. Use paper circles or draw the eyes instead.
Setting out too many supplies. Too many choices lead to chaos. One craft, a few supplies, and a clear plan works better.
Skipping the wipe station. Paint travels fast. A bowl of soapy water and a stack of wipes at the table turns a disaster into a five-second cleanup.
Correcting their work. Resist “no, the eye goes here.” Let them place everything, then fix the look with the display ideas below.
Forcing it. If your toddler wants to watch, let them. Many toddlers join in on the second or third round once they see how it works.
Final Thoughts
The best toddler Halloween crafts are short, simple, and forgiving. Choose one or two from this list, set up before your child sits down, and let them lead. Then take a few minutes to hang the results where everyone can see them.
Pick the crafts that fit your toddler’s age today, hang the results at their eye level, and keep the best prints in a box. Next October you can compare hand sizes.