
30 Winter Craft Ideas for Kids, Adults, Preschoolers & Toddlers
Winter hands you three things for free: dark evenings, closed windows and a house that needs something warm to look at. Winter craft ideas put all three to work.
This guide sorts 30 projects by who is doing the making. You will find simple winter craft ideas for anyone, projects for adults that double as home decor, crafts for kids, projects for preschoolers, and toddler winter craft ideas that skip the small parts. Most ideas come with a rough time, a rough cost, and a note on where a kid, a pet or a glue gun could cause trouble.
Most of the crafts below stay on display well past December 26, so you get decor for the whole season instead of one week.
The best winter craft ideas match the age of the maker and the time you have. For a first project, try Epsom salt jars, coffee filter snowflakes or a sock snowman (10 to 30 minutes, under $10). Adults can make teacup candles, yarn wreaths and embroidery hoop scenes. Preschoolers do best with tearing, stamping and handprints. Toddlers need big, taste-safe, parent-led projects with no small parts.
Why Winter Is the Best Season to Craft
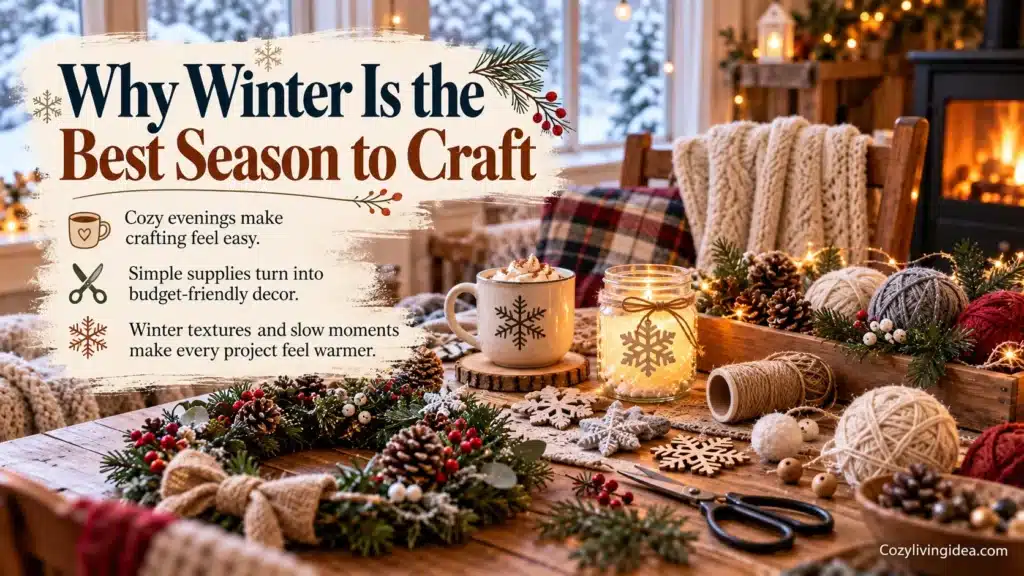
You are already inside. Most of the year, a craft competes with the garden, the beach and the weekend plans. In winter, the table is free and the evening is long, so a project that takes two hours feels like a treat instead of a chore.
Handmade costs less than seasonal décor. Store-bought winter décor is priced like a holiday product. A wreath, a set of snowflakes and a few candles can add up fast. The same pieces made from yarn, felt, pinecones and thrifted jars often cost a few dollars each, and you pick the colors yourself.
Winter decor runs on texture. Snow, wool, wood and candlelight are all about softness and surface. That is why chunky yarn, rough pinecones and matte paint look right in January, even in a plain room. A craft with good texture rarely needs much color to work.
It slows you down. Hands busy with glue and yarn leave less room for scrolling. Many people find that an hour of simple making at the end of a cold day settles the mind better than another episode.
Winter Craft Ideas at a Glance
Not sure where to start? This table compares ten popular projects from the list. Times and costs are rough estimates and will shift with your local prices and what is already in your drawers.
| Craft | Best For | Hands-On Time | Rough Cost | Mess Level |
|---|---|---|---|---|
| Epsom salt frosted jars | Anyone | 15 min + drying | Under $5 | Low |
| Coffee filter snowflakes | Kids, beginners | 20 min | Under $3 | Low |
| Sock snowman | Anyone | 10 min | Under $3 | Low |
| Teacup candle | Adults | 1 hour + 24 hr cure | $10 to $15 | Medium |
| Embroidery hoop snow scene | Adults | 1 to 2 hours | $8 to $12 | Low |
| Sweater pillow | Adults | 1 to 2 hours | $5 to $15 | Low |
| Wax-resist snowflakes | Kids 6 to 12 | 30 min | Under $5 | Medium |
| Handprint polar bear | Preschoolers | 20 min | Under $3 | High |
| Ice cube painting | Toddlers | 15 min | Under $2 | Medium |
| Salt dough handprint | Toddlers, preschoolers | 20 min + baking | Under $2 | Medium |
How to pick in 30 seconds. Ask three questions. Who is making it? How much hands-on time do you really have? And where will it live afterward? A craft you can finish in one sitting beats an ambitious one that sits half-done on the table until March.
If you are crafting with mixed ages, choose one theme and run it at three levels. Everyone makes snowflakes: toddlers sponge-stamp them, preschoolers tear and stick them, older kids build them from cotton swabs, and adults stitch them. The table stays peaceful and nobody feels left out.
A Starter Winter Craft Kit (Dollar Store Friendly)
You do not need a craft store trip for most of this list. A small starter kit covers the majority of projects, and a dollar store or the craft aisle of a big-box store will have almost all of it.
- ✓
Low-temperature hot glue gun and sticks: Safer for beginners than a high-temperature gun, and strong enough for felt, yarn and pinecones.
- ✓
White craft glue: For paper, frosted jars and window clings.
- ✓
Felt sheets in white, cream, gray and navy: Felt does not fray, so cutting mistakes stay invisible.
- ✓
Chunky yarn and plain twine: The backbone of wreaths, garlands and pom-poms.
- ✓
White and warm-gray acrylic paint plus washable paint for kids: Keep the two separate so nobody paints a wall with permanent paint.
- ✓
Battery tealights: LED lights are the safe choice for anything made with glue, paper or salt.
- ✓
Mason jars or thrifted glass jars: Cheap, sturdy and endlessly reusable.
- ✓
Epsom salt: Gives glass a frosted, snowy surface for very little money.
- ✓
Pinecones, twigs and orange slices: Free from the yard, or a few dollars from the store.
- ✓
Cotton balls and cotton swabs: The cheapest snow there is.
Simple Winter Craft Ideas Anyone Can Make
These six projects need 30 minutes or less of hands-on time. They work for any age as long as an adult handles the oven and the glue gun. They are also the best place to begin if you have never made anything seasonal before.

1. Epsom Salt Frosted Jars
A plain glass jar becomes a snowy lantern with three cheap ingredients. Brush white craft glue (thinned with a splash of water) over the outside of a clean jar, then roll or sprinkle it with Epsom salt until it looks like frost on a window. Let it dry for about an hour, drop in a battery tealight, and tie twine around the neck.
The salt catches the light and gives off a soft sparkle at night, so a row of three on a windowsill looks far more expensive than the roughly $5 it costs. Stick with LED lights here, because a real flame next to a glue-and-salt coating is not worth testing. For more glowing ideas, see our Christmas lantern decor ideas.
2. Coffee Filter Snowflakes
Coffee filters are the secret to snowflakes that look delicate instead of crumpled. Flatten a filter, fold it in half three or four times into a small wedge, snip notches and tiny triangles along every edge, then unfold. The thin, slightly ruffled paper gives a lacy edge that printer paper never manages.
Press the finished snowflakes flat under a heavy book overnight, then hang them with painter’s tape or removable putty. A dozen in different sizes cost about $3 and fill a whole window.
3. Sock Snowman
This one has been around for years because it works. Fill a white crew sock with uncooked rice until it looks like a plump snowman, tie off the neck with a rubber band, and add a second band for the waist. Cut the cuff off a bright sock for a hat, tie a fabric strip around the neck for a scarf, and draw the face with a permanent marker.
It takes about 10 minutes and uses things you already own. Use marker or felt for the face instead of buttons if small children will handle it. A sock snowman also makes a surprisingly good draft stopper at the base of a door.
4. Snowy Pinecone Bowl
Pinecones are free craft supplies that look best when you barely touch them. Line a baking tray with foil and bake the cones at a low temperature (around 200°F) for 30 to 45 minutes. This melts the sap and opens the scales, and it clears out any bugs. Stay home while they bake and let them cool completely.
Then dab white paint onto the tips with a sponge brush so they look dusted with snow. Pile them in a wooden bowl or on a tray, and tuck a battery candle in the middle. Total cost is close to nothing.
Paint lightly and let some brown show through. A heavily painted pinecone looks like plastic, while a lightly dusted one looks like it just came in from the woods.
5. Dried Orange Slice Garland
Few crafts give you a better smell for so little effort, and almost all the work is waiting. Slice oranges about a quarter inch thick, blot them with a towel, and bake on parchment at around 200°F for two to three hours, flipping once, until they feel dry and slightly leathery. Let them cool, then thread them onto twine with a large-eye needle, adding a few cinnamon sticks between slices.
Drape the garland across a mantel, a window frame or a bookshelf. Make sure the slices are fully dry before you hang them, or they can turn moldy. Store them in a dry box and they will last for years of winters.
6. Glue Snowflake Window Clings
Squeeze white school glue onto wax paper or a clear plastic sleeve in a snowflake pattern, using thick lines so the shape holds together. Sprinkle on fine glitter if you like, then leave it for a full 24 hours. Once the glue turns clear and firm, peel the snowflake off and press it onto a clean window.
These are ideal for renters because they leave no marks and peel off in seconds. Plan ahead, since the drying time is the only catch, and give thin lines a miss because they tear when you peel.
Winter Craft Ideas for Adults
Adult winter crafts can be a quiet evening hobby, a handmade gift or a way to fill an empty corner of the living room. These eight lean on texture, soft colors and materials you can often find at a thrift store.

7. Chunky Yarn Wreath
A yarn wreath looks like a boutique item and costs about the same as a coffee. Wrap a foam or straw wreath form with thick yarn, starting and ending at the back with a dab of hot glue. Keep the wraps tight and slightly overlapping so no form shows through.
Pick cream, oatmeal or pale gray, and the wreath reads as winter instead of Christmas, so it can stay on the door until the end of February. Add a few wooden beads or a small bow if you want a focal point. Allow about an hour and roughly $8 to $15 depending on the yarn.
8. Embroidery Hoop Snow Scene
If you can sew a straight stitch, you can make a tiny winter landscape. Stretch cream or linen fabric in an eight-inch hoop, then sketch snowy hills and a few pine trees with a pencil or water-soluble pen. Stitch the hills in long white and pale blue lines, and make each tree from a few short green stitches angled like branches. Tiny crosses in the sky make stars.
The hoop is the frame, so there is nothing else to buy. Trim the back fabric, glue it down for a clean finish, and hang it from a nail or lean it on a shelf. It takes one to two hours and suits a first-time stitcher well, because mistakes read as texture.
9. Sweater Pillow Cover
An old wool or thick cotton sweater is the cheapest cozy pillow cover there is, and thrift stores sell them for a few dollars. Choose a sweater whose torso is slightly wider than your pillow insert and has no holes. Cut off the sleeves, sew straight across the neckline, and turn the piece so the seams are inside.
Slide the insert through the bottom hem and close it with a few stitches or hem tape. Because the sweater’s side seams are already done, you only sew one edge. Sweater buttons or a ribbon tie add detail, and the cover comes off for washing when winter ends.
10. Teacup Candle
Thrifted teacups and mugs are made for this project, and each one ends up a little different. Follow these steps and keep an adult in charge of the wax:
Pick a heat-safe cup with no cracks and wash it well.
Stick a pre-waxed wick to the bottom center with a glue dot or wick sticker.
Melt soy wax flakes in a double boiler (never directly on the burner).
Take the wax off the heat, add fragrance if you like, and let it cool slightly. Check the wax label for the recommended pour temperature.
Hold the wick upright with a pencil laid across the cup and pour slowly.
Leave it alone for 24 hours before you trim the wick and light it.
Never leave melting wax unattended. If you share a home with a cat or dog, go easy on scented oils, since many essential oils are harmful to pets. Skipping scent altogether is a perfectly good choice, and the candle still looks lovely.
11. No-Sew Fleece Tie Blanket
This is the easiest large project on the list, and you will not touch a needle. Buy two matching pieces of fleece, about a yard and a half each for a lap-size throw. Stack them with edges lined up, trim them even, and cut a three-inch square out of each corner.
Then cut fringe about an inch wide and four inches deep all the way around. Tie each top strip to the strip beneath it with a double knot. A blanket takes around an hour, costs less than most store throws, and makes a thoughtful gift. Choose a thick fleece, because thin fleece stretches and the knots can pull loose.
12. Mason Jar Snow Globe
A homemade snow globe is part craft, part tiny science experiment, and it rewards patience. Here is the order that works:
Glue a small waterproof figurine (a mini tree, deer or snowman) to the inside of the lid with waterproof adhesive, and let it cure for the full time on the label.
Fill the jar nearly to the top with distilled water, which stays clear longer than tap water.
Add a small spoonful of fine white glitter and a few drops of glycerin so the flakes drift down slowly.
Seal the rim with waterproof glue, screw the lid on tight, and let it cure again before you turn it over.
Use fine glitter only, because chunky glitter sinks like gravel. Paper figures will fall apart in the water. Place the finished globe on a high shelf, since a leak onto wood is the one real risk.
13. Mini Winter Village
A winter village is a slow, calm project you can build one house at a time. Paint small wooden or cardboard houses in white and warm gray, then add lights from the inside with a tiny LED puck or a strand of micro lights threaded through the back. Add a few bottle brush trees, and set it all on a tray covered with a layer of cotton batting or white fabric.
Stick to LED lights only, because a real tealight inside a cardboard house is a fire risk. A village on a mantel or bookshelf looks charming in daylight and glows after dark. If you like the look, our cozy living room décor ideas show how to layer it with other winter pieces.
14. Hand-Painted Winter Puzzle
This gift idea is unusual and thoughtful. Order a blank puzzle kit, assemble it, and paint a winter scene across the whole surface in blues, whites and silvers. An abstract pattern works just as well as a landscape, and it makes the puzzle harder to solve, which is half the fun.
Let the paint dry completely, seal the top with a clear coat such as Mod Podge, and take the puzzle apart again. Pop the pieces in a bag or box and give it to a friend who loves a quiet evening. It is a good rainy-weekend project for one person or a group.
Winter Craft Ideas for Kids (Ages 6 to 12)
Kids this age have the focus and fine motor skills for real projects. They like to see results, so these crafts have a clear, satisfying finish. Craft projects also build cutting, folding and problem-solving skills without feeling like practice.

15. Cotton Swab Snowflake Ornaments
This craft teaches symmetry without ever using the word. Cut cotton swabs into different lengths and glue them in a star pattern onto a circle of painted dark-blue cardboard. Short pieces go at the tips for branches, and dots of glue at the ends become crystals.
Punch a hole at the top and tie on a ribbon, and each child has an ornament no one else will match. An adult should do the cutting for the youngest kids in this age range. Allow about 30 minutes and expect to spend under $3.
16. Wax-Resist Snowflakes
Here is a craft that feels like magic the first time. Draw a snowflake with a white crayon on white paper, pressing hard. The lines are almost invisible. Then brush over the whole sheet with a wash of blue watercolor and watch the snowflake appear, because the wax pushes the paint away.
Do the drawing at the table and the painting in the sink area, because the wash can run. Hang the dry sheets on a string like laundry. This is one of the lowest-cost projects in the guide, and it works for a classroom or a birthday party just as well.
17. Tube Snow Family
Save empty toilet paper tubes through the year and winter gives them a second life. Paint each tube white, let it dry, and add a scarf cut from felt, pipe-cleaner earmuffs and a pom-pom hat. Draw faces with a marker, then stand the whole family on a shelf in different heights.
Recycling like this makes a quiet point about reusing things, and it costs almost nothing. Children can invent a whole story for their snow family, which makes the craft last well past the gluing.
18. Instant Snow Play
Mix baking soda and white hair conditioner and you get cold, powdery fake snow that packs into snowballs. Start with a cup of baking soda in a rimmed baking sheet and stir in conditioner a spoonful at a time until it clumps like wet snow. Small toy animals and little pine twigs turn it into a winter scene.
Keep it out of mouths and eyes, and rinse hands afterward. Conditioner leaves a slippery film, so wipe up spills from hard floors right away. Expect about 15 minutes of setup and a long stretch of focused play.
19. Fork Pom-Pom Penguins
Making pom-poms is a skill kids are proud of, and all they need is a fork. Wrap yarn around the tines until it feels plump (roughly 40 wraps), slide a piece of yarn between the middle tines and tie it tight, then cut the loops and fluff. Do this in black for the body and white for the belly, then glue on a felt beak and eyes.
Make a whole colony in different sizes and line them up on a windowsill. Use felt eyes rather than beads when younger siblings are around.
20. Felt Mitten Lacing Ornaments
This is a great first sewing project because there is no sharp needle. Cut two mitten shapes from felt, punch holes around the edges with a hole punch, and lace them together with yarn that has a taped tip, like a shoelace. Stuff the mitten lightly before you close it, and add a loop of ribbon at the top.
Kids learn a basic stitch and end up with something they can hang on a tree or give to a grandparent. Set aside about 45 minutes and spend under $5 for a few mittens.
Let kids choose the colors and decide when a project is done. A slightly lopsided mitten that a child loves is better décor than a perfect one the adult finished.
Winter Craft Ideas for Preschoolers (Ages 3 to 5)
Preschoolers love a craft with a clear action: tear, stamp, stick, paint. Most give a project roughly ten to twenty minutes, so choose crafts with a quick payoff. Small safety scissors are fine at this age, but tearing paper is even better for building finger strength.

21. Tear-and-Stick Snow Scene
Hand your child a sheet of blue construction paper, a pile of white paper and a glue stick. Tearing the white paper into hills and clouds is half the fun, and it builds the finger strength they will need for writing. Glue the torn pieces down in layers, then add a few cotton balls for snowdrifts.
There are no scissors to manage, and no two scenes look alike. It takes about 15 minutes and costs next to nothing.
22. Paper Plate Winter Hat
A paper plate folded in half becomes a hat with a little help. Let your child paint or color it in stripes, then glue on a cotton ball or a yarn pom-pom at the top. A strip of paper around the edge makes the brim.
The finished hat can hang on the wall or go on a stuffed animal. It uses supplies from the pantry and an afternoon’s worth of imagination, and it is easy enough that you can set it up in under five minutes.
23. Handprint Polar Bear
Press a hand into white washable paint and stamp it on blue paper, fingers pointing down. Once dry, the palm becomes the bear’s body and the thumb and fingers its legs. Add black dots for eyes and a nose, and a scarf from a scrap of felt.
This one is messy, so cover the table first and have wipes ready. It is also the kind of keepsake that gets tucked into a memory box, so write the date and age on the back.
24. Ice Suncatchers
Pour an inch of water into a pie tin or a shallow plastic container. Let your preschooler drop in pinecone scales, cranberries or a few evergreen sprigs, then lay a loop of twine over the edge so the ends dip into the water. Freeze it overnight, pop it out, and hang it from a branch or a porch hook.
The light through the ice is lovely, and kids enjoy watching it melt slowly. This is a cold-weather craft, so it works best outside in freezing temperatures or in a freezer. Remind your child that the berries and sprigs are for looking, not eating.
25. Bubble Wrap Tree Prints
Bubble wrap makes a perfect stamp for snowy trees. Draw a trunk and triangle shape on paper, then wrap a piece of bubble wrap around a block or an empty jar. Dab on green paint and press it over the triangle to make a textured evergreen. Use white paint for the snow.
The bubbles leave a pattern that looks like needles, and the pressing and patting motion is satisfying. Put down newspaper first, and expect about 20 minutes of paint and a fair amount of laughing.
Toddler Winter Craft Ideas (Ages 1 to 3)
Toddler crafts are about the experience more than the result. Choose big, simple, taste-safe materials, stay within arm’s reach, and expect the project to end when your child decides it is over.

Small parts are the main safety concern at this age.
The U.S. Consumer Product Safety Commission defines a small part using a test cylinder that approximates the throat of a child under three. A common rule of thumb at home is that anything that fits through a toilet paper tube is a choking risk for a toddler. That rules out buttons, beads, googly eyes and loose glitter. If you enjoy simple handprint projects, our toddler Halloween crafts offer more ideas that follow the same safe, big-piece approach.
26. Contact Paper Snow Scene
This craft involves no glue and almost no mess. Tape a sheet of clear contact paper to a window or a tabletop with the sticky side facing out. Give your toddler big pieces of torn white tissue paper, large felt shapes and cotton fluff, and let them press everything down however they like.
Everything sticks without any gluing, and the finished piece catches the daylight as a window sun-catcher. Skip small pieces and sequins, and keep the pieces larger than a toddler’s fist. The whole thing takes about 15 minutes.
27. Sponge-Stamp Snowflakes
Cut a kitchen sponge into a few large shapes, such as a square, a circle and a long rectangle. Pour a little washable white paint into a shallow dish and let your toddler dab the sponge on dark blue paper. The prints look like snow, and the repeated dabbing is great practice for hand control.
Use paint labeled washable and non-toxic, and tape the paper to the table so it does not slide. Fifteen minutes is a good session length for this age.
28. Cloud Dough Snow
For a taste-safe sensory bin, mix about eight parts flour to one part vegetable oil in a large tray. The mixture feels like soft, packable snow and holds its shape when pressed. Add a few big plastic animals (larger than a toddler’s fist) and a wooden spoon for scooping.
It is messy in a calm way, so put the tray on a washable sheet or a shower curtain. Supervise closely, since flour dough can get everywhere. Cleanup takes about five minutes with a damp cloth.
29. Salt Dough Handprint Keepsake
Salt dough is a classic winter keepsake and a lovely thing to make once with a very young child. Mix two parts flour to one part salt with enough water to form a smooth dough, roll it out, and press in a small hand. Bake at a low temperature (around 200°F) for several hours, until it is completely hard, flipping halfway.
Handle the baking yourself and let your toddler help with rolling and pressing. Paint and seal it later. One important warning: salt dough is dangerous to dogs and cats if eaten, so keep it out of reach all year, even when it has been stored for years. The Pet Poison Helpline explains the risk in more detail.
30. Ice Cube Painting
Freeze washable paint mixed with a little water in an ice cube tray, with a craft stick pushed into each cube for a handle. Once frozen, hand a few to your toddler and let them slide the cubes across a sheet of paper. The cold feels new and the colors streak as the ice melts.
Work on a tray or a plastic tablecloth, since melting paint finds the edges. Use only one or two colors at a time, or the paper turns muddy. Stay beside your child the whole time and enjoy the quiet.
How to Display Winter Crafts Without Making Holes
Making the craft is half the project. Showing it off well is the other half, and renters can do it without a single nail.
- ✓
Use removable putty or painter’s tape or paper snowflakes and window clings. Both come off clean in seconds.
- ✓
Stretch a tension rod across a window and hang a garland or a string of snowflakes from it.
- ✓
Choose removable adhesive hooks for wreaths and lightweight hoops, and follow the weight limit on the package.
- ✓
Group by threes and fives. Odd numbers look natural. Vary the heights, mixing a tall jar with a low bowl and a mid-height candle.
- ✓
Stick to one color story. Cream, white and gray with one accent color looks calm, while ten colors looks cluttered.
Think about when each craft belongs, too. Snowflakes, pinecones, candles, wreaths and yarn pieces suit all of winter and can stay up through February. Santa, stockings and obvious Christmas pieces pack away on December 26. Keeping the two groups separate helps your home feel fresh after the holidays. For more ideas, see our Christmas decor ideas for every room and our small apartment Christmas decor tips.
Store each craft in its own labeled box with a sheet of tissue paper. Crafts you made together last longer when they are not crushed in a closet, and pets cannot reach them.
Plan a Winter Craft Night in One Weekend
A craft night works best when the preparation is done before anyone sits down. Here is a simple weekend plan for a family or a small group of friends.
Friday evening (30 minutes): Bake the pinecones, slice and dry the oranges, and set out the starter kit. Freeze the ice suncatchers and the paint cubes overnight.
Saturday morning (45 minutes): Run the toddler and preschool crafts while energy is high: sponge stamps, tear-and-stick scenes and handprint polar bears. Save the handprint for when you have wipes nearby.
Saturday afternoon (90 minutes): Move on to the kid and adult projects. Older kids can make pom-pom penguins while adults start the embroidery hoop or the wreath. Put on music and bring snacks.
Sunday (30 minutes): Display everything, and wrap a few pieces as gifts. Take a photo of each person with what they made.
Mistakes That Ruin Winter Crafts
Picking a project that is too hard. The fastest way to lose interest is a craft above the maker’s skill level. Start with something you can finish in one session, and treat the bigger projects as a reward for later.
Using too many colors. Winter décor looks best with a limited palette and plenty of texture. If a piece feels busy, remove a color before you add anything.
Rushing the drying time. Glue, paint and salt dough all need their full time. Peeling a window cling early or moving a candle while it sets ruins the result. Work on something else while you wait.
Forgetting about pets. Salt dough, scented oils and tinsel can all harm cats and dogs. Keep finished crafts out of reach and choose pet-friendly options when in doubt.
Mixing flame and craft materials. Paper houses, dried orange garlands and glue-coated jars should stay with LED lights. Real candles belong in glass or ceramic, away from anything that can burn.
Final Thoughts
The best winter craft ideas are the ones you actually finish. Pick one project from this list, gather what you need, and give it an hour on a cold evening. A jar of frosted salt, a yarn wreath or a toddler’s first painted ice cube all end the same way: with something handmade to look at all season.
Start small, keep the safety notes in mind, and add a new craft each weekend. By February, your home will look warm, personal and entirely yours.
Frequently Asked Questions (F.A.Q)
Epsom salt frosted jars, coffee filter snowflakes and sock snowmen are the easiest. They take 30 minutes or less, use cheap supplies and are very hard to get wrong. Glue snowflake window clings are another good first project.
Pom-pom penguins, snowflakes, pinecone bowls and the mason jar snow globe all work for mixed ages. Pick one theme and give each person a version that matches their skill, so no one feels left out.
Choose big, taste-safe materials with no small parts: contact paper scenes, sponge stamping, cloud dough and ice cube painting. Stay within arm’s reach and skip buttons, beads and loose glitter.
Most preschoolers give a project roughly ten to twenty minutes. Pick crafts with a fast payoff and be ready to stop when interest fades. Setting out materials ahead of time helps you start quickly.
Start with what you already have: pinecones, socks, jars, old sweaters and cardboard tubes. Thrift stores and dollar stores cover most of the rest, and many of the projects here cost under $5.
Yes. Wreaths, teacup candles, fleece blankets and sweater pillows make thoughtful gifts. If you plan to sell candles, check your state’s rules on labeling and liability first.