
16 Pantry Organization Ideas for a Neat, Functional Kitchen
Disclosure: This post contains affiliate links. We may earn a small commission from qualifying purchases at no extra cost to you.
You open the pantry for one can of tomatoes. Behind the cereal sits half a bag of pasta, and behind that, a second bag of the same pasta you bought last week. In the back, a forgotten jar is quietly passing its date.
Good pantry organization is not matching jars and color-coordinated bins. It is a space where everyday ingredients are easy to reach, everything has a home, and you can see at a glance what is running low.
This guide to kitchen pantry organization gives you 16 ideas, four layouts (small cupboard, walk-in, reach-in, deep cabinet), a step-by-step reset, budget tips, and a routine that survives grocery day. For broader kitchen improvements involving cabinetry, materials, lighting, and layout, explore our modern kitchen design ideas
Group food by how you cook, not alphabetically. Keep everyday items between eye level and hip height, give backup groceries their own shelf, and buy an organizer only when it fixes a specific problem, like a pull-out bin for a deep shelf. Measure before you buy.
Pantry Organization Ideas That Make Everyday Cooking Easier
Each idea below is a different arrangement, not the same basket in a new spot. Use what fits your cooking and skip the rest.
Give Every Pantry Shelf a Clear Purpose
1. Divide Your Pantry Into Practical Food Storage Zones
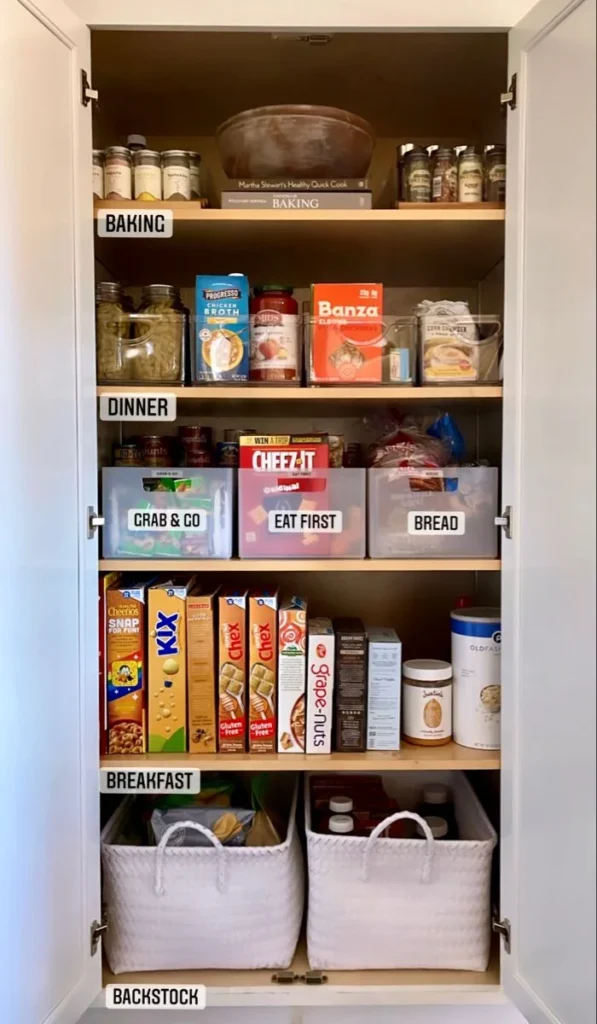
Groceries placed wherever there is a gap mean you hunt every time. Zones give each category a fixed address, based on what you do in the kitchen:
- ✓
Cooking essentials: pasta, rice, lentils, canned tomatoes, broth, oils
- ✓
Breakfast: cereal, oats, pancake mix, syrup, tea, coffee
- ✓
Baking: flour, sugar, cocoa, baking powder
- ✓
Snacks: crackers, bars, popcorn, dried fruit
- ✓
Canned goods: beans, vegetables, tuna, soup
Think of these as broad storage zones rather than rigid categories. Keep ingredients used together in nearby areas, but allow dedicated sections for regularly used items such as baking supplies and snacks. The goal is to find groceries quickly without dividing a small pantry into too many separate compartments.
Skip any zone you will not use. A household that never bakes does not need a baking shelf.
2. Arrange Ingredients According to How Often You Use Them
Shelves between shoulder and hip height are your best space, because you can see and grab without bending or stretching.
- ✓
Eye level to hip height: oils, pasta, rice, cereal, everyday snacks
- ✓
Top shelves: light, occasional items like holiday baking supplies and party napkins
- ✓
Floor and bottom shelves: heavy items like bulk flour, canned goods by the case, and large bags of rice
Heavy items stay low because lifting a 10-pound bag of flour overhead invites an accident. In a shared pantry, a frequency-based layout also means a teenager and a grandparent can both find the oatmeal without asking.
3. Separate Everyday Groceries From Extra Supplies
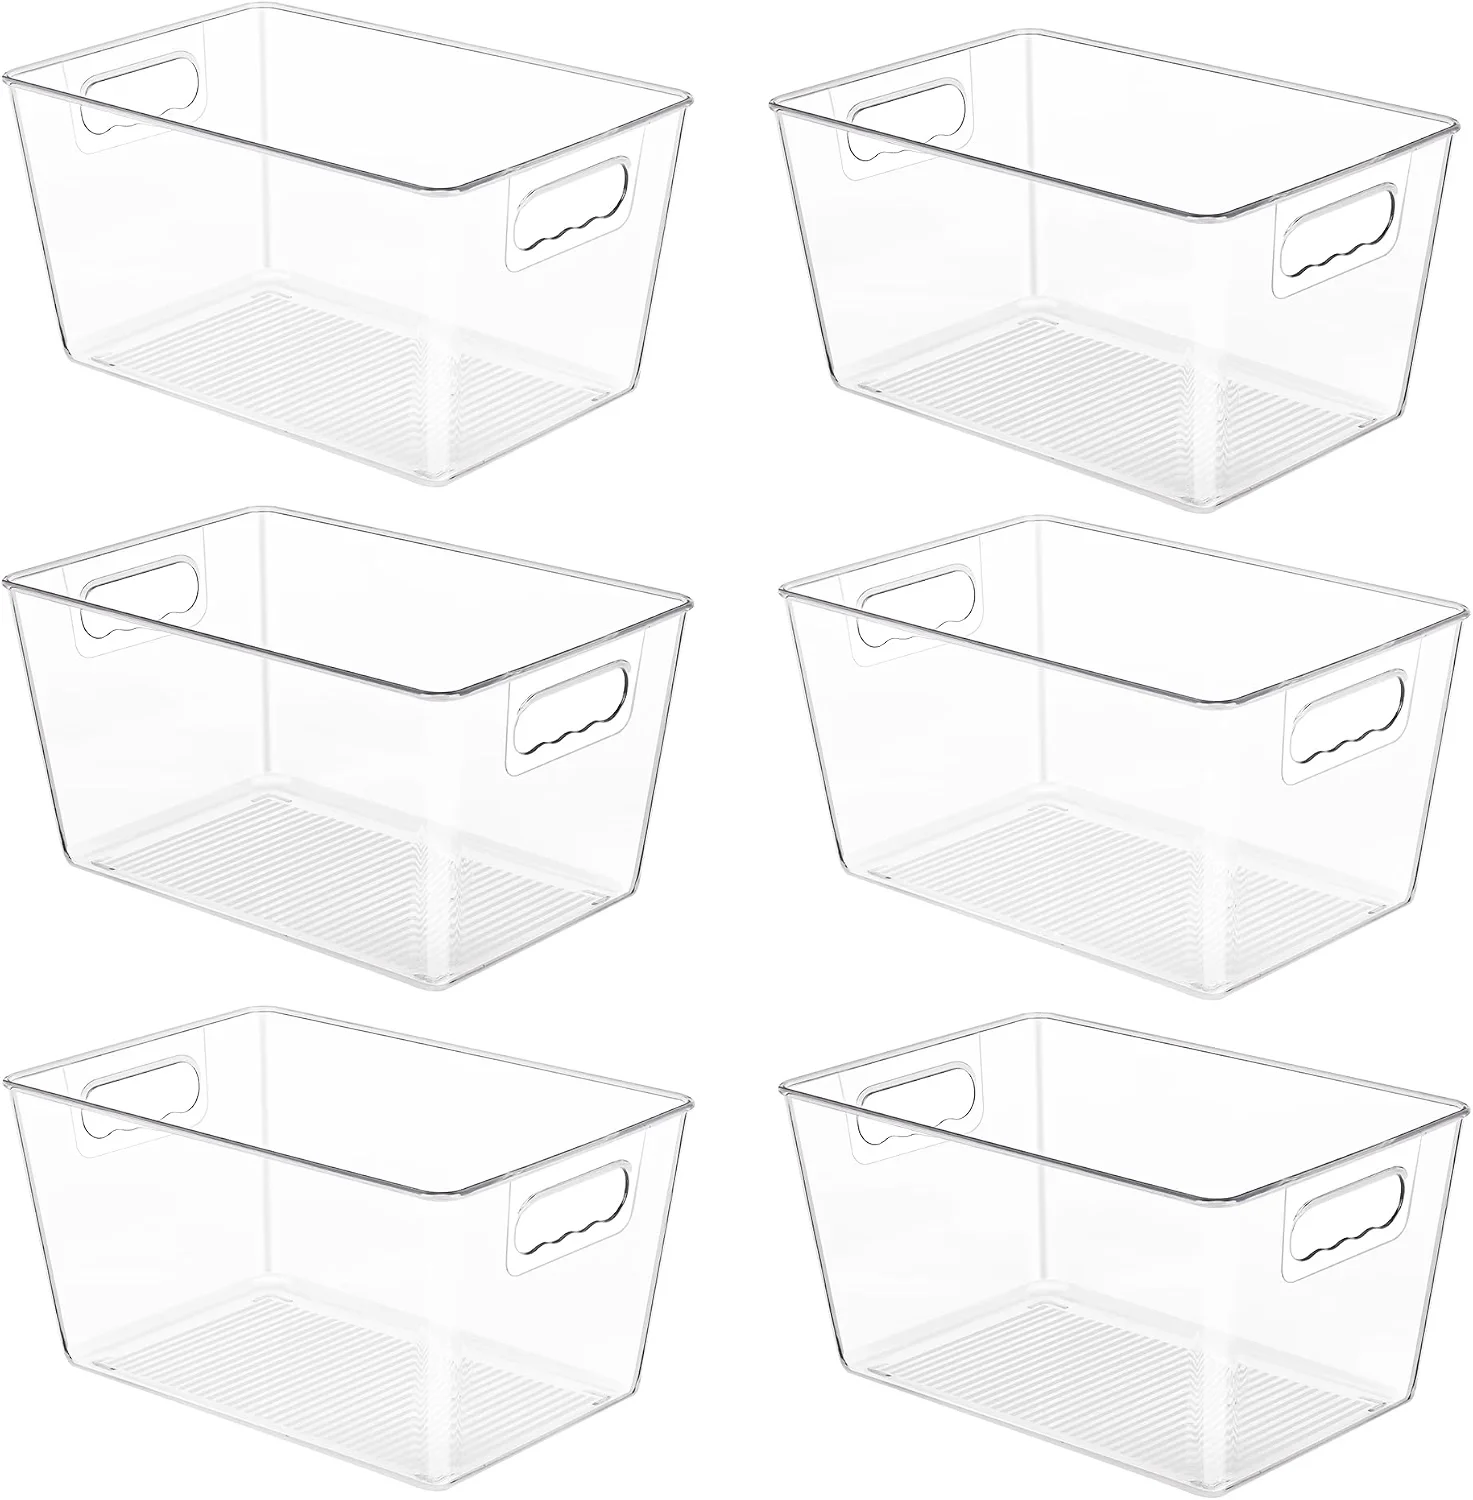
Pantry Storage Containers for Kitchen, Freezer, Cabinet, Closet, Bathroom, Under Sink Organization
Say you buy two bags of rice on sale and shelve them together. The open bag runs out, but the unopened one hides the problem, so you never add rice to the list until the day you need it and it is gone.
Give unopened backup groceries their own shelf or labeled bin. Keep one package in use in the main food zone and place sealed extras together in backstock. Set a reasonable backup limit for frequently used staples according to your household’s consumption and available space. This prevents unopened packages from getting mixed up with ingredients already in use.
4. Create a Small Baking Station Inside the Pantry
Baking pulls from more shelves than any other cooking: flour near the floor, chocolate chips by the snacks, sprinkles somewhere. A station puts it all in one place, so one trip fills the counter.
- ✓
Flour, sugar, brown sugar
- ✓
Baking powder, baking soda, cocoa
- ✓
Chocolate chips, vanilla, sprinkles
- ✓
Measuring cups and spoons, parchment
A dedicated shelf works if you have room. A handled caddy works better in a small pantry, since it lifts out whole and goes back after you bake. To avoid overcrowding, keep only what you use in a typical month at the front and move once-a-year decorating supplies to a high shelf.
5. Organize Spices and Seasonings Where You Can Easily Find Them
Spice jars are small, similar, and easy to lose behind each other. Pick the arrangement that fits your space:
- ✓
Tiered shelf: shows every label in a row. Measure the height so the back row clears the shelf above.
- ✓
Drawer insert: angles jars so you read lids from above. Hard to beat in a shallow drawer near the stove.
- ✓
Narrow rack: uses a door or slim wall gap that would otherwise sit empty.
For order, sorting by frequency (salt, pepper, garlic powder up front) suits most people. Alphabetical works for large collections, and grouping by cuisine suits cooks who repeat the same dishes. Label the lids or front edge, and store spices away from the stove, dishwasher vent, and sunny windows, since heat, moisture, and light dull flavor.
Find More Storage in the Space You Already Have
6. Make Deep Pantry Shelves Easier to Use With Pull-Out Bins
On a deep shelf, anything behind the front row is forgotten. A pull-out bin brings a whole category forward like a drawer. Measure four things before buying:
- ✓
Width of the opening, plus about half an inch each side for sliding
- ✓
Depth from the front edge to the back wall
- ✓
Height between shelves, including the bin’s lip
- ✓
Clearance so the door still closes
Use one bin per category: baking supplies in one, packaged snacks in another, pasta and grains in a third.
7. Use Tiered Shelf Risers to Keep Cans and Jars Visible
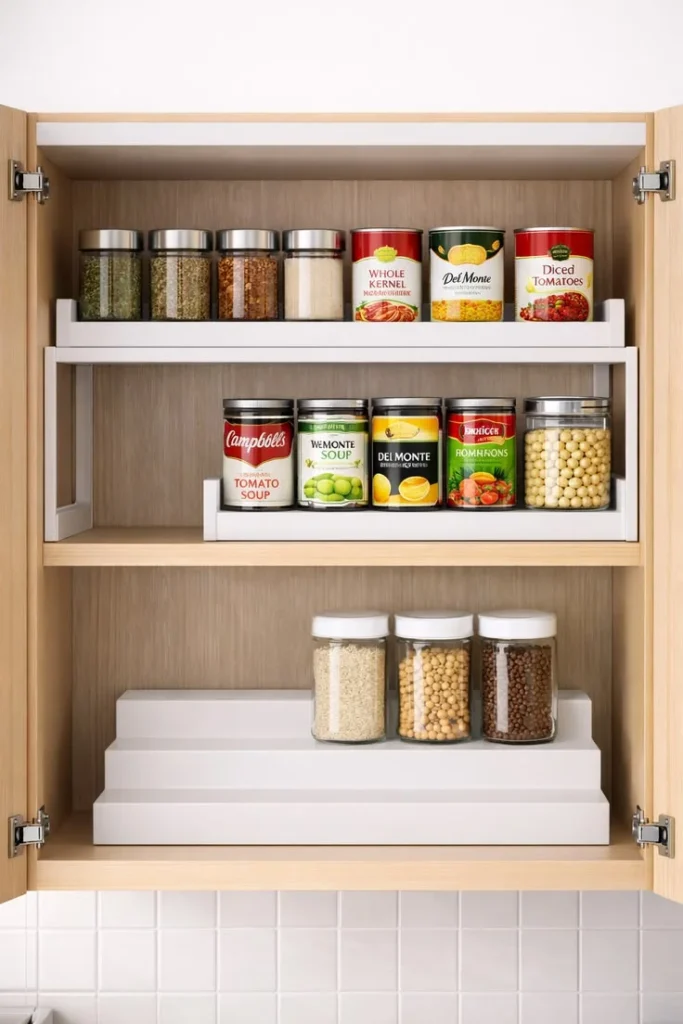
Stepped risers lift each row above the one in front so every label shows. They suit cans, sauces, small jars, and spice bottles. Two details decide whether a riser helps: the top step must leave room for your tallest item, and the width should match the shelf. A riser that leaves a four-inch gap on one side wastes that gap, so look for expandable ones.
8. Use a Rotating Tray to Organize Awkward Corners

Non-Slip Lip, Turns Easily, Deep Ledge, Deep Ledge Contains Items, Ideal for Cabinet and Fridge Organizing
A Lazy Susan turns a dead corner into usable space. You spin the tray instead of reaching into the dark and knocking over a bottle. It works for oils, vinegars, sauces, honey, and spreads.
Give each tray one job. A turntable holding a half-open chip bag, a battery, and mustard is just a mess that spins. A tray with a raised lip also keeps sticky bottles from sliding off.
9. Store Baking Trays and Cutting Boards Vertically

Stacked flat, the sheet pan you want is always at the bottom. Standing trays, cutting boards, cooling racks, and platters on edge in dividers gives each its own slot, so you slide one out without disturbing the rest. Vertical storage also saves shelf space in a small cabinet. Tension rods or wire file sorters do the same job cheaply.
For more ways to improve storage throughout your kitchen, explore these contemporary kitchen storage ideas, including deep drawers, pull-out storage, and vertical dividers.
10. Use the Inside of the Pantry Door for Lightweight Storage
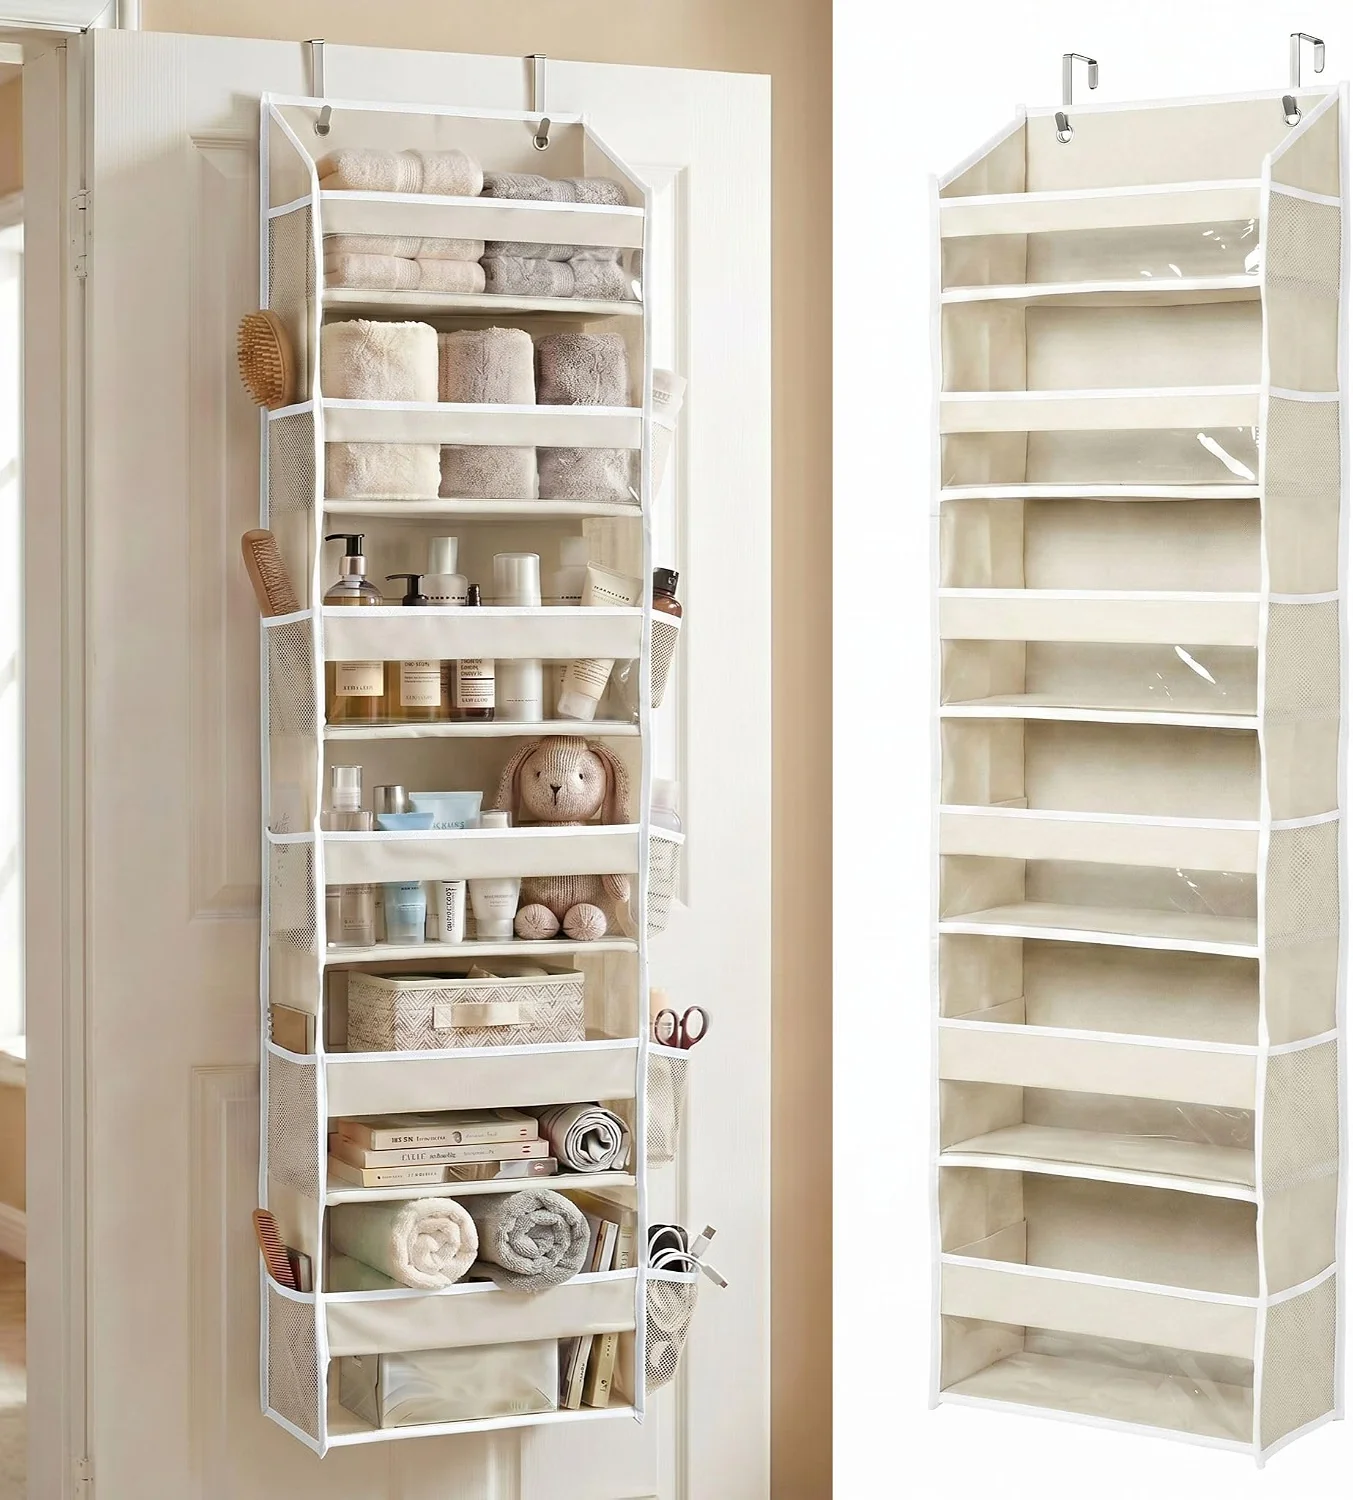
Over the door shoe organizer, 50 lbs capacity, 12 side mesh pockets, 100D extra thick fabric, Closet & entryway storage
The back of the door holds seasoning packets, foil, parchment, wraps, and small bottles in narrow racks or hanging pockets. Check two limits first: racks must not hit the shelves when the door closes, and the door, hinges, and hooks have weight limits. Keep heavy jars and cans on the shelves.
11. Adjust Shelf Heights to Accommodate Different Grocery Packages

Evenly spaced shelves waste space because groceries come in different heights. A shelf of short jars with eight inches of empty air above them is a good example. Lower the shelf and add another above it. If the shelf is fixed, an insert or riser doubles the surface. Measure the tallest item on each shelf and set the next shelf just above it.
Pro Tip: Move shelves only after you have loaded the pantry. Sort first, then fit the shelves to what you actually own.
Organize Smaller Items and Keep Track of Your Groceries
12. Keep Small Packets and Loose Ingredients in Clearly Defined Bins

4 Pack Pantry Organizers and Storage, Clear Storage Bins with 3 Removable Divider for Kitchen, Fridge, Cabinet Organization and Storage, Plastic Containers for Snacks, Packets, Spice Packets, Pouches
Seasoning packets, granola bars, drink mixes, and cake decorations slide to the bottom and wander off. One shallow, handled bin per category keeps each group together and lets you pull it out whole. Choose open or see-through bins, and keep them no deeper than the products. A deep bin of flat packets forces you to dig.
13. Create a Dedicated Grab-and-Go Snack Shelf
One snack shelf at a height everyone can reach keeps crackers, bars, dried fruit, and popcorn in one spot. It speeds up lunchbox packing and lets kids snack without asking. If someone in the house has a food allergy, store that allergen on a separate, labeled shelf, and keep anything unsuitable for young children out of reach.
14. Use a Separate Basket for Groceries That Need to Be Used First
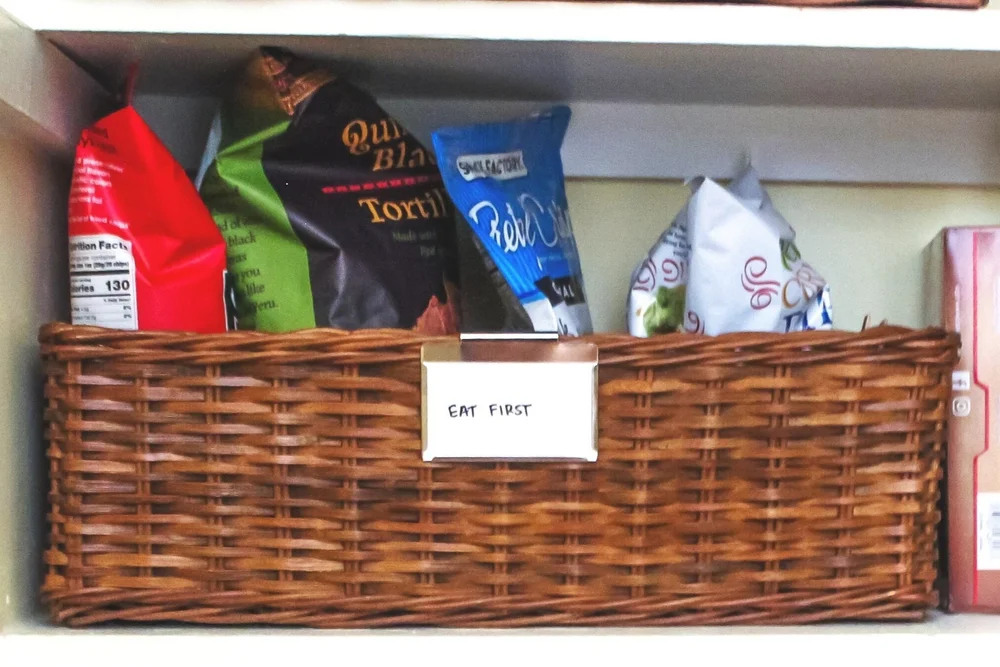
Keep opened packages, ingredients planned for upcoming meals, and suitable products that need to be used soon in a visible basket labeled “Use First.” Move older suitable stock toward the front when adding new purchases. Follow the package’s storage instructions, particularly for opened products that need refrigeration.
Pair it with first-in, first-out rotation: older products in front, new ones behind. Check the date and storage instructions, since some foods go in the fridge once opened.
15. Add a Simple Pantry Inventory and Restocking System
Pick the format that suits your household:
- ✓
Whiteboard or magnetic pad on the door: best if you pass the pantry daily
- ✓
Printed staples checklist: best if you tick things off before a store run
- ✓
Shared phone list: best if several people shop and anyone can add items
Set a minimum stock level for frequently used ingredients. For example, when you start using the last unopened backup of pasta or rice, add that item to the shared shopping list. Check existing quantities before purchasing more so you don’t replenish something that is already available.
16. Improve Visibility With Lighting in Dark Pantry Areas
If you cannot see the back of a shelf, you will not use it. Battery or rechargeable LED strips, motion-activated lights, or puck lights need no wiring. Aim them down at the shelf below without blocking storage, and keep them away from heat-sensitive foods.
Pantry Organization Ideas for Different Pantry Layouts
The same principles apply everywhere. Here is how they look in four common spaces.
Organizing a Small Pantry Cupboard
With only three or four shelves, prioritize everyday groceries over bulk storage. Keep frequently used cooking ingredients and breakfast supplies on the easiest-to-reach shelf, place snacks and smaller packets in shallow bins, and reserve the bottom shelf for heavier groceries. Use the cupboard door for lightweight accessories only when it closes without hitting the shelves. Store excess bulk purchases elsewhere rather than overcrowding the cupboard.
Making a Walk-In Pantry More Functional
In a walk-in pantry, organize shelves by food category and frequency of use. Keep everyday ingredients and frequently accessed supplies close to the entrance, place heavier bulk groceries on lower shelves, and reserve upper shelves for lightweight or occasional products. Use deeper shelves for suitable pull-out bins, but leave the main walking area clear enough to access shelves without moving other groceries.
Creating an Organized Reach-In Pantry
A reach-in pantry works best when its contents remain visible from the doorway. Arrange frequently used groceries in a single accessible row wherever possible, use shelf risers for suitable cans and jars, and group smaller packets in shallow labeled bins. Put heavier products on lower shelves and avoid stacking packages so deeply that items disappear behind one another.
Making Deep or Awkward Pantry Cabinets Work Better
Deep pantry cabinets need storage that brings groceries within reach. Use pull-out bins for packaged ingredients, a rotating tray for suitable awkward corners, and adjustable shelves to accommodate different package heights. Keep frequently used ingredients toward the front and reserve harder-to-reach areas for lightweight products you use less often. Measure the usable cabinet space before purchasing any sliding or rotating organizer.
When reorganizing existing cabinets isn’t enough, explore these small-kitchen remodeling and storage ideas for ways to improve cabinetry and create additional pantry space.
How to Organize Your Pantry From Scratch
This is the order for a full reset, and the answer to how to organize a pantry without buying a container too early.
Step 1: Empty the Pantry and Check Everything
Take everything out. Check dates, and set aside anything expired, damaged, or unwanted. Move items that belong in the fridge or elsewhere out of the pile. A food bank may take unopened, in-date food you will not eat.
Step 2: Clean and Measure the Available Space
Wipe the shelves and let them dry completely before food goes back. Measure each shelf’s width, height, and depth, plus door and drawer clearances. Write the numbers down for shopping.
Step 3: Decide Which Storage Zones You Actually Need
Look at the piles on your counter. The big ones show your real cooking habits. Create zones only for those, since a family of five and a single person need very different maps.
Step 4: Choose Organizers That Solve Specific Problems
Shop only now, and only for problems you can name: a deep shelf needs a pull-out bin, a crowded can shelf needs a riser. If you cannot say what an organizer fixes, skip it.
Step 5: Arrange Groceries by Accessibility and Storage Needs
Put frequent items within easy reach and heavy items low. Check each product’s storage instructions, since some foods need a cool spot or the fridge once opened.
Step 6: Label, Rotate, and Establish a Restocking Routine
Label shelves or bins so everyone knows where things go back. Keep important product information intact (see the food storage section). Put older groceries in front, and set up a way to track what is running low.
Pantry Organization on a Budget: Create a Better System Without Overspending


You do not need a full set of matching containers. Most pantry problems are fixed by rearranging what you own, and pantry organization on a budget starts with that. For more low-cost projects, see our creative DIY home decor ideas for every budget.
Make the Most of Your Existing Shelves and Containers
Rearrange first: group like items, set up zones, and move things to the right heights. Then reuse what is clean and safe, like sturdy baskets, shoe boxes for packets, and glass jars from pasta sauce or pickles, washed and fully dried. Do not reuse containers that held non-food products.
Invest in Organizers That Solve Real Problems
After a week with the new arrangement, you will see what still annoys you. Buy a riser, pull-out basket, rotating tray, or divider for that problem first. Dollar stores and discount retailers sell simple versions of all of them.
Refresh the Appearance With Simple, Coordinated Details
A few clear containers for suitable dry goods, consistent labels, and baskets in related colors make a neat result. Leave some items in their original packaging. A mix of textures looks better than a wall of identical jars.
Avoid Buying Organizers Just Because They Look Beautiful
Every container takes shelf space, so each one needs a job. An organizer that does not fit your shelf or your food reduces usable space and makes the pantry harder to maintain.
Pantry Food Storage Practices That Help Keep Groceries in Good Condition
A pantry should look good and store food properly.
Choose food-safe containers for suitable dry goods. Clean, completely dry, sealed pantry organization containers work well for flour, sugar, rice, lentils, cereal, and pasta, depending on the product. Seals also help keep out pests and moisture. Check each product’s storage instructions first.
Do not automatically remove food from its original packaging. The package carries ingredients, allergen warnings, cooking instructions, batch codes, and dates. If you decant, keep that information by taping the cut-out label inside the lid or writing the date and key details on the container. Some products are better left in their box.
Protect Food From Heat, Moisture, and Sunlight. Store pantry products in a clean, dry, relatively cool place, away from direct sunlight and heat-producing appliances. Follow the storage instructions on each package, particularly for products that require refrigeration after opening.
Keep household supplies separate. Pet food, cleaning products, and other non-food items should not share shelves with human food.
Check Products Regularly. Every few weeks, inspect packages for moisture, damaged seals, pest activity, and signs of spoilage. Review product dates according to their labeling and storage instructions. For most packaged foods in the United States, printed quality dates are not automatic food-safety expiration dates; infant formula is an important exception. Discard food that is spoiled, contaminated, or in unsafe packaging.
Skip universal storage-life claims. Foods differ, and an opened package behaves differently from a sealed one. When unsure, follow the label or the USDA FoodKeeper app.
How to Keep Your Pantry Organized After Every Grocery Trip
Put new purchases in their zones right away. Bags left on the nearest shelf are how pantries slide back into chaos.
Check what you have before you buy. A quick look at the pantry or your list stops the fourth jar of the same sauce.
Move older groceries forward. Slide the older package to the front and put the new one behind it.
Restock staples at a practical minimum. Decide a level for each staple, such as one backup bag of rice, and add it to the list when you drop below it.
Review the pantry every month or two. Remove expired food, things nobody eats, and anything that wandered in from other rooms.
Keep the system simple enough to maintain on your busiest week. If it takes too much effort, simplify it.
Conclusion
A well-organized pantry makes cooking, grocery shopping, and meal prep easier, and the pantry organization ideas above all start from how you actually cook. You do not need expensive accessories or a set of matching jars. A sensible layout, sound food storage habits, and a few well-chosen organizers are enough. The best pantry is the one where ingredients are easy to find, space is used well, and the system is simple enough to keep up.
Frequently Asked Questions (FAQ)
Empty it, check dates, and clean the shelves. Then group food into zones based on how you cook, put everyday items within easy reach, store heavy items low, and give backup supplies their own shelf. Add organizers only where they fix a specific problem.
Use height with risers and adjustable shelves, add storage on the back of the door, and choose a few organizers that fit exactly. Keep only a few weeks of groceries inside and store bulk extras elsewhere.
Dry goods like flour, sugar, rice, lentils, pasta, and cereal often do well in clean, dry, sealed containers, especially where pests or humidity are a concern. Follow each product’s storage instructions and keep its dates and allergen information with it.
Rearrange food into zones first, then reuse sturdy baskets, shoe boxes, and clean food-safe jars. Buy inexpensive organizers only for problems that remain after a week or so.
Shelve every item in its zone as you unpack, rotate older products forward, and keep a running list of what is low. A short check every month or two catches drift.
Put light, rarely used items on top, like holiday baking supplies and party goods. Put heavy items on the lowest shelves, like bulk flour, canned goods by the case, and large bags of rice.