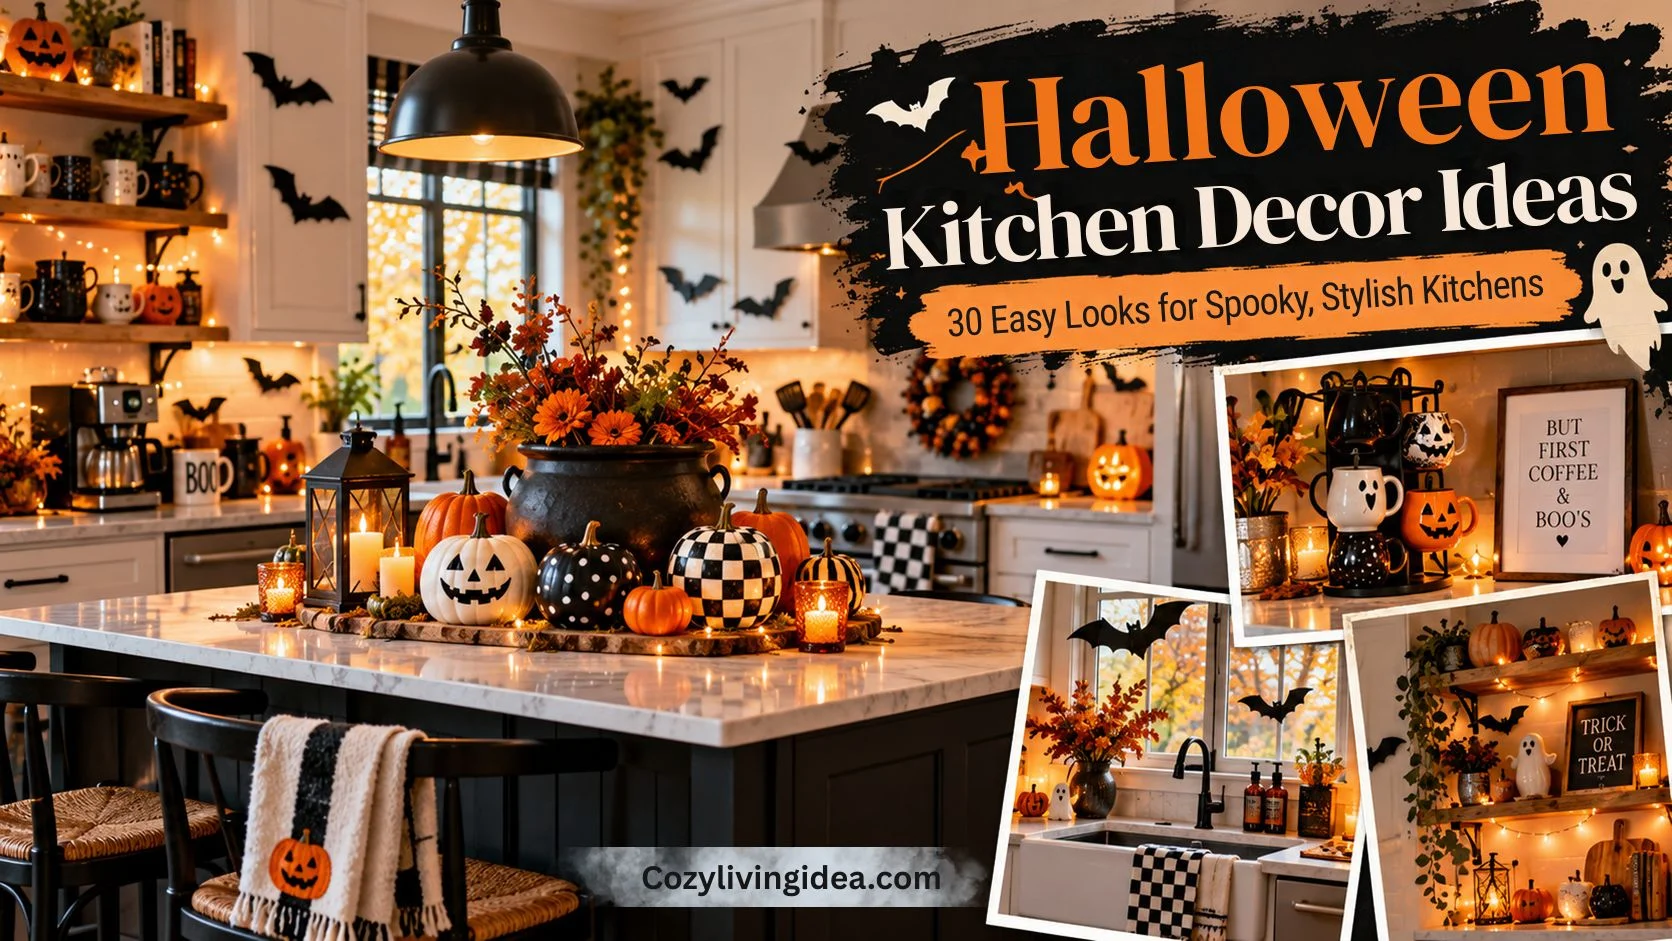
30 Halloween Kitchen Decor Ideas: Spooky, Elegant, Vintage and DIY Looks That Still Let You Cook
The kitchen has a problem the living room never has: somebody has to cook in it. Cobwebs drift toward a burner, a cauldron takes the only clear counter, and glitter ends up in the salad. Most roundups skip all of that and just show a pretty photo.
These Halloween kitchen decor ideas start from the other direction. Each one is sorted by style (spooky, scary, elegant, vintage, Disney-inspired or DIY), and each comes with the reason it works, a rough cost and a warning about where it should never go. Most take under ten minutes to put up, and most peel or lift off on November 1, so they suit renters.
To decorate a kitchen for Halloween, keep your cooking zone nearly clear and put the decor in two other places: one “hero” display on the island or table, and lightweight pieces on walls, windows, cabinets and above the cabinets. Pick one style, repeat two colors, and add one small swap or two (towels, mugs, jars). That mix looks planned instead of crowded, and it leaves you room to chop an onion.
Planning to decorate the rest of the house too? Our Halloween home decor ideas cover the living room, entryway and bedrooms, so the kitchen doesn’t end up looking like it belongs to a different house.
How to Decorate Your Kitchen for Halloween (Without Losing Your Workspace)
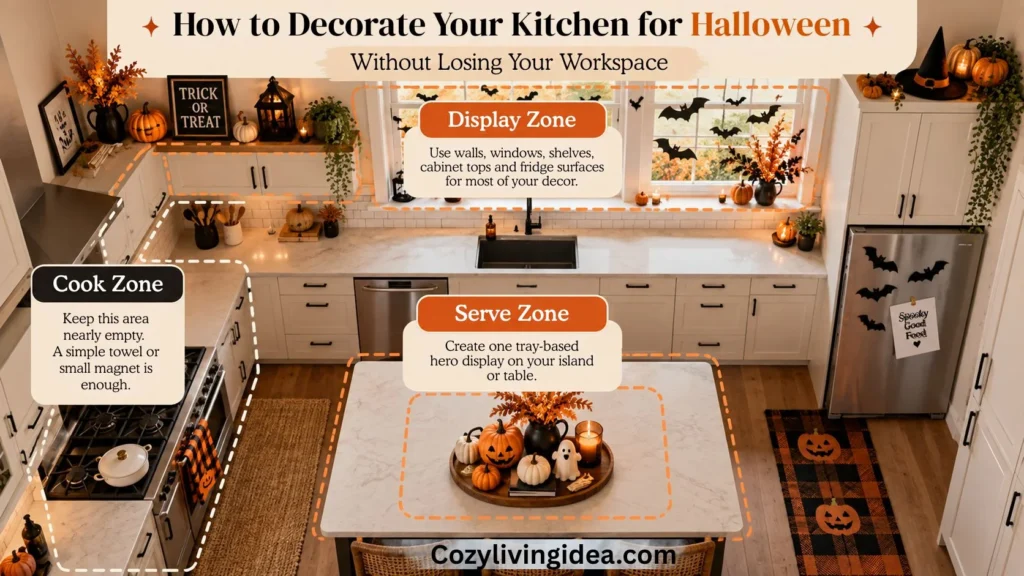
Before you buy a single bat, sort the kitchen into three zones. This one habit prevents most of the clutter you see in over-decorated kitchens.
- ✓
The cook zone (stove, main prep counter, sink): Keep this nearly empty. You need the space, and steam and grease ruin decor fast. Towels, a floor mat and fridge magnets are enough here.
- ✓
The serve zone (island, dining table, coffee bar): Put one hero display here, and put it on a tray. A tray gives the display a clear edge, so it looks arranged, and you can lift the whole thing in one move when you need the counter.
- ✓
The display zone (windows, walls, cabinet tops, shelves, fridge): This is where most of your decor should live. Nothing here costs you work surface.
2 more rules make the whole kitchen look intentional:
- ✓
Repeat 2 colors, not 5. Black and orange is the classic pair. Black and gold looks polished. Gray and plum looks moody. Whatever you pick, use it on the tray, the towels and the wall pieces so the room reads as one idea.
- ✓
One hero per zone. If 3 things compete for attention on the same counter, the eye has nowhere to land, and the whole corner looks messy.
Group small objects in threes and vary the heights. One tall candlestick, one medium pumpkin and one short jar will always look better than three items of the same size in a row.
Kitchen Safety Rules Worth Following
Most decorating guides leave these out. A kitchen has heat, grease and food, so a few rules matter more here than in any other room:
- ✓
Keep webbing, paper and fabric away from burners, toasters and open flames. Stretchy fake webbing and paper both catch fire quickly.
- ✓
Use flameless LED candles near anything dry. Dried leaves, paper bats and cheesecloth do not mix with a real flame.
- ✓
Put dry ice in its own container, never in the drink. Handle it with tongs or gloves, keep the room ventilated and never seal it in an airtight jar.
- ✓
Don’t hang anything over the prep area that could drop into food. Lightweight hats over the island are fine. Anything with beads or glitter over the cutting board is not.
Spooky Halloween Kitchen Decor Ideas
Spooky is the friendly end of the scale: bats, ghosts, witch hats and skeletons with a sense of humor. It suits families, renters and anyone who wants the room to look festive without feeling like a haunted attraction.
1. Bat Swarm on the Cabinets
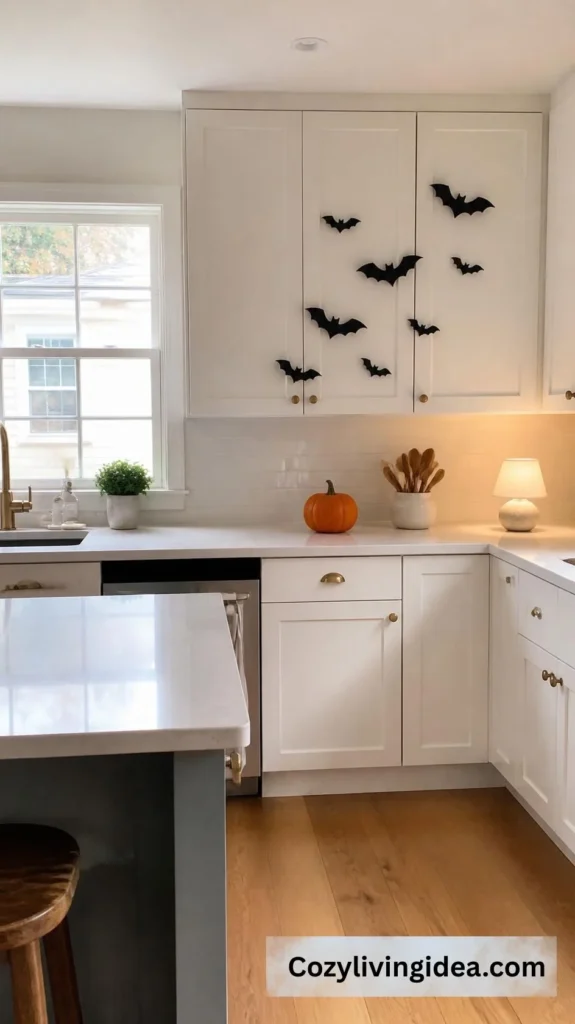
A small swarm of paper or peel-and-stick bats is the fastest way to make a plain kitchen look decorated. Start near a cabinet corner and let the bats fan out, getting smaller as they go, so it looks like they are flying away from the door. Use odd numbers (five, seven or nine) because even rows look like wallpaper instead of movement.
Test one bat on the inside of a cabinet door first. Removable adhesive can lift the finish on older or budget laminate. A pack usually costs under $10.
2. Spider Takeover on the Range Hood or Pendant Light
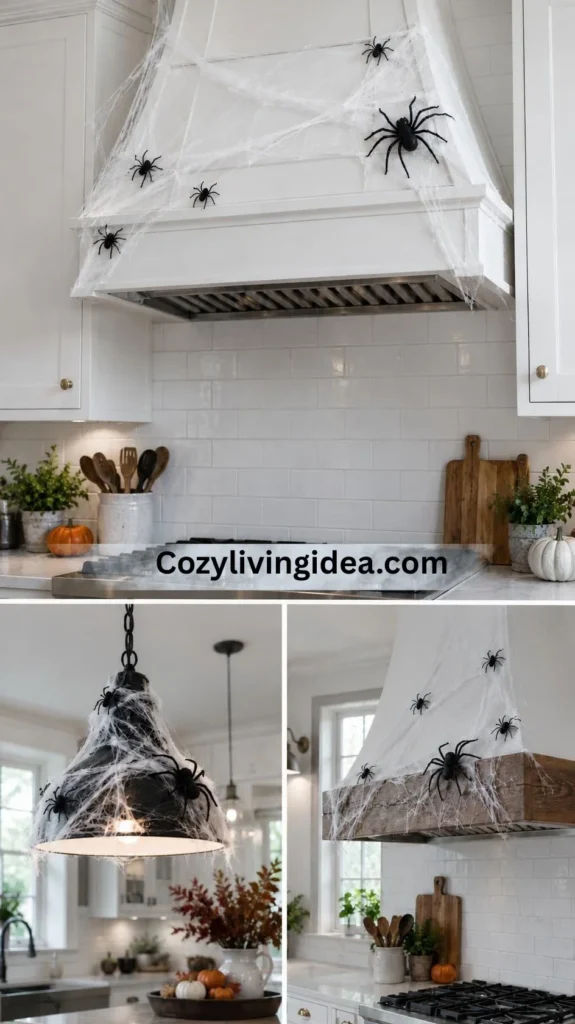
Contrast is what makes this one work. A clean, polished kitchen with a sudden spider infestation looks like a joke the room is in on. Keep the whole effect contained to one feature, either the front face of the range hood or a single pendant light, so the rest of the kitchen stays calm.
Read the safety rule twice on this one. Only put webbing on a pendant light if it has an LED bulb, because an older bulb runs hot enough to be a problem. Keep the webbing off the bulb and the socket, and keep it off the inside of the hood entirely.
3. Floating Witch Hats Over the Island
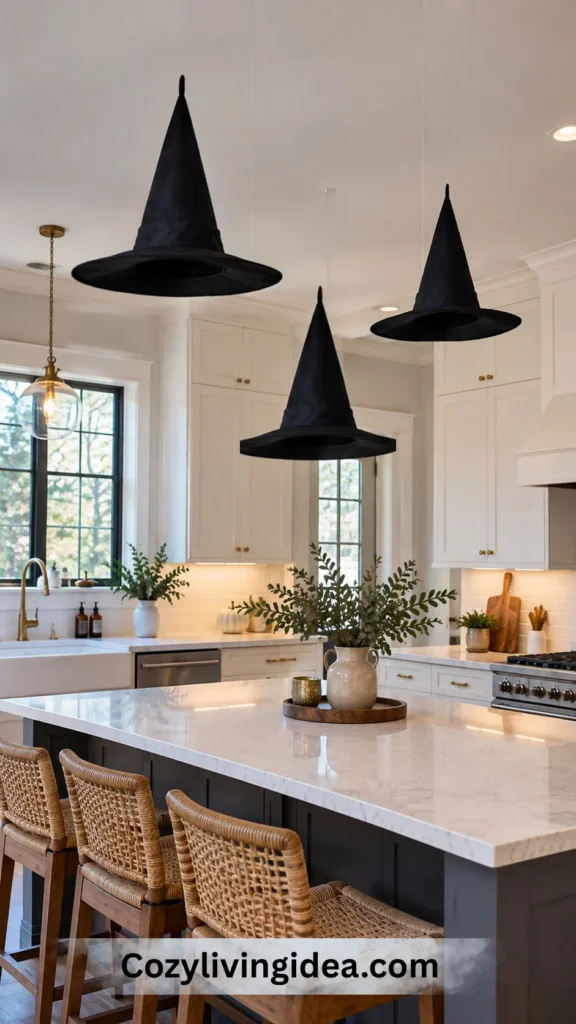
Lightweight witch hats hung from fishing line at different heights are the smartest Halloween kitchen island decor there is, because they use the air above the island and leave the surface clear. Hang three to five hats with drops between roughly 6 and 18 inches so they look like they are drifting, not lined up.
Renters can use small adhesive ceiling hooks, because paper or felt hats weigh almost nothing. Keep the lowest hat above head height at the island so nobody bumps it while carrying a hot pan.
4. The Skeleton Sous-Chef
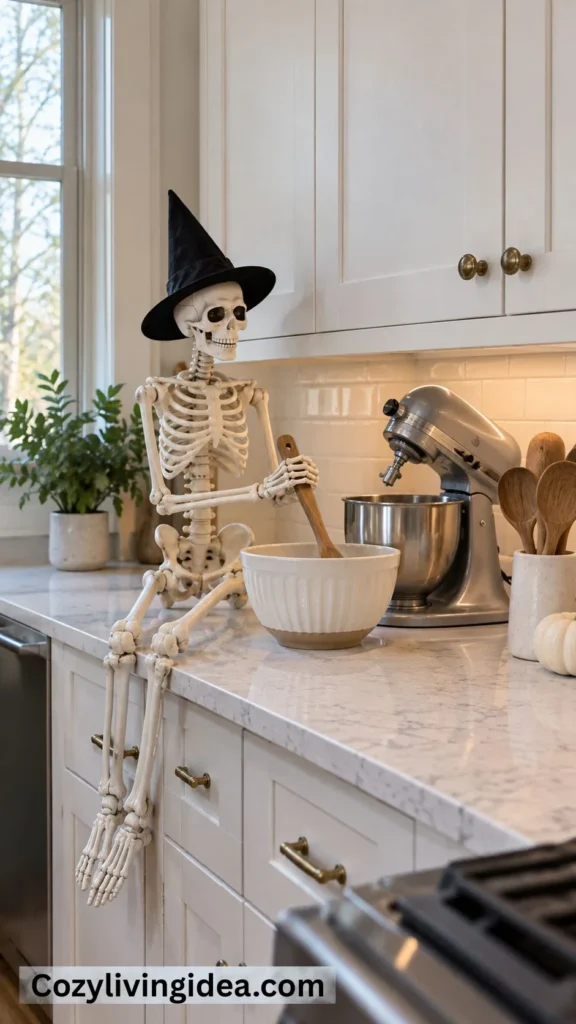
A poseable skeleton next to the stand mixer, holding a wooden spoon, gets more laughs than any other single prop. It works because the joke is tied to the room: a skeleton in a kitchen is funnier than a skeleton in a hallway. Add a witch hat or an apron and you have a focal point for the entire counter.
The fridge is another good home. Sit or lean a skeleton against it, add a “BOO” banner and a few bat magnets, and the plainest surface in the kitchen becomes part of the display in about five minutes.
5. Cauldron Centerpiece With Safe Fog
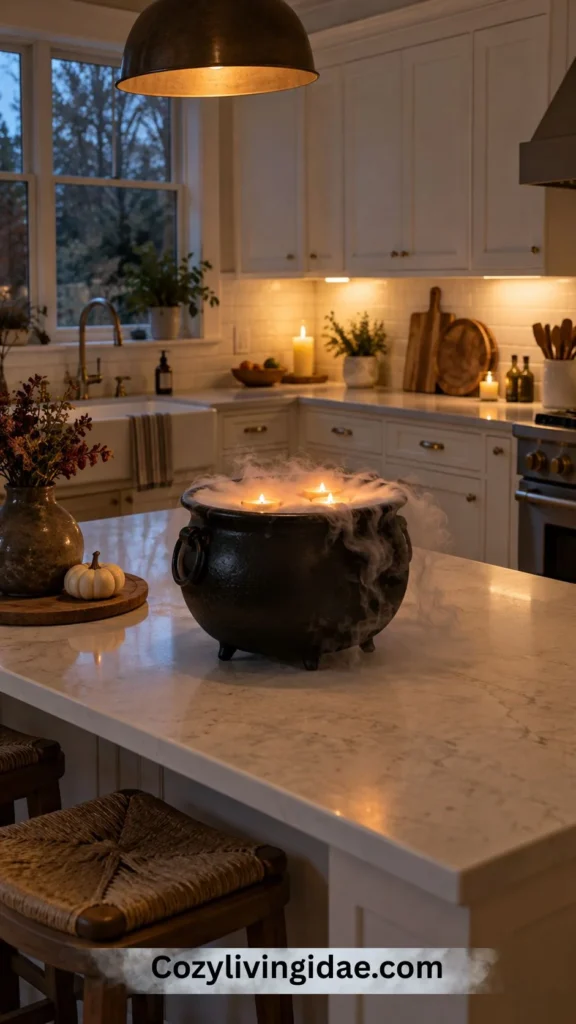
A black cauldron, or just a black stockpot you already own, makes a fast centerpiece for the island or table. The drama comes from the fog spilling over the rim. A small battery mist maker with water gives the same effect with no handling risk. If you use dry ice, follow the safety rules above: separate container, tongs, ventilation and never in the drink.
Add two or three orange LED tea lights inside the pot so it glows after dark. Total cost is close to nothing if you already own the pot.
6. A Haunted Kitchen Window
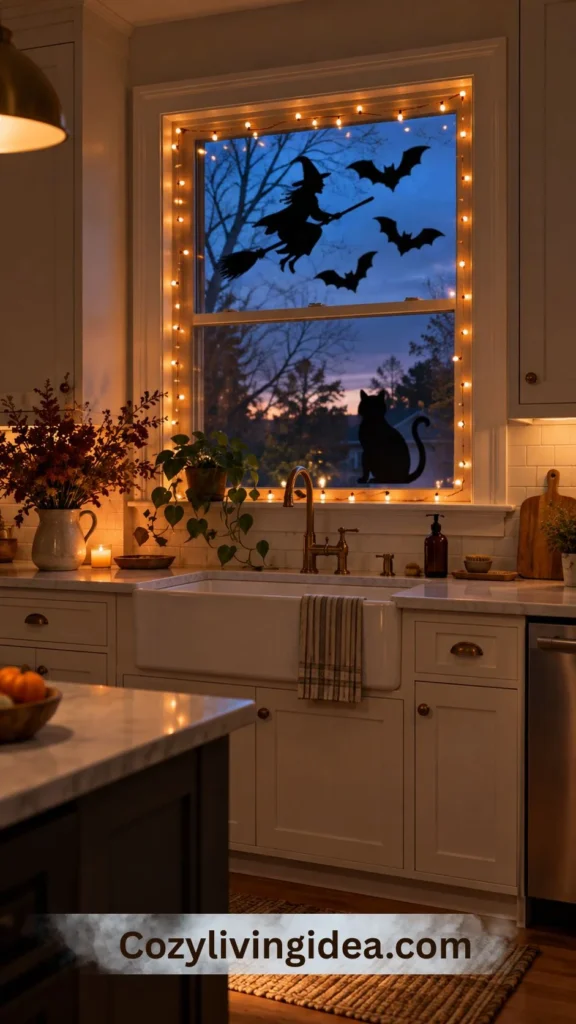
Kitchen window Halloween decor works because it takes up zero counter space. Cut black cardstock into a witch on a broom, a cat and a few bats, then tape them to the inside of the glass. Static-cling decals do the same job with less effort, and they peel off cleanly.
At night, a string of battery lights along the window frame lights the silhouettes from behind, and they read clearly from the street too. If you also want pumpkins on the sill, measure the depth first. Six to eight inches gives small pumpkins room to sit without tipping.
Scary Halloween Kitchen Decor for Haunted House Lovers
If “cute” is not the goal, this section is for you. Scary kitchens rely on lighting, shadow and a few well-placed props instead of piles of plastic. That makes them more effective and easier to clean up.
7. The Haunted Apothecary Pantry
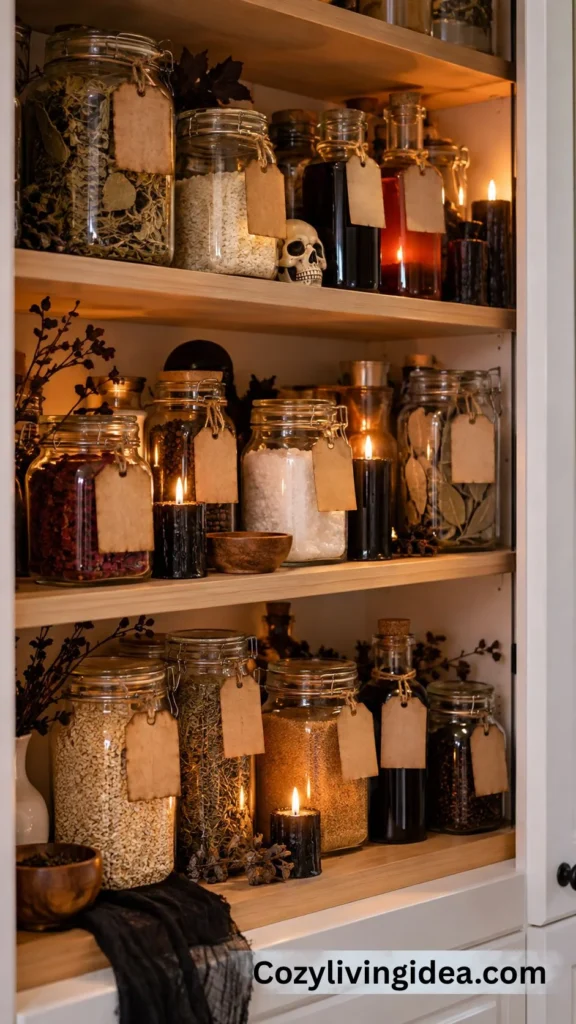
Turn pantry staples into a witch’s supply shelf. Print small labels with invented names like “Bat Wing Flour,” “Toad Sugar” or “Raven Feather Rice” and tape them to jars you already own. It costs almost nothing, and guests reading the labels is half the fun.
Two safety notes. First, label real food playfully but clearly, so nobody grabs the wrong thing in a hurry. Second, if you fill decorative bottles with colored water for a potion shelf, keep them well away from the drinks and add a “not for drinking” tag if kids will be around.
8. Mad-Scientist Drink Station With Hand-Shaped Ice
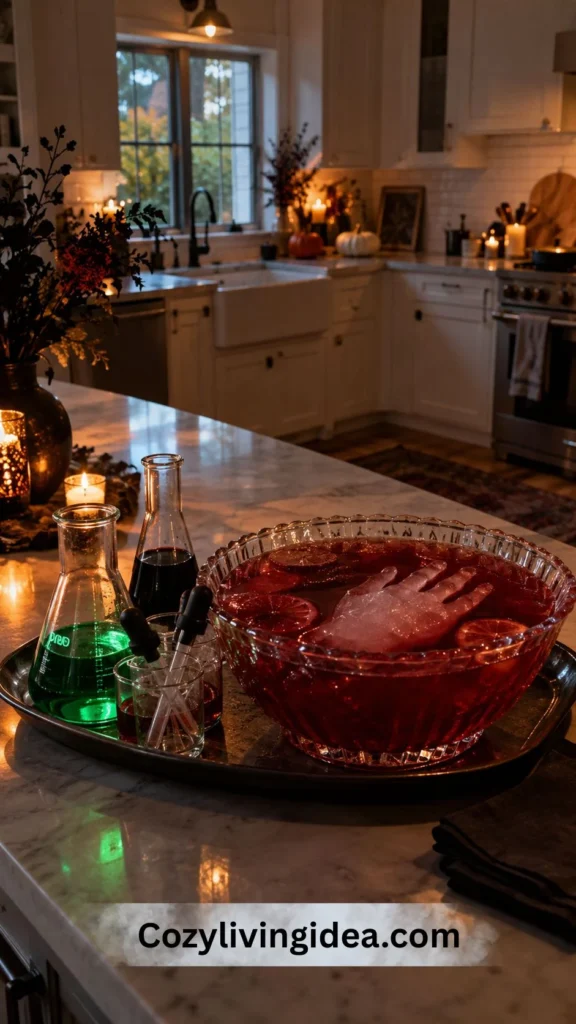
Set a tray with beakers, droppers, a bowl of bright punch and a few “specimen” jars, then float ice hands in the bowl. To make them, fill a clean, food-safe glove with water, tie it off and freeze it. Stand it upright in a mug or jar so the fingers stay curled instead of flat.
This idea is decoration and drink service in one. Put the ice in just before guests arrive, or it turns into a puddle within an hour or two.
9. Cobweb Corners and One Colored Light
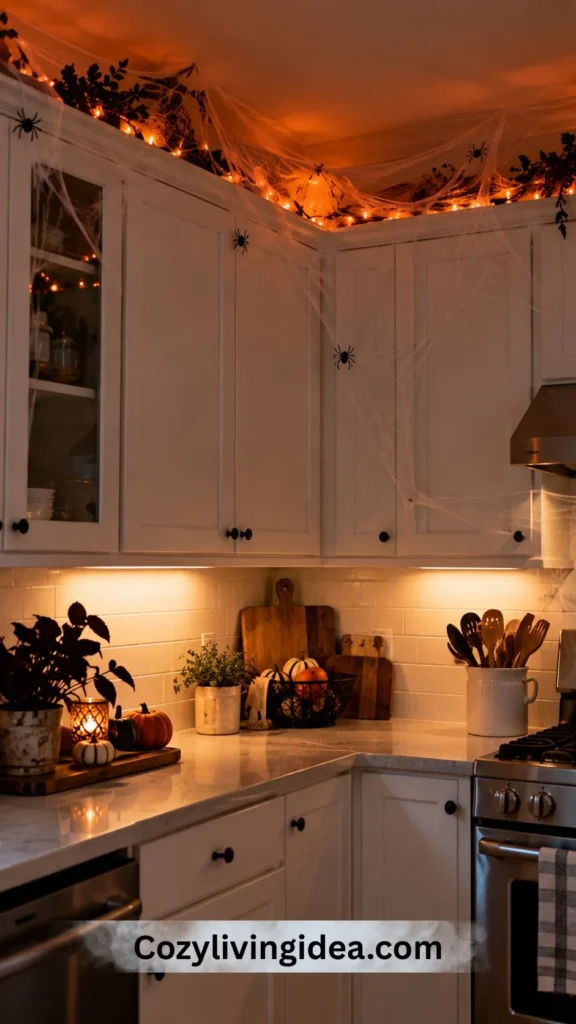
A scary kitchen comes from shadow more than from props. Pull webbing thin and stretch it across corners and the tops of doorways, where real cobwebs would gather. Then change the light. Swap one bulb for a colored LED (orange, purple or red) or run an orange string light along the top of the cabinets.
Leave your white under-cabinet task lights on. You still need to see your knife, and a dark work zone is how people get cut.
10. Bloody Handprint Clings on Glass Cabinet Doors
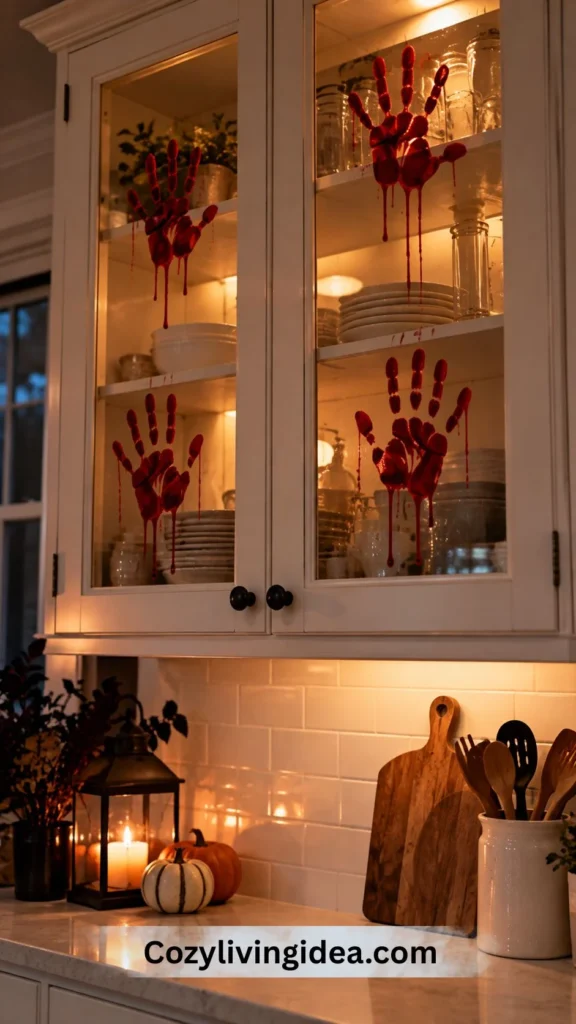
Static-cling handprints on the inside of glass cabinet doors or the window look disturbingly real and peel off with no residue. This is the most shocking idea on the list, so think about your audience. If little kids or nervous neighbors will see it, try a softer version like scratches or claw marks in the corner of the glass.
Elegant Halloween Kitchen Decor That Looks Expensive
Elegant does not mean no pumpkins. It means fewer colors, better materials and more empty space between objects. Stick to three materials: matte black, brass or gold, and something natural like wood or dried stems.
11. Black-and-Gold Tray Centerpiece
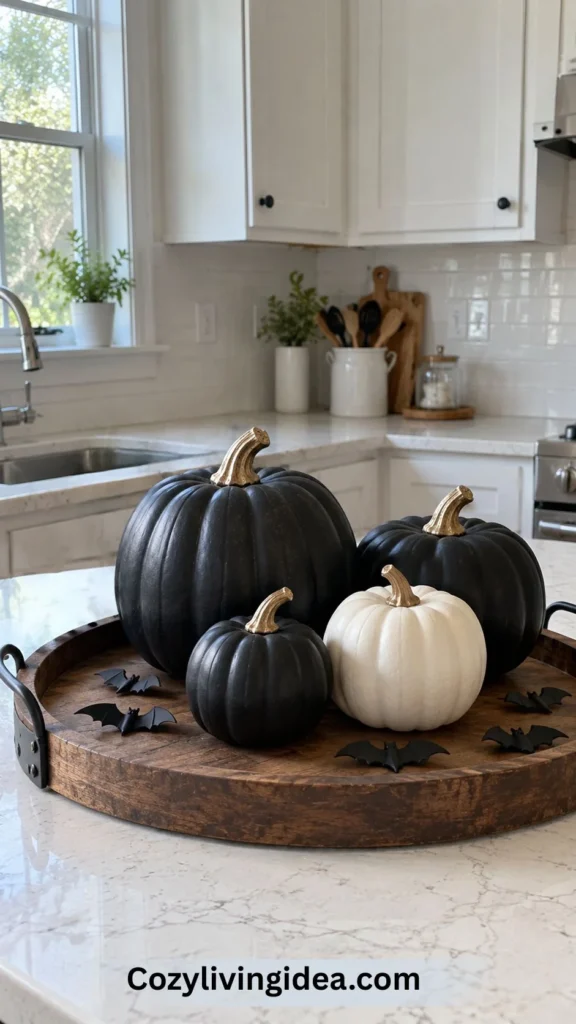
Set matte black pumpkins with gold stems on a round tray, add one white pumpkin and a few black bat cutouts, and you have the most reliable elegant Halloween kitchen decor look there is. The single white pumpkin matters. It gives the eye a place to rest, so the black doesn’t feel heavy.
Use a wood, brass or black tray. The tray edge makes the group look like a styled vignette instead of loose objects.
12. Amber Glass and White Pumpkins on a Shelf or Sill
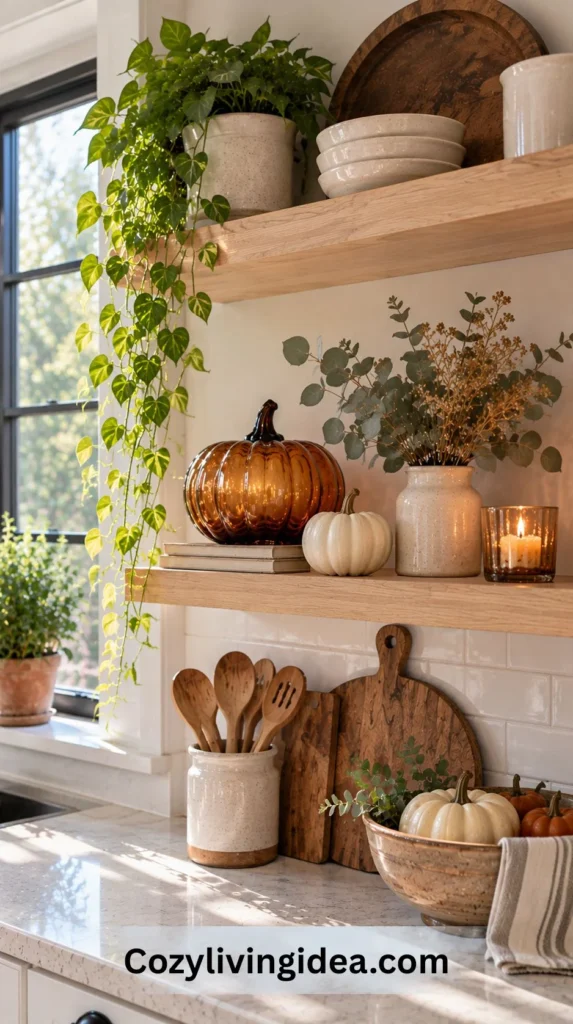
Keep the palette almost neutral, add one white pumpkin, a sprig of eucalyptus and a single amber glass pumpkin. The glass is the only “jewel” in the display, so the whole shelf feels considered instead of themed.
Glass in a kitchen picks up fingerprints and a thin film of cooking grease. Wipe it with a dry microfiber cloth every few days and it will stay clear.
13. Styling Black Kitchen Cabinets for Halloween
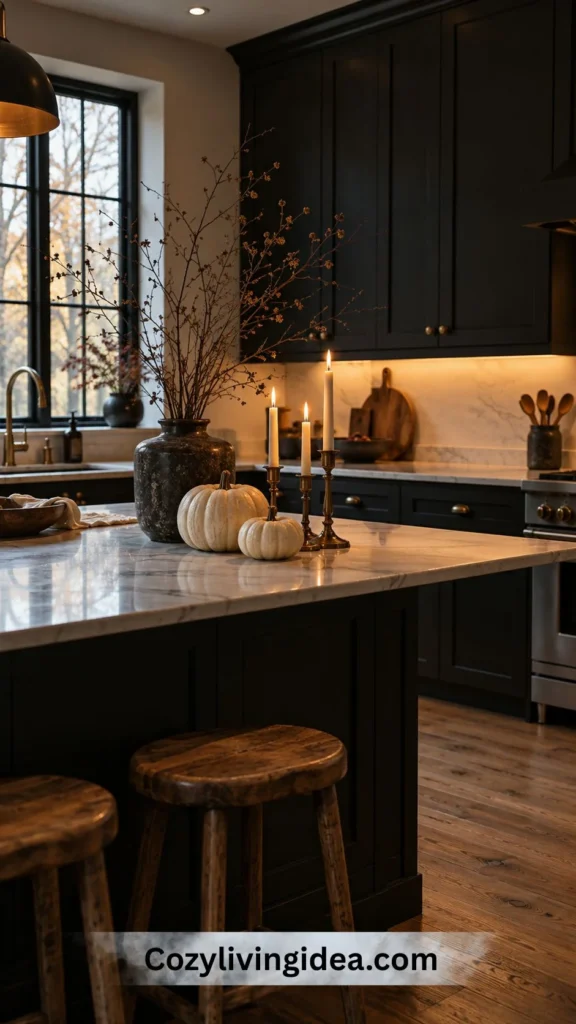
Dark cabinets are a gift in October. They act like a theater backdrop, so light objects pop hard: white pumpkins, brass candlesticks and pale bare branches all look sharp against them. Avoid dark brown and navy decor, because it disappears into the cabinet color.
Put felt pads under ceramic pieces so they don’t scratch the finish, and add an under-cabinet light strip so the display is actually visible at night. If you’re still choosing a cabinet color for the long term, our guide to modern kitchen design ideas for 2026 covers dark, moody and light options.
14. Floral-Goth Wreath on the Range Hood
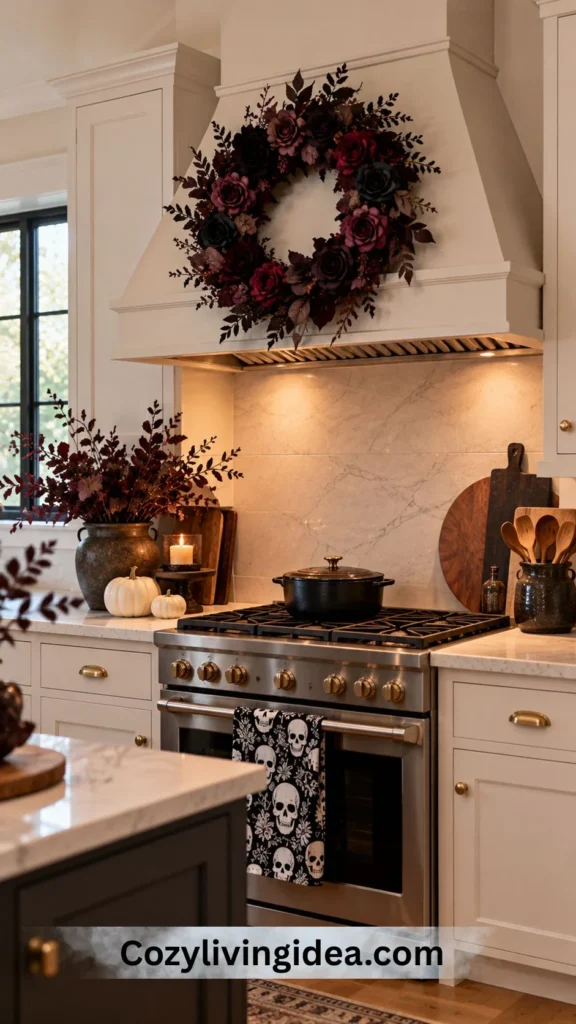
A wreath of dark, dramatic florals (deep burgundy, plum or black roses) on the front of the range hood turns a plain metal surface into a focal point. Pair it with skull-print tea towels and a patterned kettle, and the look feels collected instead of costume-y. It leans romantic, with just enough edge.
Hang it on the outer face of the hood, never inside or under it. If you do a lot of high-heat cooking, hang it on the wall beside the hood or on a cabinet door instead.
15. Brass Candlesticks With LED Tapers
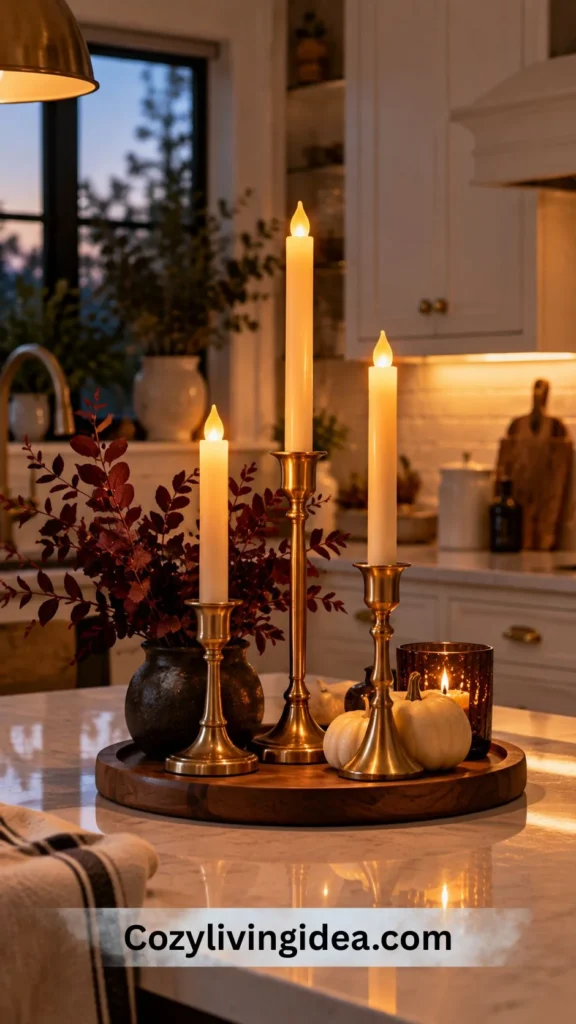
Tall brass candlesticks in groups of three, with flameless LED taper candles, give the kitchen an old-manor glow. Real tapers drip wax onto counters, and they are a fire risk near dried leaves, paper and fabric. Modern LED tapers flicker convincingly and look the same from across the room.
Vary the heights, and put them on a tray or runner so the group stays tidy.
16. Dried Stems and Warm Lights Above the Cabinets
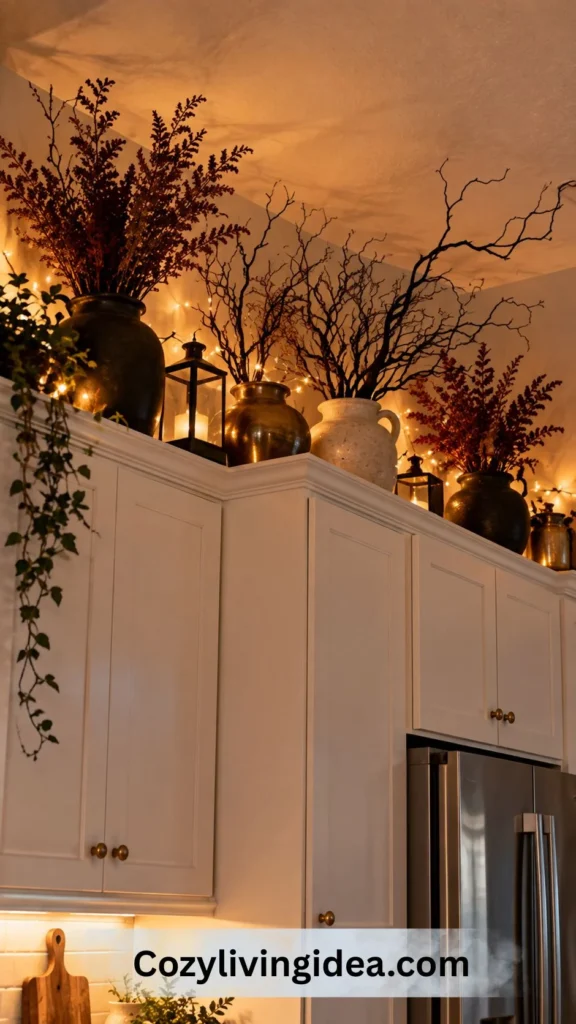
The top of the cabinets is prime real estate for above kitchen cabinet Halloween decor. Tall dried grasses or black branches in a vase add height and drama without touching your counters. Thread a strand of warm string lights behind them and the glow will show up at night.
Two cautions. Dust and grease collect up there, so wipe the cabinet tops before you set anything down. Choose faux stems over real ones in a kitchen, because they don’t shed and can be wiped off.
Vintage Halloween Kitchen Decor With Retro Charm
Halloween-themed homewares have been sold since the 1920s, so there is plenty of real vintage to hunt for. The classic palette is orange, black, mustard and cream, and the motifs are black cats, jack-o’-lanterns with triangle eyes, owls and witches. Thrift stores and flea markets are your best sources.
17. A Curiosity Tray
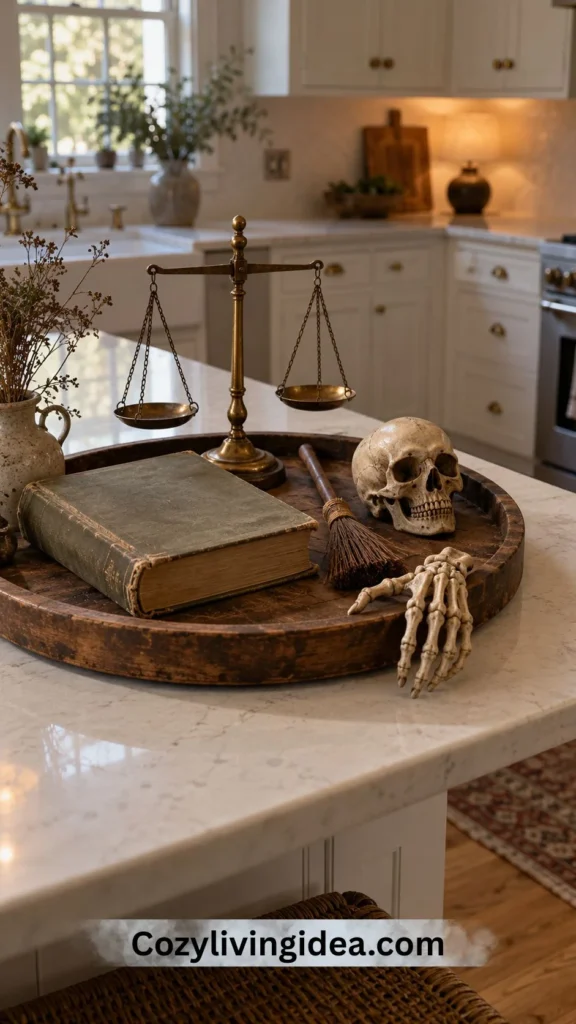
Fill a round wooden tray with a small brass scale, an old book, a tiny broom, a skull and a skeletal hand reaching over the edge. It looks like a witch’s desk, and each object is small enough to move when you need the counter.
Build it in a triangle: one tall item, one medium and one low. The result reads as a deliberate arrangement.
18. A Black-Cat Cookie Jar and Retro Tablecloth
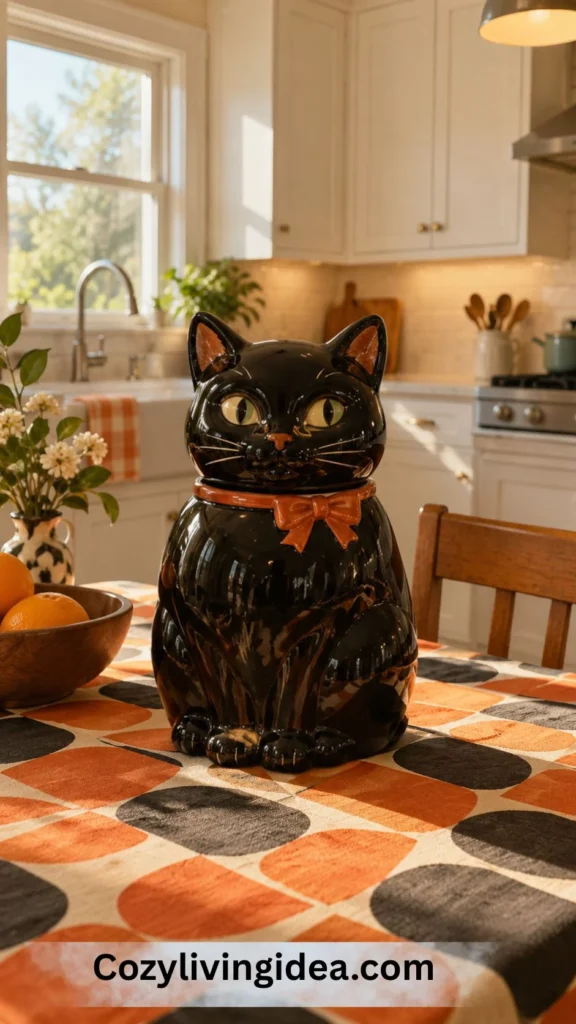
One vintage-style cat jar on a retro tablecloth says “old-school Halloween” without any help. The rule is to choose one theme and edit hard. If the cat jar is the star, leave the plastic spiders and fake cobwebs off the same table, or the whole thing slides from nostalgic to party-store.
Use vintage for display, not for food. Ceramic dishes made before 1971 were made before the US set any limit on leachable lead in dinnerware, so old glazes can release lead into food. The Center for Environmental Health explains the risk in its guide to whether vintage dishware is safe to use. Put candy or cookies in a modern liner or bowl inside the jar, and serve food on new plates.
19. Checkerboard and Retro Orange at the Sink
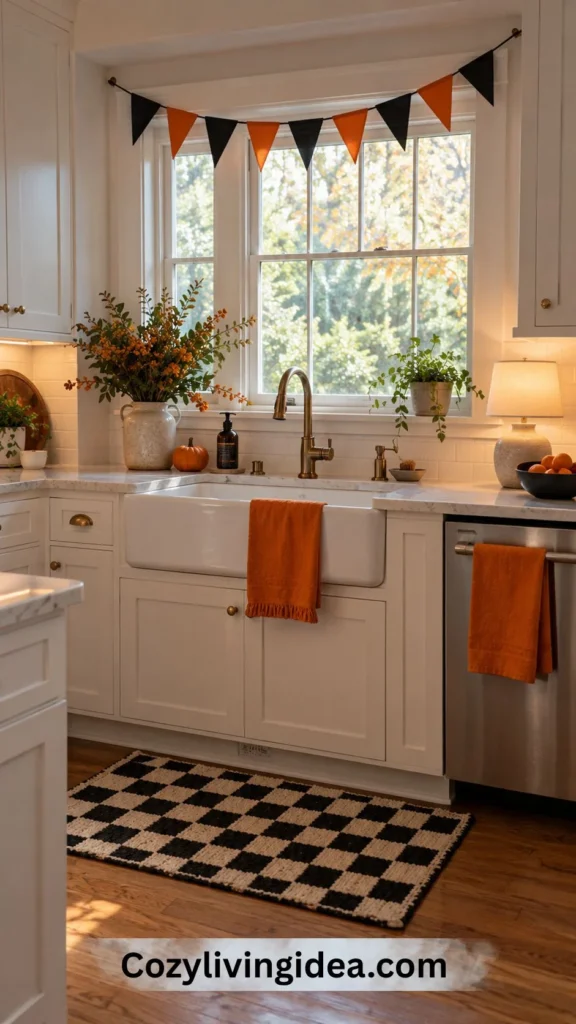
Sunny orange towels, a checkerboard runner or mat, and a small “Trick or Treat” banner over the window make a cheerful sink nook. Checkerboard is one of the strongest retro patterns, and it works with any of the Halloween colors, so it pulls the look together with a single piece.
This one is also easy to leave out past Halloween, because the orange and checks read as fall.
20. Antique Cake Stand and Glass Cloche
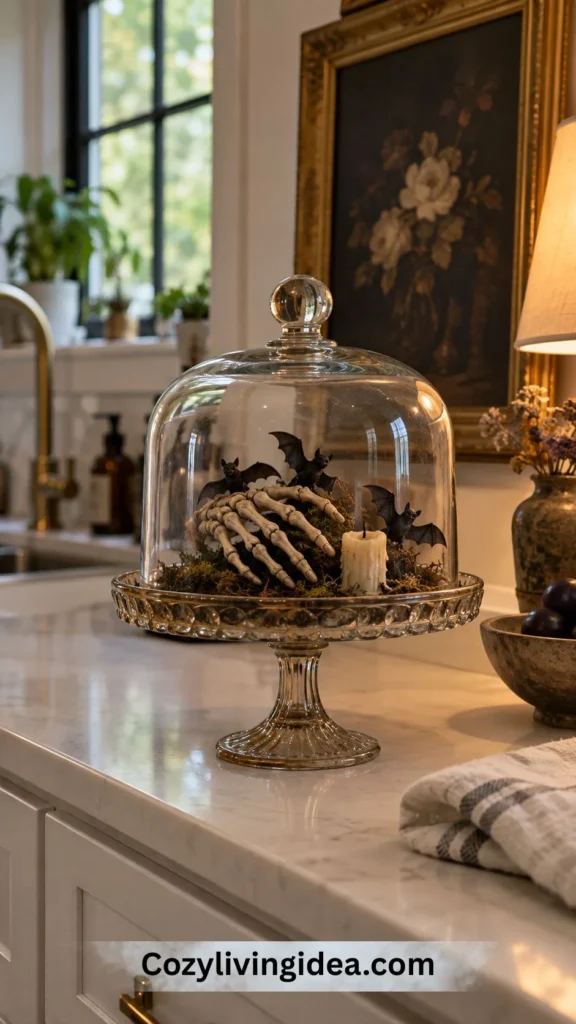
A footed cake stand with a glass dome is a small stage. Put a bundt cake under it for a party, or a skeleton hand, a candle stub and a couple of bats for a display that stays up all month. The glass keeps dust and grease off whatever is inside, a real advantage in a kitchen.
Add a framed print behind it in a gold frame, and you have an elegant-vintage corner using one hook and no drilling.
Disney Halloween Kitchen Decor Ideas
Three Disney worlds give a kitchen the most to work with: The Haunted Mansion, The Nightmare Before Christmas and Hocus Pocus. You have two routes. You can buy licensed pieces, since Disney Store and big-box retailers carry kitchen items like cheese boards, salt-and-pepper shakers and dinnerware. Or you can borrow the palette and props from things you already own. That costs less and often looks more grown-up. Ideas 21 to 23 use the second route.
21. Haunted Mansion-Inspired Kitchen
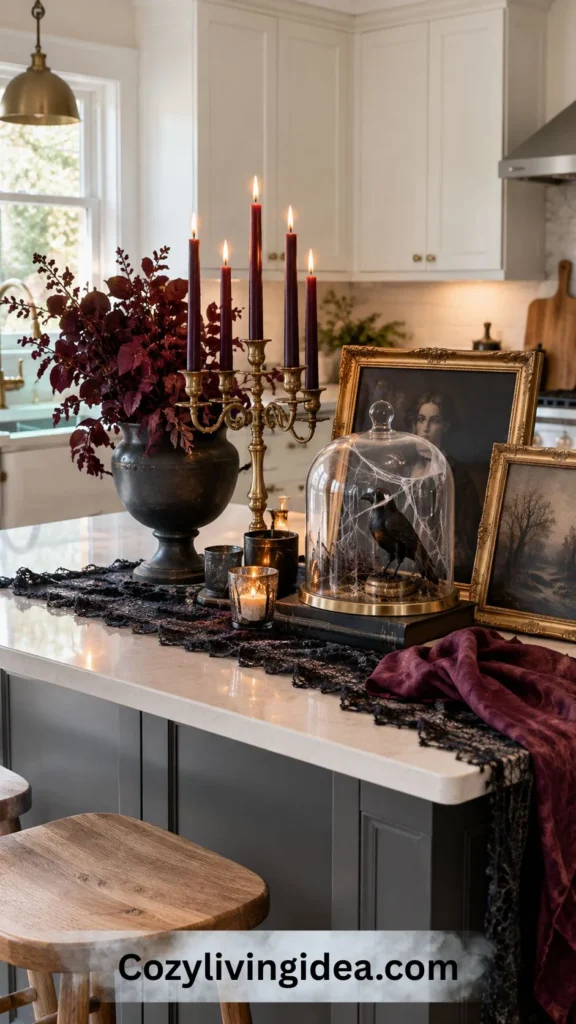
Forget orange. This look is deep gray, plum and candlelit gold. Set a candelabra with LED candles on the island, hang a few dark portrait prints in gilded frames, and lay a lace runner across the table. A cobweb-draped glass cloche over a small raven or skull finishes it.
Leaving out orange makes the kitchen read as adult, and the flickering gold light does most of the atmosphere work.
22. Nightmare Before Christmas-Inspired Stripes
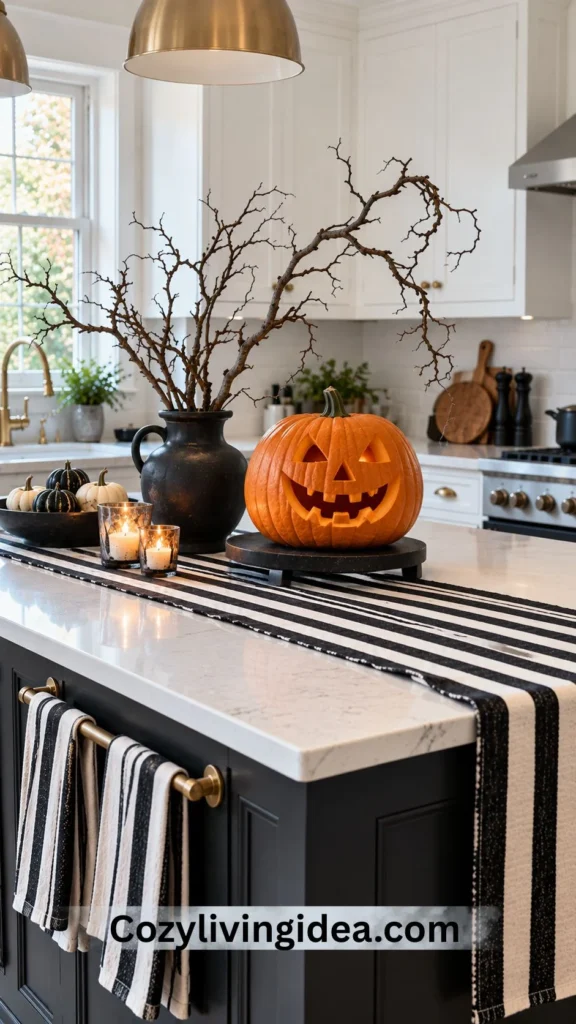
Black-and-white stripes are the shortcut to this one. Striped towels, a striped runner, a bent twig “spiral hill” in a black vase and one pumpkin with a wide, spooky grin are enough. Stripes are easy to find at any price, so you don’t need licensed items.
Add one small orange accent (a mini pumpkin or a candle) and let the stripes do everything else.
23. Hocus Pocus-Inspired Witch’s Kitchen
This is the most practical of the three, because a witch’s kitchen is a real kitchen. Hang bundles of dried herbs (rosemary and thyme dry well), set an old cookbook out as the “spell book,” line up mismatched jars and add a tiered tray with candles. A broom leaning by the pantry door finishes it.
Purple and green candles and a few potion bottles push it toward Halloween, while the herbs keep the kitchen useful.
Buy licensed pieces or copy the style, but keep to one Disney world per kitchen. Mixing all three ends up looking like a souvenir shop.
DIY Halloween Kitchen Decor You Can Make This Weekend
DIY Halloween kitchen decor works best when it uses cheap materials and takes under an hour. All five projects below fit that description. Prices are rough US estimates and vary by store. For more projects beyond the kitchen, see our DIY Halloween decor ideas.
24. Black Birdhouse Haunted Village
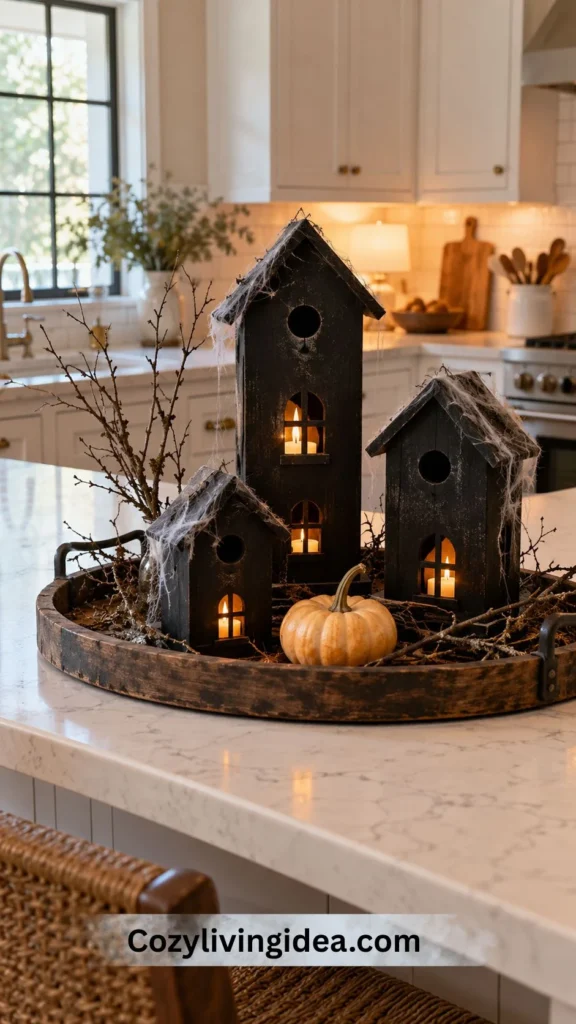
Thrifted wooden birdhouses turn into a tiny haunted village with one can of paint. The matte black finish hides thrift-store wear, and a little webbing makes the shapes look old.
What you need:
- ✓
2 to 4 wooden birdhouses (thrift stores, roughly $3 to $6 each)
- ✓
Matte black spray paint
- ✓
Fake webbing and a few bare twigs
- ✓
Battery tea lights
Steps:
Spray the birdhouses outdoors in light coats, then let them cure for a full day so they don’t stick to the counter.
Tuck a small piece of webbing over one corner of each roof.
Slip a battery tea light into each house and set them on a tray with twigs and a mini pumpkin.
Rough cost: $15 to $30 total.
25. Bat Branch in a Jar
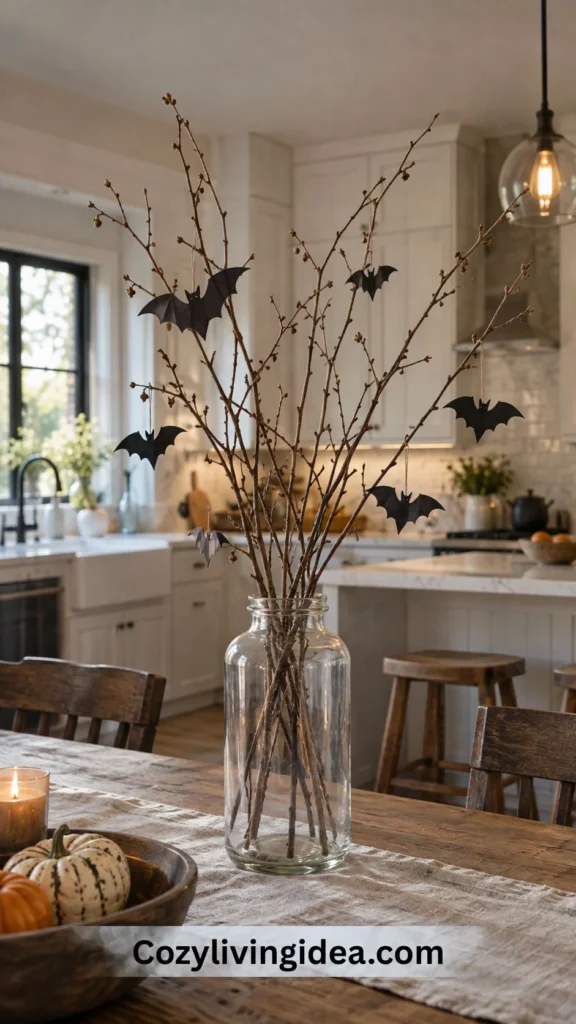
Bare branches with black paper bats look far fancier than they are. The branches give height, and the bats add movement.
What you need:
- ✓
3 to 5 bare twigs from the yard
- ✓
A tall glass jar or vase
- ✓
Black cardstock
- ✓
String or tape
Steps:
Shake the twigs out and wipe off any dirt.
Cut bat shapes in two sizes and fold the wings slightly so they look like they are flying.
Tie or tape the bats onto the branches at different heights, then stand the branches in the jar.
Rough cost: Under $10.
26. Cabinet Door “Haunted Windows”
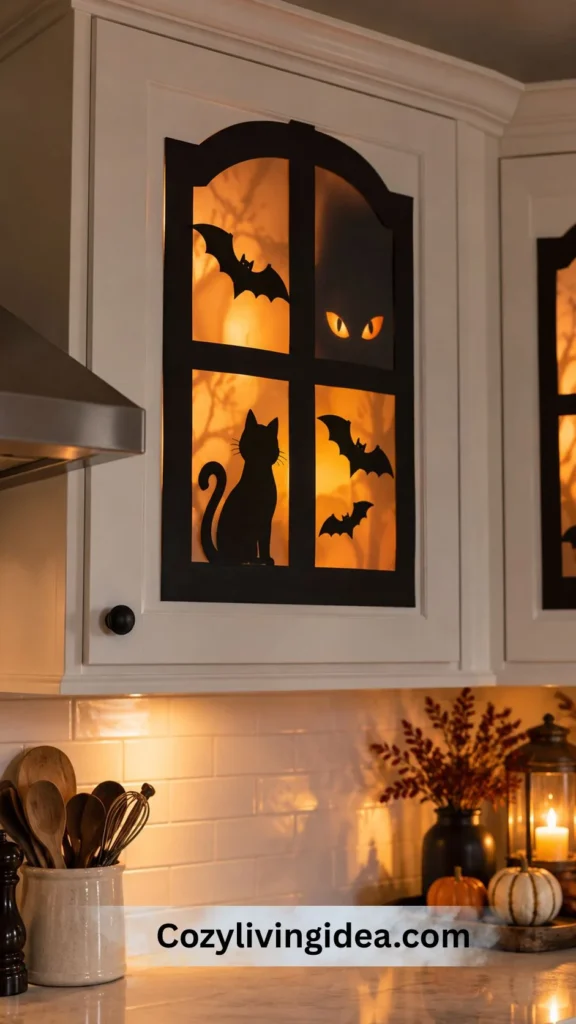
Cut black cardstock into a window frame with four panes, then place a bat, a cat or a pair of glowing eyes in each pane. Stuck to an upper cabinet, it looks like the cabinet has a haunted house behind it.
What you need: Black cardstock, a craft knife, white or orange paper for the backing shapes, and low-tack painter’s tape.
Painter’s tape holds paper on cabinet doors and lifts off cleanly. Test it in a hidden spot first. Rough cost: Under $8.
27. Cheesecloth Ghost Jars
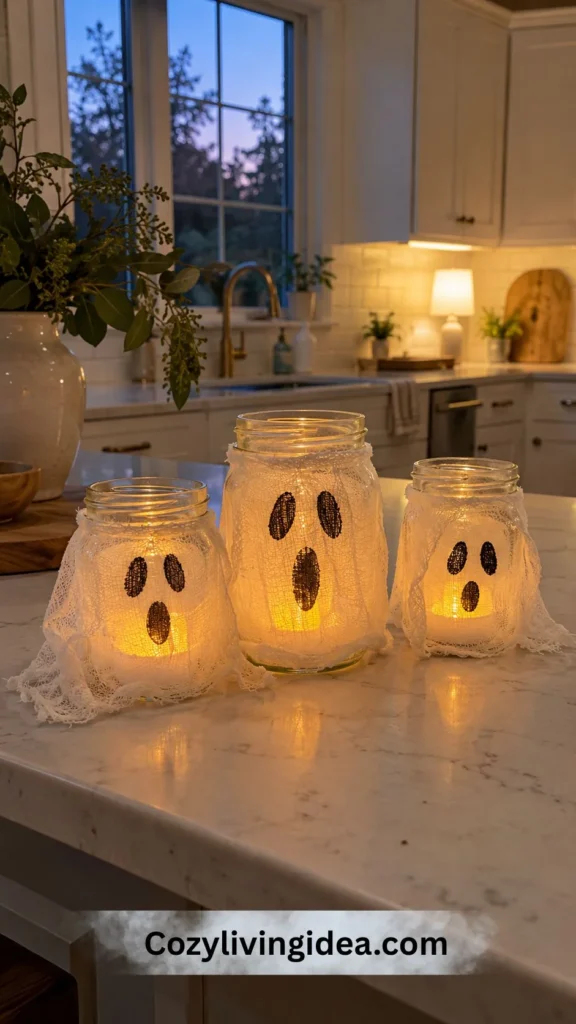
These glow, they are cheap, and children can help make them.
What you need:
- ✓
Clean glass jars
- ✓
Cheesecloth or white gauze
- ✓
A black marker
- ✓
Flameless LED tea lights
Steps:
Wrap the jar loosely in cheesecloth and let it drape at the bottom.
Draw two eyes and a mouth on the front with the marker.
Drop an LED tea light inside.
Use an LED light only. Cheesecloth burns very fast, so never use a real candle in these.
28. Spooky Recipe Cards for the Fridge
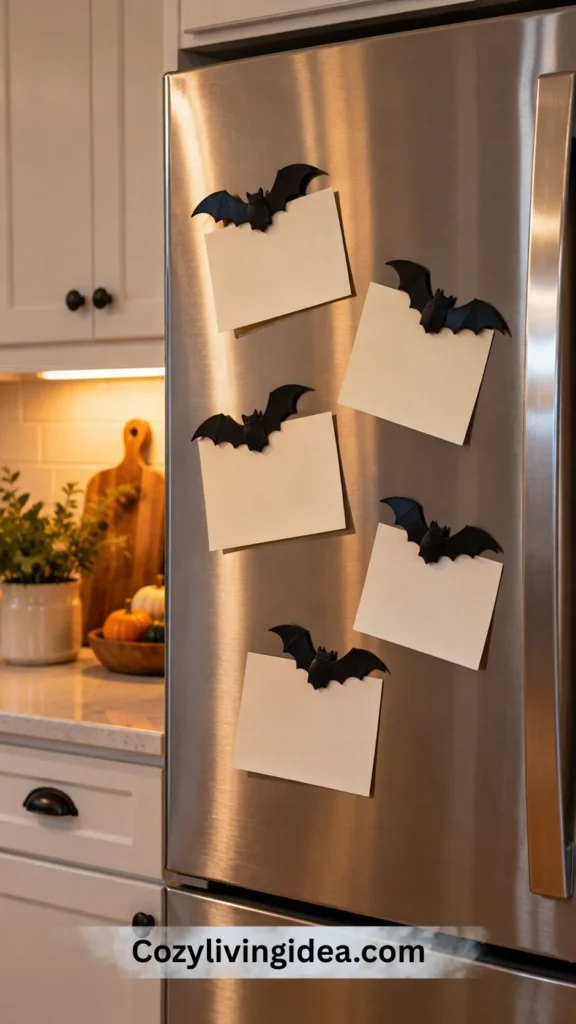
Print recipe cards with playful names like “Witch’s Brew Soup” or “Monster Mash Brownies” and hang them with magnets on the fridge or a small clipboard on the wall. Choose real recipes you plan to make, so the cards are decor and a dinner plan at once.
They cost nothing beyond paper, and they sit at eye level, where guests read them while waiting for a drink.
Halloween Coffee Bar and Candy Station Ideas
29. A Halloween Coffee Bar
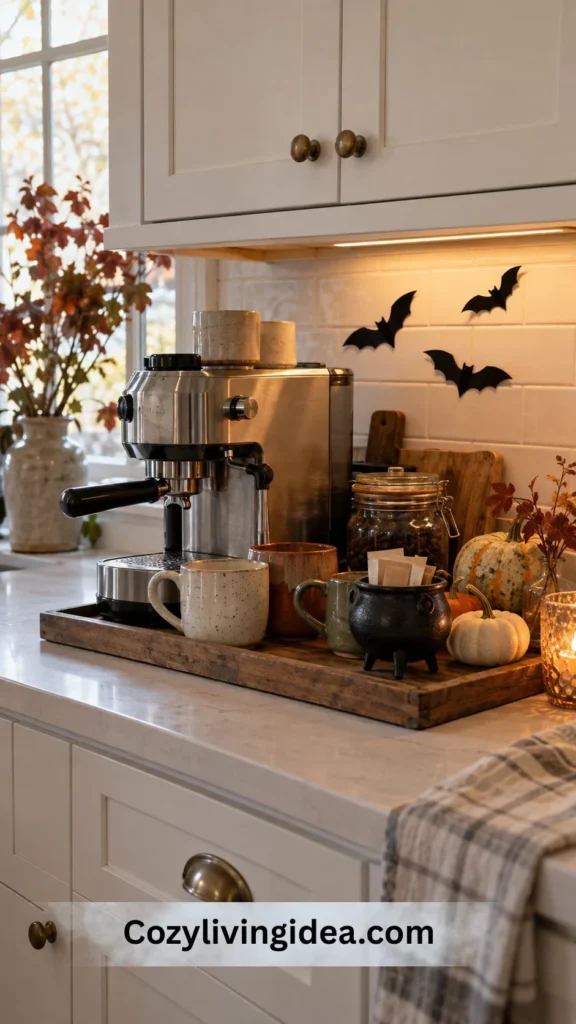
Give the coffee corner its own tray so it looks styled. Build it in layers: tall items at the back (a coffee pot or stacked mugs), mid-height pieces in the middle (a jar of pods or sweeteners) and small things at the front (a mini cauldron for sugar packets, a tiny pumpkin).
Add two or three themed mugs and a few bats on the wall above, and it looks like a small café display without replacing your whole setup. Because it sits on a tray, you can lift it off to wipe up coffee spills.
30. A Trick-or-Treat Candy Station
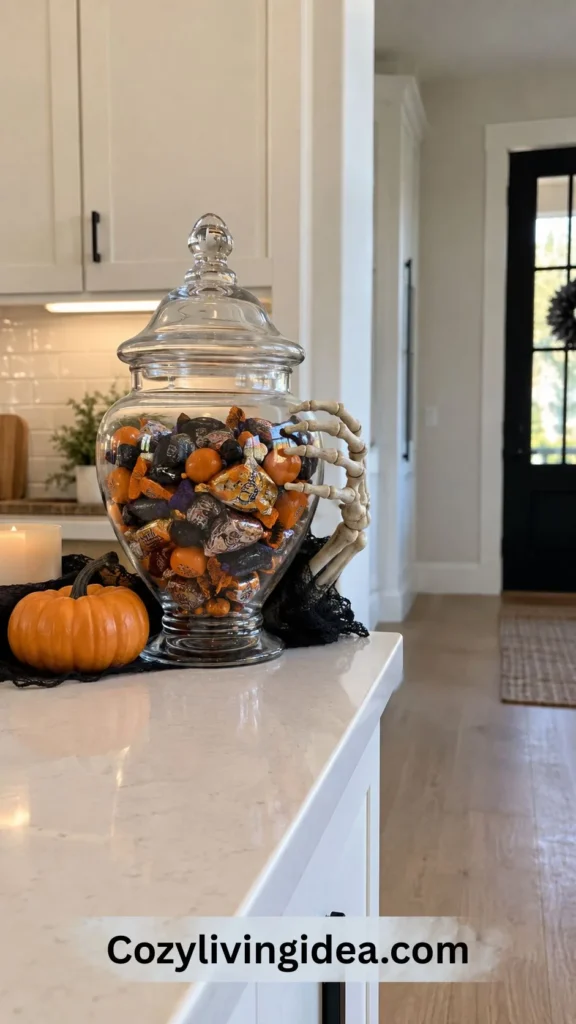
A big glass apothecary jar filled with wrapped candy, a mini pumpkin beside it and a skeleton hand reaching out is decoration and snack table in one. Set it near the entry side of the kitchen, away from the stove, so kids do not have to cross the cook zone.
Keep candy wrapped, and if you have guests with allergies, add a small card noting which candies contain nuts. If you are hosting a party, use our Halloween party planning checklist to time the food, drinks and decor.
Where to Put What: A Spot-by-Spot Cheat Sheet
Searching for something specific? Use this table to jump straight to the right idea.
| Spot | Best Ideas | Why It Works There |
|---|---|---|
| Halloween kitchen counter decor | 11, 17, 29 | Tray-based displays lift off when you need the space |
| Halloween kitchen island decor | 3, 5, 11, 21 | Overhead pieces and tray centerpieces keep the surface usable |
| Above kitchen cabinet Halloween decor | 16 | Zero counter cost, and it gets seen from across the room |
| Kitchen window Halloween decor | 6, 10, 19 | Silhouettes and clings need no floor or counter space |
| Halloween kitchen wall decor | 1, 14, 26 | Light pieces on the wall, no drilling for most |
| Range hood | 2, 14 | A contained focal point, kept off the heat path |
| Refrigerator | 4, 28 | A big flat surface that is otherwise wasted |
| Dining table or kitchen table | 8, 15, 21, 22 | Candlelight, runners and layers set the mood |
| Pantry or shelf | 7, 12, 23 | Uses what you already have on display |
| Coffee bar and snacks | 29, 30 | Decoration you can actually use |
Common Halloween Kitchen Decor Mistakes
Using too many colors. Black, orange, purple, green and silver all at once look like a party aisle. Choose two and repeat them on the tray, the towels and the wall pieces.
Decorating the cook zone. The most common mistake is dressing the counter next to the stove. Grease coats it within days, and you end up moving it every time you cook. Keep that space clear and put the decor on walls, windows and cabinet tops.
Mixing real flames with paper and fabric. Candles near dried leaves, paper bats or cheesecloth are a fire risk. Use LED candles anywhere a dry material is close by.
Spreading small pieces everywhere. A few tiny objects scattered around look like clutter. Group them in threes on a tray, and the same objects look like a display.
Forgetting the exit plan. If everything is themed, you will be taking it all down on November 1. Build a base of neutral pumpkins, gourds and warm lights that can stay through Thanksgiving, and only swap the spooky pieces (bats, webs, skeletons).
Decorate Your Kitchen in One Evening
Short on time? Here is a plan that takes about two hours, and you can stop at any step:
Wipe down the surfaces and put away appliances you don’t use daily.
Write them on a sticky note so you stay on track while shopping or digging through boxes.
Set one tray on the island or table (ideas 11, 17 or 29).
Bats on the cabinets, silhouettes in the window, and a wreath on the hood if it suits your cooking.
Towels, floor mat, fridge magnets and the candy jar.
Turn on the string lights above the cabinets, place the LED candles and turn the overhead lights off to check the glow.
Final Thoughts
The best Halloween kitchen decor ideas are the ones that respect how you actually use the room. Keep the cook zone clear, choose one style and two colors, put one hero display on a tray and let the walls, windows and cabinet tops carry the rest.
Start small. A bat swarm, a window silhouette and a tray centerpiece will change the room in an hour, and you can add more pieces each weekend. Whichever direction you pick (spooky, elegant, vintage, Disney-inspired or DIY), a kitchen that still lets you cook will always feel better than one that only looks good in photos.