23 Christmas Cake Decorating Ideas That Look Bakery-Made (No Fondant Needed)
A Christmas cake does a lot of work. It sits in the middle of the table, gets photographed before anyone cuts it, and has to hold its own next to candles, greenery and every other sparkly thing in the room. Most of us don’t need a fancier cake. We need a better plan for the one we’re already making.
This guide gives you 23 Christmas cake decorating ideas, from five-minute finishes to a tall tree cake you’ll want a quiet afternoon for. Most of them use buttercream and fresh ingredients, so there’s no fondant to crack or wrestle. A section near the end covers the traditional UK-style fruit cake with marzipan and royal icing, because “Christmas cake” means two quite different things on either side of the Atlantic.
Every idea comes with the reason it works. That way you can swap pieces around and still end up with a cake that looks planned.
The easiest way to decorate a Christmas cake is to follow one rule: smooth (or deliberately rustic) frosting, one hero decoration, and one finishing touch. A white cake with a cluster of cranberries and rosemary, or a plain cake with a piped tree on top, will look better than a cake covered in 6 ideas at once. Pick one idea below and stop there.
The Three-Part Formula Behind Every Good-Looking Christmas Cake
Cakes that look homemade in the wrong way usually try to do five things at once. Cakes that look professional do three. Learn this formula and you can build your own designs without a tutorial.
- ✓
A calm base. This is smooth frosting, or a thin “naked” coat where the layers peek through. Why it matters: decoration needs a quiet background. A smooth or deliberately rustic surface makes even a handful of cranberries look intentional.
- ✓
One hero. This is the thing the eye lands on first: a tree, a wreath, a cluster of fruit, a Santa belt. Why it matters: without a focal point, the eye bounces around the cake and nothing feels finished.
- ✓
One finishing detail. A dusting of powdered sugar, a few gold pearls, a ribbon, a single candle. Why it matters: a small last touch tells people the cake was styled, not just frosted.
Then add a colour rule. Choose two colours plus white or a metal (gold, silver, or copper). Christmas palettes are already loud, so a limit keeps a cake from looking like a candy aisle.
Always do a thin crumb coat first, then chill the cake for about 30 minutes in the fridge (or 10 minutes in the freezer). It locks loose crumbs under a sealed layer, and your final frosting goes on clean.
Which Christmas Cake Style Fits You?
Use this to pick a design before you buy a single ingredient.
| Style | Skill Level | Time to Decorate | Best For |
|---|---|---|---|
| Snowy and elegant | Beginner | 15-30 minutes | Dinner parties, adult gatherings |
| Rustic naked cake | Beginner | 15-20 minutes | When you hate smoothing frosting |
| Piped Christmas tree | Beginner to intermediate | 30-60 minutes | Photos, family tables |
| Fun and character cakes | Beginner | 20-40 minutes | Kids’ parties |
| Traditional UK fruit cake | Intermediate | A few short sessions over days | Classic Christmas Day cake |
Snowy and Elegant Christmas Cake Decorating Ideas
These suit grown-up tables, white-and-green holiday decor, and anyone who wants the cake to look like part of the room rather than a party prop.
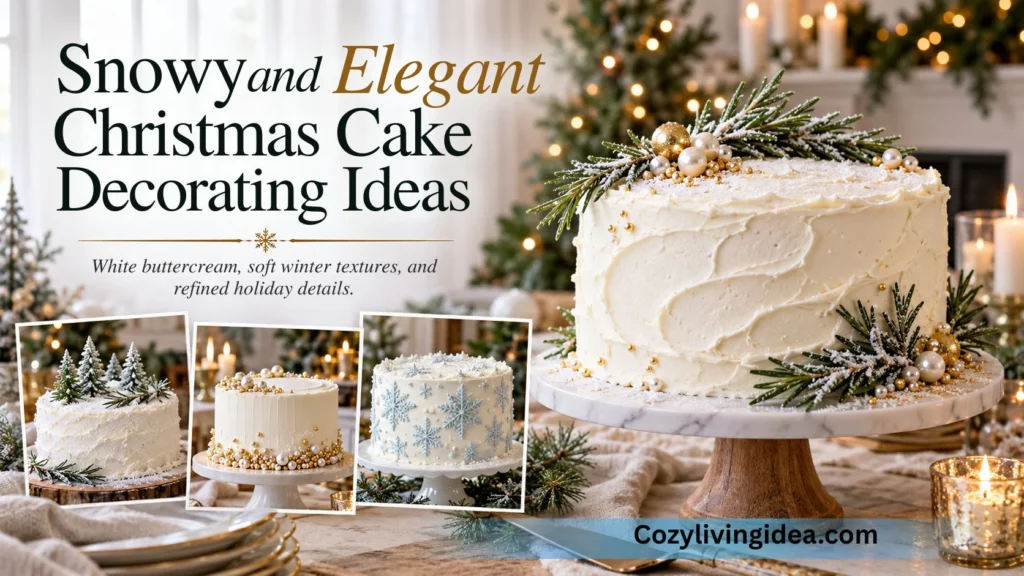
1. Snowdrift Cake with Rosemary Sprigs
Frost a cake in white buttercream, then press the back of a spoon into the top and pull away to make soft, uneven peaks. Tuck three or four rosemary sprigs into the peaks like bare winter branches. The texture does the decorating here, and the rosemary is the only green, so the white reads as fresh snow.
Dust powdered sugar through a small sieve right before serving. If you do it earlier, the sugar can sink into the frosting and fade.
You’ll need: white buttercream, rosemary, powdered sugar. Level: Beginner, about 15 minutes.
2. Gold Bar and Pearl Cake
Frost a cake in white buttercream and, while it’s still soft, press edible gold bars and sugar pearls into one corner or a diagonal band. Add a pair of taper candles in proper holders beside the cake for a patisserie feel.
Why a cluster and not a scatter? A tight group of metallic pieces reads like jewellery. Scattered everywhere, the same pieces read as clutter.
Safety note: check that your gold is labelled edible, not just “non-toxic,” which means it’s decorative only. Keep candle flames well away from dry rosemary or other greenery.
You’ll need: white buttercream, edible gold bars and pearls, taper candles. Level: Beginner, about 20 minutes.
If you’re using metallic dust or glitter alongside the gold decorations, check the FDA guidance on edible cake glitter and dust. Products labeled “non-toxic” are not necessarily intended for direct use on food.
3. Icy Blue Snowflake Cake
Frost a cake in pale blue or white, then pipe snowflakes in white icing with a small round tip. If piping lines worry you, press in snowflake sprinkles or sugar snowflakes instead.
Blue feels cooler and more modern than red and green, which makes it a good pick if your Christmas decor leans silver, white or Scandinavian. Draw a few snowflakes on parchment and pipe over them first to get your hand steady.
You’ll need: pale blue or white buttercream, white piping icing, small round tip. Level: Beginner, about 30 minutes.
4. Poinsettia Buttercream Cake
Use a petal tip (a Wilton 104 or similar) to pipe overlapping red petals into a flower, add a few green leaves with a leaf tip (a Wilton 352 or similar), and finish each centre with gold pearls. Cluster two or three flowers on one side of the cake and leave the rest plain.
Flowers are what make a cake look like it came from a bakery, and the plain space around them gives them room to show off. Practise one flower on parchment before you pipe on the cake.
You’ll need: red and green buttercream, petal and leaf tips, gold pearls. Level: Intermediate, about 45 minutes.
5. Bow Cake
Bows are all over Christmas decor this year, and a bow on a cake is a neat way to match your tree. Pipe a ribbon-style bow on top, or wrap a strip of parchment around the sides and tie a real ribbon over it so the fabric never touches the frosting.
Pick a ribbon that matches something already in the room, like your napkins or tree ribbon. That small echo is what makes a table look styled. Remove the ribbon before cutting.
You’ll need: buttercream and a petal or ribbon tip, or satin ribbon and parchment. Level: Beginner, about 15 minutes with real ribbon.
Rustic and Naked Christmas Cake Ideas
A naked cake has a very thin coat of frosting, so the layers show through. It’s the most forgiving finish there is, and it needs no fondant.
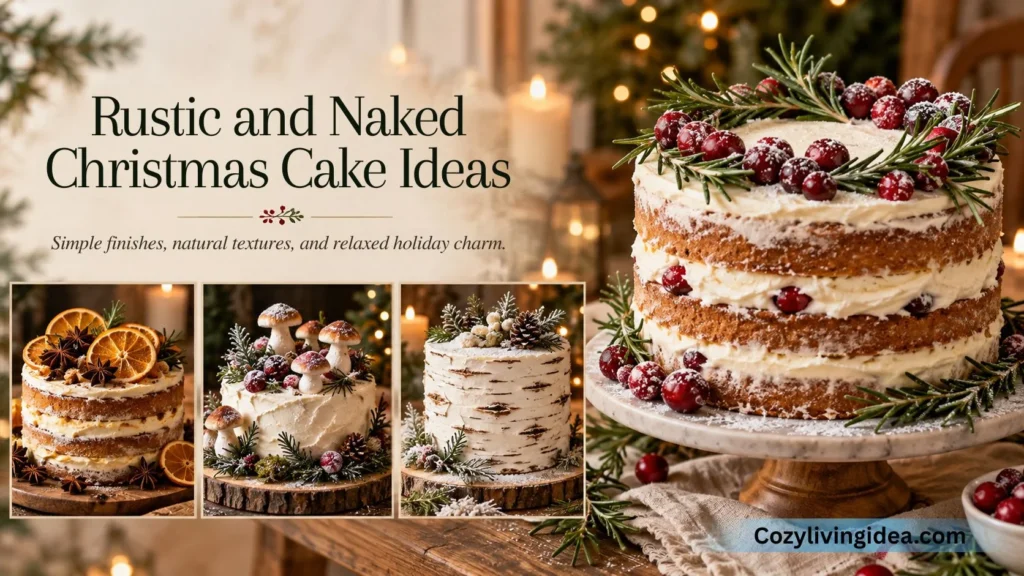
6. Cranberry and Rosemary Naked Cake
Spread a thin, uneven layer of frosting over the cake so the sponge shows in places. Heap a cluster of fresh cranberries on top, and nestle rosemary sprigs between them.
Why it works: the cranberries are the red, the rosemary is the green, and the cake does the rest. Because the frosting is meant to look casual, there’s no smoothing to get wrong.
For a frosty look, make sugared cranberries: steep them briefly in a warm simple syrup (equal parts sugar and water), roll them in sugar, and let them dry for about an hour.
You’ll need: cream cheese frosting or buttercream, fresh cranberries, rosemary. Level: Beginner, about 15 minutes.
7. Dried Orange and Star Anise Cake
Dry thin orange slices in a very low oven (around 200°F / 95°C, roughly two to three hours, flipping once) the day before. Arrange them on a naked cake with rosemary and a few star anise.
Dried orange is translucent, so it catches the light a bit like stained glass, which is why this cake looks so much richer than it is. Star anise and cinnamon sticks are decoration only, so tell guests and lift them off before cutting.
You’ll need: naked cake, oranges, rosemary, star anise. Level: Beginner, 10 minutes to decorate plus drying time.
8. Pomegranate Border Cake
Frost a cake in white buttercream, then line pomegranate seeds along the top edge in a tidy ring, with a small rosemary or thyme sprig every few inches.
The ruby seeds act as your red, and the ring keeps the juice from bleeding across the frosting. Add the seeds just before serving, since the juice will stain white frosting over time.
You’ll need: white buttercream, pomegranate seeds, rosemary or thyme. Level: Beginner, about 10 minutes.
9. Woodland Cake with Meringue Mushrooms
Frost a cake in white or soft beige, then group meringue mushrooms, sugared cranberries and rosemary on top. A light dusting of powdered sugar finishes it.
Meringue mushrooms look like something from a storybook, and shop-bought ones save you an hour. If you want to include real pinecones in the presentation, place them in a separate decorative arrangement beside the cake stand rather than directly on the cake or serving surface. Use edible meringue mushrooms for the woodland decorations on the cake itself.
You’ll need: frosted cake, meringue mushrooms, cranberries, rosemary. Level: Beginner, about 20 minutes.
10. Birch Bark Winter Cake
Frost a cake in white buttercream. Drag a spatula through light brown frosting to make soft streaks down the sides, then add short dashes of dark chocolate frosting to look like bark markings. Dust the top with powdered sugar and rest a few pinecones around the base.
Using just three frosting colours and a spatula, you get a design that looks far harder than it is. The contrast between the smooth top and textured sides is what sells it.
You’ll need: white, light brown and dark chocolate frosting, spatula. Level: Beginner, about 25 minutes.
Christmas Tree Cake Ideas
A tree is the most searched Christmas cake shape for a reason: everyone recognises it, and you can scale the effort up or down.
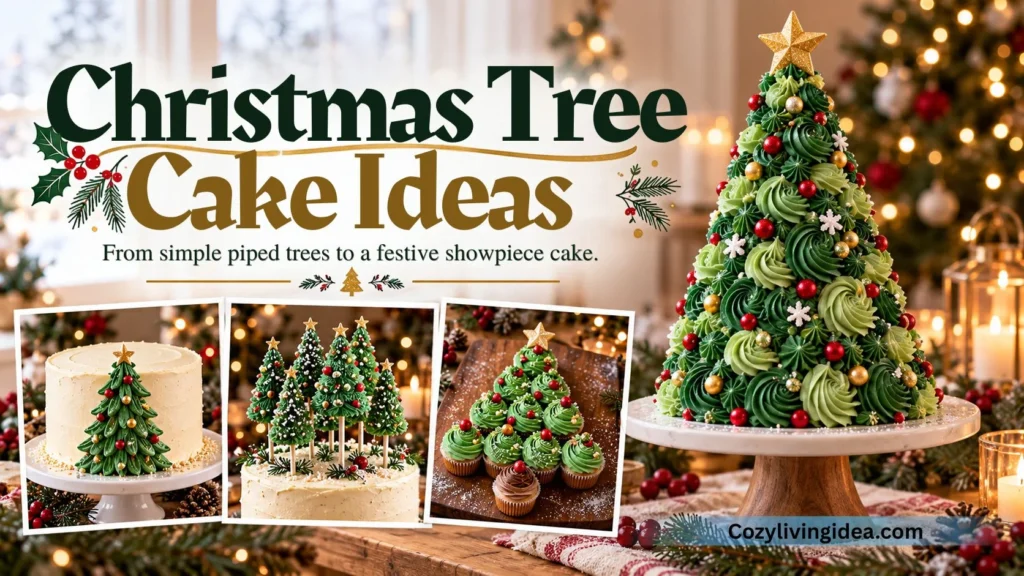
11. Petal-Tip Tree on a Plain Cake
Frost a cream-coloured cake smoothly. Then pipe one green tree on top using a petal tip, working in overlapping rows from the bottom up. Finish with a small gold star and “Merry Christmas” in chocolate if you like.
Leaving the sides plain is the secret. All that empty space makes one simple tree feel designed. This is a good first piping project for beginners.
You’ll need: green buttercream, petal tip, gold star topper. Level: Beginner to intermediate, about 30 minutes.
12. Forest of Lollipop-Stick Trees
Pipe graduated star-tip swirls in two shades of green onto lollipop sticks, building each tree from the bottom up. Chill them until firm, then press them into a frosted cake in a loose cluster. Fill the gaps with coarse sugar and gold pearls.
Making trees in three different heights gives the cake depth, like a real forest. You can pipe the trees ahead of time and chill them, which breaks the job into smaller pieces.
You’ll need: green buttercream, open star tip (Wilton 1M or similar), lollipop sticks. Level: Intermediate, about 45 minutes.
13. Cupcake Pull-Apart Tree
Arrange cupcakes on a board in a triangle: one at the top, then rows of two, three, four and five (15 in all), with one more below as a trunk. Frost each with green star swirls, then dot with sprinkles or pearls.
No slicing, no plates needed, and nothing falls apart on the way to the table. That makes it ideal for parties where people are standing and chatting.
You’ll need: 16 cupcakes, green buttercream, star tip, sprinkles. Level: Beginner, about 45 minutes.
14. Tiered Cone Christmas Tree Cake
This is the showpiece. Bake round layers in graduated sizes (for example 8, 7, 6 and 4 inches), stack them from largest to smallest, and trim the sides into a taper. For a tall or heavy stacked cake, use food-safe cake boards and a support system appropriate to the cake’s height, weight and number of tiers. Don’t rely on a single drinking straw to support a large stacked design.
Marbled green sponge makes a lovely surprise inside. A tall cake gives the table real presence, and it can reach about a foot high. Chill your layers in the freezer for about 20 minutes before you stack them, because cold cake is far easier to trim and frost.
You’ll need: graduated cake layers, dowel, green, red, yellow and white buttercream, open star tip. Level: Intermediate, one afternoon.
Fun and Kid-Friendly Christmas Cake Ideas
Bright, silly and quick. These are the cakes children remember, and most need very little piping skill.
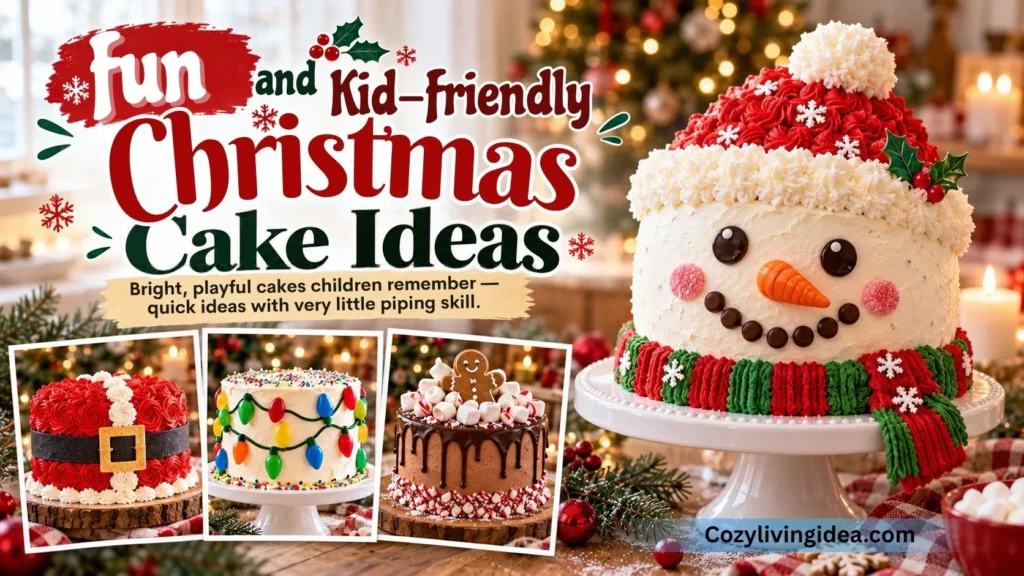
15. Snowman Cake with Toasted Coconut
Stack two small round cakes, coat them in buttercream, and press shredded coconut all over for a fluffy snow texture. Add chocolate chips for eyes, an orange candy or tinted frosting for the nose, and a piped or candy scarf.
Coconut gives you “snow” with no piping at all. Toast a portion of it lightly for flavour, but keep most of it pale so it still reads as white.
You’ll need: two small rounds, shredded coconut, chocolate chips, candy nose. Level: Beginner, about 30 minutes.
16. Santa Belt Cake
Frost the whole cake in red, pipe or spread a thick black band around the middle, and add a yellow buckle. That’s it.
Three flat colours are enough to be recognised from across the room. A tip with red: use gel colour and let the frosting rest for a few hours, since it deepens over time and you’ll need less (heavy dye can taste bitter).
You’ll need: red, black and yellow frosting. Level: Beginner, about 20 minutes.
17. Christmas Lights Cake
Pipe a loose, wavy black line around the sides of a white cake, then press colourful candy-coated chocolates along it as bulbs while the frosting is still soft.
The line doesn’t need to be neat. A little wobble looks like a real string of lights, which is why this cake is easier than it appears.
You’ll need: white frosting, black piping icing, candy-coated chocolates. Level: Beginner, about 25 minutes.
18. Hot Cocoa Drip Cake
Frost a chocolate cake in chocolate buttercream and chill it. Pour slightly warm chocolate ganache around the edge so it runs down the sides, then pile mini marshmallows on top and dust with cocoa.
The drip does all the visual work. Let the ganache cool until it’s thick but still pourable, and test one drip on the chilled cake first. If it’s too warm, it will slide straight to the plate.
You’ll need: chocolate cake, ganache, mini marshmallows, cocoa powder. Level: Intermediate, about 30 minutes.
19. Gingerbread Village Cake
Cover a cake in smooth white frosting for a snowy ground, then set three to five mini gingerbread or cookie houses on top. Add piped icicles, mini marshmallows and a dusting of powdered sugar.
Shop-bought cookie houses save a lot of time and still make the cake feel like a little scene. Don’t forget to tell guests which parts are decorations only.
You’ll need: frosted cake, mini gingerbread houses, powdered sugar. Level: Beginner, about 30 minutes.
20. Peppermint Swirl Cake
Pipe red swirls over white frosting, and soften the lines with a small spatula for a blended peppermint look. Scatter crushed candy cane around the base.
Add the candy at the last minute. Crushed candy canes slowly weep colour into moist frosting, so a cake that looks sharp at noon can look streaky by evening.
You’ll need: white and red buttercream, candy canes. Level: Beginner, about 25 minutes.
Traditional UK-Style Christmas Cake Decorating
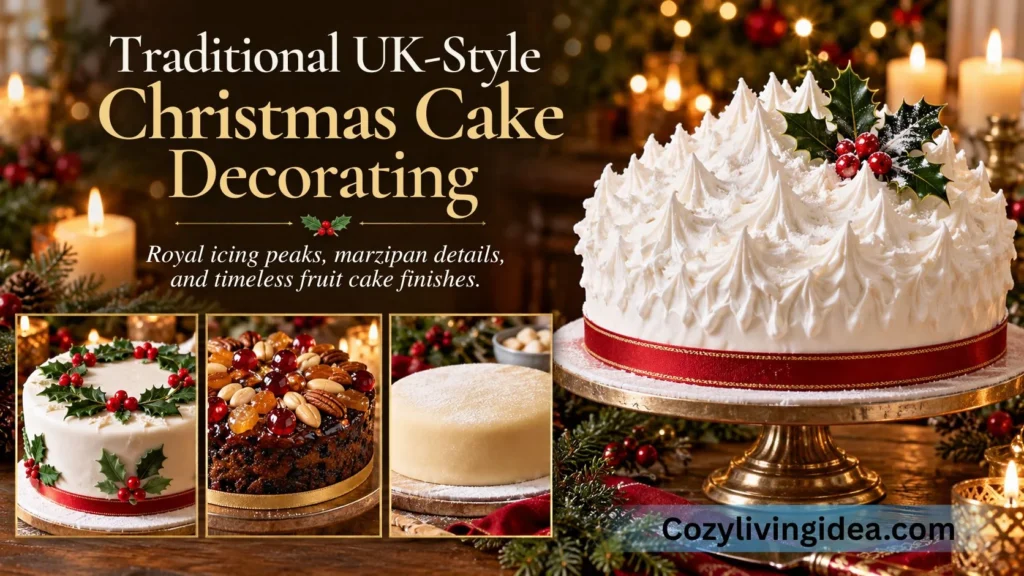
In the UK, a Christmas cake is usually a rich fruit cake, baked weeks ahead and finished with marzipan and icing. This is a different job from decorating a layer cake, so here’s how the finishing works.
Royal icing safety: If you’re making royal icing with egg whites, use pasteurized egg whites or an appropriate meringue-powder recipe rather than uncooked regular egg whites. Follow the recipe’s preparation and storage instructions.
A quick vocabulary note for readers on both sides: sugarpaste is the UK word for fondant, and icing sugar is powdered sugar. The usual order is to brush the cake with warmed apricot jam, cover it in marzipan, let that dry for a day or two, then add the final icing. The marzipan is what stops the fruit oils from showing through the white icing.
Allergy note: marzipan is made from almonds, so label the cake clearly for guests with nut allergies.
21. Classic Snow-Scene Fruit Cake
Cover the marzipanned cake in royal icing and pull it up into stiff peaks with a palette knife so it looks like windswept snow. Add a ribbon around the cake board and finish with a few edible sugar decorations, such as marzipan holly leaves and berries. If you use non-edible figurines, keep them separate from the icing where possible and remove them before serving.
The peaks give plenty of drama while hiding a hand that isn’t perfectly smooth, which is why this finish has lasted for generations.
You’ll need: marzipanned cake, royal icing, palette knife. Level: Intermediate, a couple of short sessions.
22. Marzipan Holly and Berries
Roll out marzipan or sugarpaste, cut holly leaves, and mark the veins with a knife. Roll tiny red berries between your palms and arrange the leaves and berries in a cluster on a white-iced cake.
The deep green and bright red read instantly as Christmas, and you can make the pieces a few days ahead and let them dry flat. Keep the cluster to one corner or the centre rather than ringing the whole cake.
You’ll need: green and red marzipan or sugarpaste, a leaf cutter or small knife. Level: Intermediate, about 30 minutes.
23. Glazed Fruit-and-Nut Top
Skip the icing entirely. After marzipanning, arrange whole nuts and glacé cherries in a pattern on top, then brush with warm apricot glaze for shine.
It looks glossy, jewelled and very traditional, with no icing skills needed at all. This is the easiest way to finish a fruit cake. As above, label it for nuts.
You’ll need: nuts, glacé cherries, apricot glaze. Level: Beginner, about 20 minutes.
Christmas Cakes for a Crowd, or for Gifting
Not every cake needs to be a centrepiece. These formats give you more servings, or more gifts, with less pressure.
- ✓
Mini loaf cakes. Pipe a small tree down the centre of each loaf. They’re already the right size to wrap and give, and you can bake and decorate a batch at once.
- ✓
A pre-scored sheet cake. Mark portions before decorating, and give each square its own small piped tree. Why it works: guests get tidy slices, and you get a repeating pattern that looks impressive from a distance.
- ✓
Decorated cake slices. Top each slice with its own small character, like a reindeer or snowman. Individual slices let guests pick a favourite and keep the main cake looking clean.
- ✓
Store-bought cake, dressed up. Add fresh frosting, sprinkles, crushed candy cane or a few cranberries, then serve it on a proper stand. Most guests will never know, and it saves a whole afternoon.
If you’re serving cake alongside cocoa or coffee, our Christmas kitchen decor guide has practical ideas for festive drink stations, countertop trays and kitchen displays that still leave room for serving.
How to Style a Christmas Cake on Your Table
A well-decorated cake can still look flat if it’s plonked on a counter. A little styling is what makes it feel part of your Christmas decor.
Choose the stand first. A stand about 2 inches wider than the cake gives it room to breathe and keeps frosting off the edge. Height matters too: a stand raises the cake above candles and plates, so it reads as the centrepiece.
Layer the table around it. Put a linen runner or plain tablecloth under the stand, then add a few sprigs of greenery or a small bowl of cranberries nearby. Repeat one colour from the cake in the table, such as a red napkin or a gold candlestick, so the two feel connected.
Mind the candles and lights. Taper candles look beautiful beside a cake, but keep flames at a safe distance from greenery and paper. Warm string lights behind the cake make frosting glow without competing with it.
Photograph it before anyone cuts it. Natural side light from a window shows frosting texture best. Overhead kitchen lights flatten the cake and can cast a yellow tint. A neat photo is also what people save on Pinterest.
If you want the cake table to match the rest of your holiday setup, our Christmas decor ideas guide explains how to carry a coordinated color palette through your living room, dining area, kitchen and other spaces.
Pro Tip: Put the cake on a cake board or a spare plate first, then set it on the stand. You can swap it onto a clean board for serving and keep the stand tidy.
Christmas Cake Decorating Styles Worth Trying
If you’re choosing a look rather than following a specific tutorial, these decorating directions can help you decide what fits your Christmas table.
- ✓
Bows everywhere. Ribbon is one of the biggest Christmas decor trends for 2026, so a bow cake (idea 5) matches what’s on trees and gifts this season.
- ✓
Natural textures with sparkle. Designers are balancing glitter with natural materials. On a cake, that means rosemary, orange slices and cranberries beside a touch of gold (ideas 2, 6, 7).
- ✓
Soft Scandinavian palettes. Light, understated tones with a softer feel suit the snowy white cakes in ideas 1 and 3.
- ✓
Personal touches. Sentimental, personalised decor is strong this year. Add initials, a name tag, or a topper that matches a family tradition.
- ✓
Playful details. Whimsical figures, including dachshunds, are showing up in Christmas decor this year. A small figurine on a plain cake is an easy, current finish.
- ✓
Rich and maximalist. Some shoppers are moving toward bolder, more traditional looks, which suits tiered tree cakes and gold-heavy designs (ideas 4 and 14).
Tools Worth Having (and What to Skip)
You don’t need a full decorating kit. These pieces earn their place:
- ✓
A small offset spatula. It makes smooth frosting, swoops and rustic streaks possible.
- ✓
A spinning cake stand (turntable). Spinning the cake as you hold the spatula still gives you smooth sides far faster.
- ✓
Piping bags and three tips. An open star tip (Wilton 1M), a closed star (Wilton 21) and a small round tip cover almost every design here. Add a petal tip and leaf tip only if you want poinsettias.
- ✓
Gel food colouring. Gel gives strong colour without thinning the frosting.
- ✓
A bench scraper or serrated knife. Use it to level layers and trim the cone cake.
- ✓
A dowel or thick straw. Essential for tall cakes, to stop layers sliding.
You can skip fondant tools, airbrushes and a drawer full of toppers. Frosting, fresh ingredients and one good tip will do the job.
Make-Ahead Timing, Storage and Food Safety
Good planning makes decorating calm. Here’s what can be done early:
- ✓
Bake early, freeze the layers. Wrap cooled layers well and freeze them. Let them thaw only partly before you frost, since slightly cold cake is easier to handle.
- ✓
Make frosting ahead. Prepare frosting according to your recipe and follow its specific refrigeration and storage instructions. Storage time varies depending on whether the frosting contains butter, cream cheese, whipped cream or other perishable ingredients.
- ✓
Decorate the day before, add fresh items last. Pomegranate seeds, powdered sugar and crushed candy go on just before serving.
- ✓
Serve at the right temperature. Some buttercream cakes benefit from a short rest outside the refrigerator before slicing, but the safe serving window depends on the filling and frosting. Keep cakes requiring refrigeration chilled until they are ready to serve.
- ✓
Refrigerate perishable cakes promptly. Cakes with cream cheese frosting, whipped cream, custard or other perishable fillings should be refrigerated according to their recipe’s instructions. As a general food-safety rule, perishable foods should not remain at room temperature for more than two hours, or one hour above 90°F (32°C).
- ✓
Know what’s edible. Tell guests which decorations (figurines, pinecones, cinnamon sticks, star anise) aren’t for eating, and remove them before slicing. Check labels for “edible” on glitter, dust and gold.
Common Christmas Cake Decorating Mistakes
Using too many ideas at once. A tree, a wreath, sprinkles, a drip and a topper on one cake compete with each other. Pick a hero and a finish, then stop.
Decorating a warm cake. Frosting melts and slides if the layers aren’t fully cool. Chill the cake after the crumb coat, and your top coat will go on much cleaner.
Soft frosting for piping. If it droops, it’s too warm or too thin. Chill the bag for ten minutes, or add a little more powdered sugar. If your hands run hot, wrap a thin towel around the bag.
Adding wet decorations too early. Fruit and candy leak juice and colour into frosting. Pomegranate, candy canes and fresh berries belong on the cake as late as you can manage.
Ignoring the cake stand. A small cake on a big plate looks lost, and a large cake on a tiny stand looks unsafe. Match the stand to the cake.
Forgetting to say what’s inedible. Always remove or flag non-edible decorations, especially if children are eating.
Final Thoughts
The best Christmas cake decorating ideas aren’t the most complicated ones. They’re the ones where the base is calm, there’s one clear hero, and one small finishing touch pulls it together. A tiered tree cake is a lovely project if you have an afternoon, but a snowdrift cake with rosemary can look just as good in fifteen minutes.
Pick the style that suits your table, make what you can ahead of time, and add the fresh details last. Then put the cake somewhere good, in daylight, and take the photo before the first slice.